Skip to content
Home › Wilderness Skills Series › Rain and Cold Weather Camping Guide
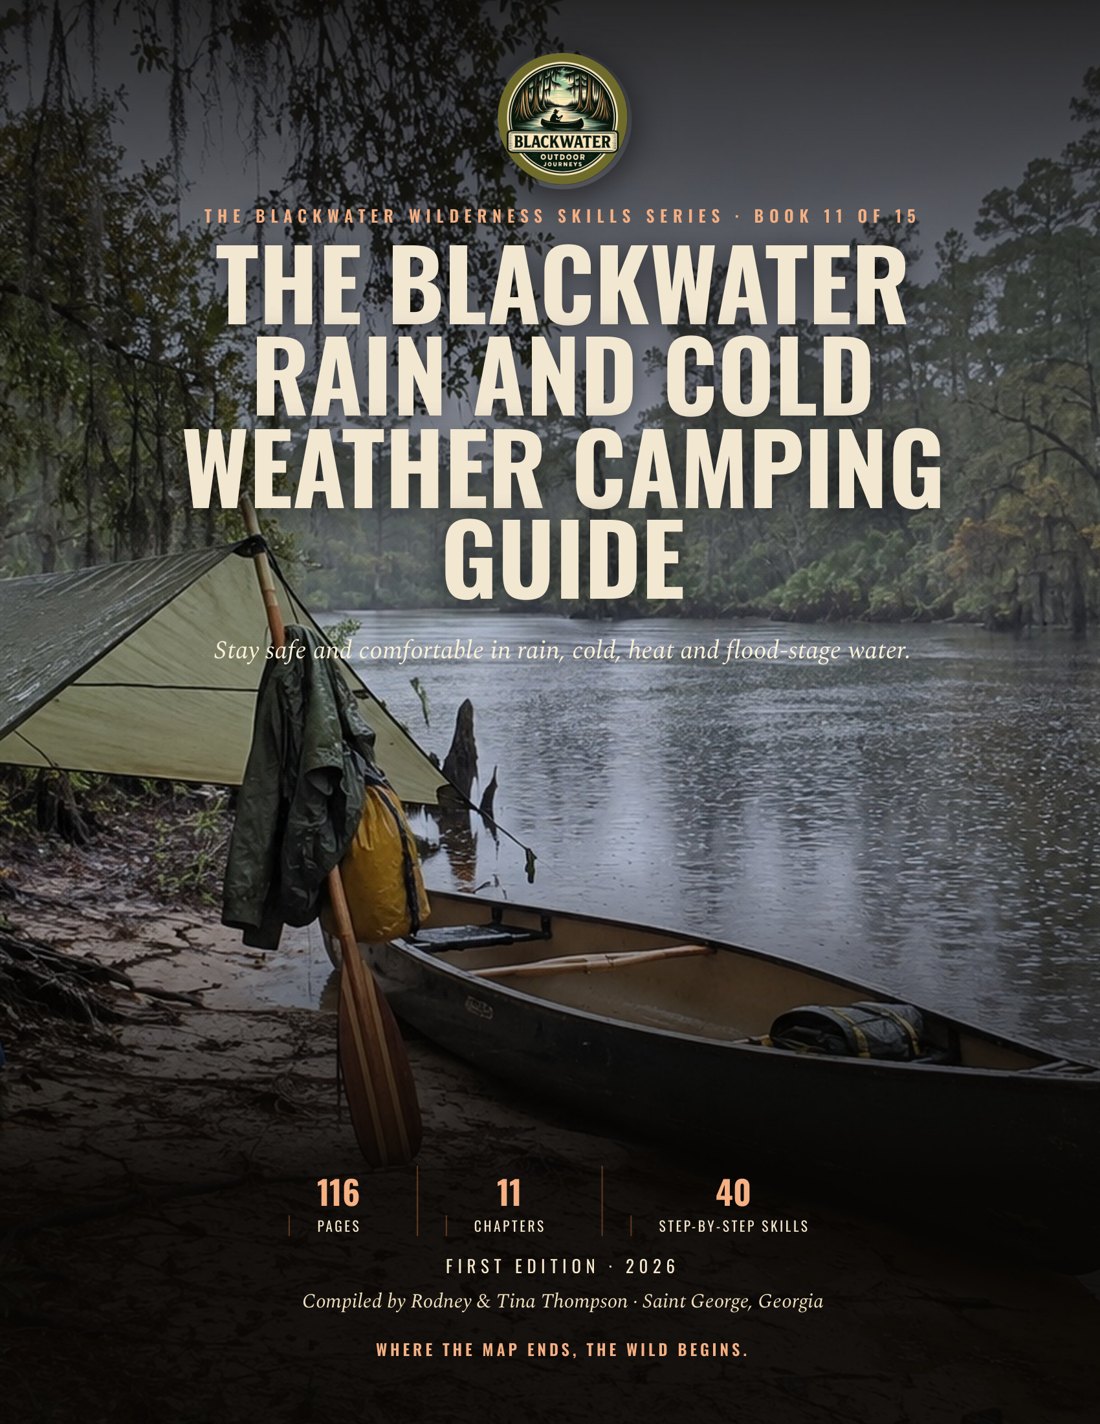
Cover of The Blackwater Rain and Cold Weather Camping Guide
The Blackwater Wilderness Skills Series · Book 11

Rain and Cold Weather Camping Guide

The Blackwater Rain and Cold Weather Camping Guide is a guidebook for staying safe and comfortable while camping and paddling in rain, cold, heat and flood-stage rivers. It covers layering, rainy camp setup, wet fire, water, navigation, field repair and emergency planning.

  • 116pages
  • 11chapters
  • Full colorprinted guide
Flip through the book

The first pages of the book, as they print.

Get the full book

Read the whole book on any screen, or hold the printed book in your pack. The printed book comes with the digital edition included.

Digital edition

Read it on your phone or tablet

$12.95 one-time
  • The whole book, page by page, in the flipbook
  • Works on a phone, tablet or computer, so it goes where you go
  • Opens with the email you buy with
Coming soon
Printed book

The full-color book, digital edition included

$24.95 plus shipping
  • The printed 116-page book, full color
  • The digital edition at no extra charge
  • Printed to order and mailed in the U.S.
Coming soon

Save on more books. Order two or more books and each one is 20% off. Come back for another book later and it is 20% off too. The full printed series is 25% off and the full digital series is 50% off. See the savings

Layout preview only. Ordering is not set up yet.

Chapter by chapter
Chapter 1

Foundations of All-Weather Preparedness

  • Weather threat scan: Read the local forecast and warnings for the launch, route, and exit areas before departure.
  • Risk card: Stop the group when weather, water, people, or equipment changes enough to affect the plan, then think about the biggest threat.
  • Mitigation brief: List the route, forecast threats, crew limits, equipment gaps, and the safest exit for the day.
  • Get your head right: Accept the discomfort, but never accept a preventable hazard. Use STOP, then act and reassess.
  • Read the weather: A forecast is not a promise.
  • Turn hazards into action: Run the risk assessment before you step off, then repeat it when the weather changes.
  • The storm drill: Your first priorities are safety, warmth, and communication.
  • Start with a plan: Read the weather, name the hazards, choose a safe response, and start an all-weather trip with a steady mind and a practical plan.
Chapter 2

3 W’s Layering System: Comfort Mastery

Printed in full here from the book.

Three jobs

Build, adjust, and care for a wicking, warmth, and weather protection system for changing blackwater conditions.

  1. Layer jobs The 3 W’s system gives every layer one job. Wicking moves sweat away from skin. Warmth traps air and slows heat loss. Weather protection blocks wind and rain while allowing sweat vapor to escape. The system works because the layers cooperate. No single jacket should be asked to dry sweat, insulate your body, and stop a blackwater downpour at the same time.
  2. Build for the trip Build for the trip. A cool morning on a tannin-dark creek can become a warm paddle, then a wet camp. You do not wear every layer from launch to takeout. Start a little cool before hard movement. Open a zipper or remove the warmth layer as your effort rises. Put warmth back on before a break, and add the shell when wind or rain arrives. Sweating into your clothing is a setup for a chill when you stop.
  3. Fit matters Fit matters. The base layer should touch the body without binding. The warmth layer needs room over it and must not crush its loft. The shell must fit over the other layers with room to move a paddle, raise your arms, and pull a pack strap into place. Tight layers compress insulation. Loose, unsealed gaps let wind steal the heat you meant to keep.

You need: Base layer to pack (A wicking base layer.)

Check it. Pass: each layer has one named job and is adjusted before you sweat or shiver. Fail: one jacket does every job.

Field check
  • I name the wicking, warmth, and weather protection jobs.
  • I start a little cool before hard movement.
  • I put warmth back on before a break.
  • I add the shell when wind or rain arrives.
  • I keep room to move a paddle.

Safety. Sweating into your clothing is a setup for a chill when you stop.

Wicking

Choose merino wool or a synthetic wicking fabric for the layer next to skin.

  1. Choose the fabric Choose merino wool or a synthetic wicking fabric for the layer next to skin. Merino moves moisture vapor and adds insulation. Synthetics dry quickly and are often a practical choice for hard work. Cotton absorbs water into its fibers and stays wet, so it belongs out of a cool, wet river day. This is not a style rule. A damp cotton shirt can hold moisture against the body after the paddling stops.
  2. Legs and feet Use the same idea on legs and feet. Wicking underwear, hiking pants that allow air movement, and socks suited to the footwear keep sweat from pooling. Carry a dry pair of socks in a waterproof bag. Treat that pair as reserve warmth, not as a towel for a leaky boat. A hat and gloves complete the system when wind reaches exposed skin.
  3. Warm humid day On a warm, humid day, the wicking layer still has a job. Choose light, breathable fabric and a fit that lets air move. A long sleeve can protect skin from sun, insects, and brush while sweat evaporates. The layer must be clean enough for its fibers to move moisture. Follow the garment label. Avoid fabric softener when the maker warns that it can reduce wicking performance.

You need: Warmth layer to pack (A breathable warmth layer.)

Check it. Pass: no cotton touches skin and a dry sock pair is sealed. Fail: a damp cotton shirt stays on after paddling.

Field check
  • I choose merino wool or synthetic fabric.
  • I keep cotton out of a cool, wet river day.
  • I carry a dry pair of socks in a waterproof bag.
  • I follow the garment label.
  • I avoid fabric softener when the maker warns it can reduce wicking performance.

Safety. Cotton absorbs water into its fibers and stays wet, so it belongs out of a cool, wet river day.

Warmth

The warmth layer is your adjustable insulation.

  1. Adjustable insulation The warmth layer is your adjustable insulation. Fleece breathes well and keeps working when damp. Synthetic insulation is the safer choice when a mid layer may get wet. Down gives excellent warmth for its weight in dry cold, but saturated down loses loft. In a rainy blackwater camp, keep down dry inside a waterproof bag or choose synthetic insulation.
  2. Room for air A warmth layer should slide over the base layer without pulling at the shoulders. It should leave room for air, but not hang so loose that the cuffs and hem pump cold air through every stroke. A hood or warm hat helps when you are stationary. Gloves protect hands that must still grip a paddle, buckle, or zipper.
  3. Before the break Pack the warmth layer where it can be reached before the break begins. If you wait until you are shivering, you have waited too long. At camp, change out of damp active layers, put on dry warmth, eat, and drink. Warm food and drink help morale, but they do not replace dry clothing and shelter from wind and rain. Watch your partner for fumbling, confusion, unusual tiredness, or slurred speech. Stop the trip plan and get the person warm if those signs appear.

You need: Shell to pack (A rain shell with hood.)

Check it. Pass: the warmth layer goes on before a break and down stays dry. Fail: you wait until you are shivering.

Field check
  • I choose synthetic insulation when a mid layer may get wet.
  • I keep down dry inside a waterproof bag.
  • I pack the warmth layer where it can be reached before the break.
  • I put on dry warmth at camp.
  • I watch my partner for fumbling, confusion, unusual tiredness, or slurred speech.

Safety. Watch your partner for fumbling, confusion, unusual tiredness, or slurred speech. Stop the trip plan and get the person warm if those signs appear.

Weather protection

The shell is the outside door of the system.

  1. Choose the shell The shell is the outside door of the system. A hard shell gives the strongest rain and wind barrier. A soft shell trades some waterproofing for stretch and breathability. A light wind shell suits cool, dry wind, not a sustained downpour. For blackwater rain, choose a shell with a hood, adjustable cuffs, an adjustable hem, and seams designed for rain. Carry rain pants when legs will be exposed to steady rain, spray, or a wet boat seat.
  2. Vent before wet Vent before you soak the inside. Open pit zips or front zippers during hard work. If the shell is clammy, reduce effort or remove the warmth layer before stripping the shell in the rain. Keep the shell on when wind or rain is the problem. The goal is a dry base and controlled warmth, not a perfectly sealed plastic bag.
  3. Care for the shell A shell’s durable water repellent finish helps water bead on the face fabric. When water stops beading, follow the maker’s care instructions. A shell can remain waterproof while its outer fabric feels cold and clammy when saturated. Wash and dry it as directed. Never assume one product’s care label applies to another product.

You need: Hat gloves socks (A hat, gloves, extra socks, and rain pants. The care labels for every technical garment.)

Check it. Pass: the shell goes on before the base is wet and is vented in hard work. Fail: the shell stays sealed while you sweat.

Field check
  • I choose a shell with a hood and adjustable cuffs.
  • I carry rain pants when legs will be exposed to steady rain.
  • I vent during hard work.
  • I keep the shell on when wind or rain is the problem.
  • I never assume one product’s care label applies to another product.

Safety. Keep the shell on when wind or rain is the problem.

Layering blueprint

Dress for function, not fashion: wick sweat, trap warmth, and block weather, then adjust before you are wet or shivering.

  1. Lay out the system Before a cool-to-cold river trip, lay the system on a dry table. Put the wicking layer closest to skin, the warmth layer next, and the shell last. Add rain pants, a hat, gloves, and spare socks. Choose the warmth material for the wettest likely condition, not the driest photograph in the forecast. Put the shell and dry reserve clothing where you can reach them without emptying the pack.
  2. Run the system Run the system through the day. At launch, wear the base and carry the warmth and shell within reach. During hard paddling, vent early. At a rest, add warmth before your body cools. When rain begins, put on the shell before the base is wet. At camp, protect clean dry clothing from splash, mud, and cooking smoke. Keep the reserve layer in its waterproof bag.
  3. Care is readiness Care is part of field readiness. Close zippers before washing. Use the detergent and cycle named on the label. Do not use fabric softener or bleach where the maker forbids it. Dry technical garments exactly as directed. For a technical waterproof garment, the maker states that washing, drying, and, when needed, restoring the water repellent finish help maintain performance. Store every garment clean and completely dry. Do not leave down compressed for long storage. A cared-for system is easier to trust when the creek rises and the sky turns black.
  4. Field check At a muddy launch, inspect two dry bags without opening them. One is soft with a cotton shirt against the body. One has a down jacket beside a leaking bottle. Name the failure in each bag, choose the first correction, and state what the crew member should do before paddling, during a pause, and after landing.

Practice it wet. Learn it on the table: build the full 3 W’s system and name each job. Then in the dark: find the shell, warmth layer, hat, gloves, and dry socks by touch. Then wet: practice venting, adding warmth at a rest, and changing into dry layers without placing clothing on the ground.

Field check
  • I inspect two dry bags without opening them.
  • I name the failure in each bag.
  • I choose the first correction.
  • I state what the crew member should do before paddling, during a pause, and after landing.

Safety. Store every garment clean and completely dry. Do not leave down compressed for long storage.

Select the wicking layer

Choose merino wool or a synthetic wicking fabric for the layer next to skin.

  1. Read the forecast Read the forecast and choose a merino or synthetic base layer for the expected effort and humidity.
  2. Check the fit Put the layer on and check that it touches the skin without binding at the neck, shoulders, waist, or knees.
  3. Reject cotton Reject cotton for cool or wet conditions and check the next-to-skin layer for cotton content.
  4. Pack dry socks Add wicking underwear and socks, then pack a dry sock reserve in a waterproof bag.

You need: Exposed skin (Put a hat and gloves beside the base layer so exposed skin can be covered before the first chill.)

Check it. Pass: the base layer touches skin, permits full paddle movement, contains no cotton chosen for the cool-wet system, and the dry sock reserve is sealed. Fail: the fabric binds, cotton is against the skin, or reserve socks can be reached only by unpacking wet gear.

Field check
  • I choose a merino or synthetic base layer.
  • I check the neck, shoulders, waist, and knees.
  • I reject cotton for cool or wet conditions.
  • I pack a dry sock reserve in a waterproof bag.
  • I put hat and gloves beside base layer so exposed skin is covered before first chill.

Safety. A damp cotton shirt can hold moisture against the body after the paddling stops.

Choose the warmth layer

Synthetic insulation is the safer choice when a mid layer may get wet.

  1. Choose breathable warmth Choose breathable fleece or synthetic insulation when damp conditions are likely.
  2. Keep down dry Choose down only when you can keep it dry and protect it from rain and splash.
  3. Raise both arms Try the warmth layer over the base and raise both arms as if paddling.
  4. Check the cuffs Check that the cuffs, hem, and collar close without crushing the loft or exposing skin.

You need: Pack near the top (Pack the warmth layer near the top of the dry bag so it can go on before a rest.)

Check it. Pass: the warmth layer leaves room for air, permits a full paddle stroke, and can be reached before a break. Fail: the insulation is compressed, the shoulders bind, or wet-weather use depends on unprotected down.

Field check
  • I choose breathable fleece or synthetic insulation.
  • I keep down dry and protect it from rain and splash.
  • I raise both arms as if paddling.
  • I check the cuffs, hem, and collar.
  • I pack the warmth layer near the top of the dry bag.

Safety. Down gives excellent warmth for its weight in dry cold, but saturated down loses loft.

Fit weather protection

For blackwater rain, choose a shell with a hood, adjustable cuffs, an adjustable hem, and seams designed for rain.

  1. Select the shell Select a hard shell for sustained rain, a soft shell for breathable stretch with less waterproofing, or a wind shell for cool dry wind.
  2. Move in the shell Put the shell over the other layers and raise your arms, turn your torso, and sit as if in the canoe.
  3. Close the hood Close the hood, cuffs, and hem enough to block wind while leaving the vents usable.
  4. Add rain pants Add rain pants when steady rain, spray, or a wet seat will soak the legs.

You need: Store within reach (Store the shell where it can be put on before rain reaches the base layer.)

Check it. Pass: the shell covers the layers, hood and cuffs adjust, vents open, and the paddler can move without the hem riding up. Fail: rain reaches the base, movement binds, or the shell cannot be reached before the storm.

Field check
  • I select a hard shell for sustained rain.
  • I leave the vents usable.
  • I close the hood, cuffs, and hem enough to block wind.
  • I add rain pants when steady rain, spray, or a wet seat will soak the legs.
  • I put on the shell before rain reaches the base layer.

Safety. No layer makes cold rain harmless. Remove wet clothing, add dry insulation, shelter from wind and rain, and seek emergency help for confusion, slurred speech, or worsening coordination.

Run and care

Care is part of field readiness.

  1. Vent before sweat Start slightly cool, then vent or remove warmth before sweat builds during hard paddling.
  2. Warm before rest Put warmth on before a rest and put the shell on when wind or rain arrives.
  3. Change at camp Change into dry socks and dry active layers at camp, then seal the reserve clothing from splash and smoke.
  4. Wash by the label Wash each garment by its care label, with zippers closed and no fabric softener or bleach where prohibited.
  5. Restore repellency Restore shell water repellency only by the maker’s stated wash, dry, heat, or reproofing method.

You need: Store down uncompressed (Store clean garments dry, and store down uncompressed.)

Check it. Pass: sweat is controlled, warmth goes on before rest, reserve clothing stays dry, and each garment follows its own care label. Fail: the paddler waits until soaked or shivering, reserve clothing is wet, or care instructions are guessed.

Field check
  • I vent or remove warmth before sweat builds.
  • I put warmth on before a rest.
  • I seal the reserve clothing from splash and smoke.
  • I wash each garment by its care label.
  • I store clean garments dry and store down uncompressed.

Safety. Never use a stove, fire, or flame under or near a tarp or tent.
Chapter 3

Cold and Wet: Staying Warm in Cold Rain

  • Cold Rain Changes: Stay warm in cold rain, recognize worsening hypothermia, protect wet feet, and give calm first aid while getting help.
  • Read The Ladder: Stay dry before you become cold, and call for help before confusion takes away the decision.
  • Keep Feet In: Wet feet fail slowly and then suddenly.
  • Five Path Heat Check: Your body loses heat in five ways.
  • Dry Core Layer Change: A short pause to make a dry core is easier than treating a cold, confused person later.
  • Hypothermia Response: Call 911 for severe confusion, unresponsiveness, slow or absent breathing, or a person who cannot walk safely.
  • Wet Foot Reset: Check feet before pain becomes a limp.
  • Pack The Gear: Pack the kit so dry clothing is within reach before the first chill.
Chapter 4

Hot and Humid: Thriving in the Heat

  • Heat illness check: Heat exhaustion is the warning stage.
  • Hydration routine: Drink before thirst becomes the only signal.
  • Sun and clothing check: Make shade part of the route plan.
  • The heat battle: Recognize heat illness early, manage water and electrolytes, and build a cool, sun-smart system for humid blackwater travel.
  • Heatstroke emergency: Heatstroke can kill or cause permanent disability.
  • Water and electrolytes: Stop early. Shade, water, and a cool body beat a brave story.
  • Win the sun game: Learn it on the table: sort heat exhaustion signs from heatstroke signs and pack the sun kit.
Chapter 5

Flood-Stage Rivers: Swollen Waters

  • The River Decision: Read a swollen blackwater river, refuse a bad crossing, cross only a defensible line, and respond to a swimmer without creating another victim.
  • Scout Then Choose: The river always wins. Scout from shore, wear the PFD, and refuse a crossing you cannot defend.
  • If The River Takes Someone: The first rescue is self-rescue.
  • Rescue Order: Get the person out before recovering a boat or pack.
  • River Hazard Read: Read the whole reach, not one pretty patch.
  • Scout And Choose A Crossing: Find the widest, shallowest, slowest line you can defend.
  • Self Rescue Swim: Do not stand in fast water at any depth.
  • REACH THROW ROW GO Rescue: Use the rescue order from the safest position toward the riskiest.
Chapter 6

Rainy Camp Setup: Staying Dry and Safe

  • Choose the Site: Choose a flood-aware site, pitch a dry shelter in the rain, and run a safe low-impact camp while weather moves through.
  • Lightning And Shelter: Do not choose a site on a cliff edge, exposed point, or open field when lightning is possible.
  • Pitch For Rain: Rain rewards sequence.
  • Keep The Dry Zone: Build the dry zone first. No flame under or near a tarp or tent.
  • Cooking Plan: A tarp-first pitch still needs a safe cooking plan: cook in an open zone with no roof, tent, or tarp overhead.
  • Wash Away From Water: Wash away from the bank.
  • Protect The Ground: Protect the ground while the storm lasts.
  • Wet Camp Practice: A storm arrives as your crew reaches a dark-water campsite. Without moving the shelter, mark the safest tent footprint, the cooking position, the wet-gear boundary, the wash site, and the action you take when thunder begins. Explain the one choice that would make you abandon the site.
  • Rain Safe Site Scan: In a wet setup, shelter choice is a safety decision.
  • Rain First Shelter: Rain rewards sequence.
  • Wet Camp Run: Wet weather makes small messes mobile.
Chapter 7

Fire, Food, and Water in Adversity

  • When Basics Get Hard: Make a safe wet-weather fire or stove meal, treat dark or muddy water, and keep food and water sanitary when a blackwater trip turns hard.
  • Dry Fuel In The Rain: Find a dry pocket under a fallen log, or inside dead standing wood where the local rule allows gathering.
  • Efficient Cooking System: Choose the system for the conditions.
  • Muddy Water To Safe Water: On the Okefenokee refuge, drinking or filtering swamp water is NOT recommended; bring all drinking and cooking water; one gallon per person per day is recommended.
  • Food Fuel Ethical Fallback: When conditions turn sour, protect the three basics in order: safe water, safe heat, and safe food. Follow the local rule for fire sites and food storage.
  • Gear And Routine: Learn it on the table: assemble the wet-fire lay, label clean and dirty water, and build a no-cook meal.
  • Wet Fire Method: Check the local fire rule and choose an open site with no tarp or tent overhead.
  • All Weather Cooking System: Choose a stove or established fire that the local rule permits, and set it on stable open ground.
  • Pre Filter And Boil: Fill a dirty container from the clearest available source and let mud settle.
  • Emergency Food Fallback: Pack a sealed no-cook emergency ration with carbohydrate, fat, and protein before leaving.
Chapter 8

Navigation and Communication in Extremes

  • When Trail Vanishes: After this chapter, you can keep a bearing in poor visibility, cross-check it with a map and GPS, and give rescuers a useful plan and signal.
  • STOP And Pace Count: If you suspect you are disoriented, use STOP: Stop, Think, Observe, Plan.
  • Use Compass and Terrain: Set the compass on the map and orient the map to the ground.
  • Blend Electronics: A GPS position is useful for checking a paper decision.
  • Make a Rescue Plan: A plan that exists only in one person’s phone is not a crew plan.
  • Brief the Contact: Give a trusted contact the names of the people traveling, the route, planned camps, vehicle description, access points, return time, medical information, and the time that a missed check-in should trigger concern.
  • Pace and Bearing: Pace counting turns movement into a rough distance when fog hides landmarks.
  • Relocate with STOP: A calm pause is a navigation skill.
  • Redundant Power Check: Phones and GPS units depend on power.
  • Contact and Distress: A rescue plan starts at home.
Chapter 9

Gear Maintenance and Repair in the Field

  • Treat Gear Safety: Audit, protect, and repair the gear that keeps a blackwater trip moving through rain, mud, heat, and cold.
  • Blackwater Gear: In blackwater country, mud and tannin water hide damage.
  • Repair Shelters Packs: A broken pole needs a straight, stiff bridge.
  • Keep Tools Feet Power: A sharp knife needs less force and gives you more control.
  • Audit Trailhead Gear: The best field repair is the failure you catch at home.
  • Repair Gear: Repair early, test the fix, and retire any part that still cannot carry its job safely.
  • Pack Your Gear: Test the whole charging chain at home.
  • Patch A Torn Shell: Make a temporary repair before you make a permanent one.
  • Splint A Shelter Pole: A broken pole needs a straight, stiff bridge.
  • Maintain A Field Knife: A sharp knife needs less force and gives you more control.
  • Run The Gear Audit: The best field repair is the failure you catch at home.
Chapter 10

Psychological Resilience and Team Dynamics

  • Micro goal reset: Use a small goal inside the big goal.
  • STOP decision check: Think about the last known position, the goal and the immediate threat.
  • Crew communication reset: Repeat back a critical instruction so the sender knows it landed.
  • The battle between ears: Grit is not denial. Stop, name the facts, protect the crew and choose the next safe action.
  • Make decisions messy: Stress creates a rush to act. Slow the rush with STOP: Stop, Think, Observe, Plan.
  • Lead follow communicate: Leadership in the swamp is service.
  • Conflict field problem: Fatigue, fear, unequal effort and different risk limits create friction.
  • Use the crew: Stay useful under discomfort, make clear decisions under stress, and help a crew communicate, lead, follow, and recover together.
Chapter 11

Emergency Planning, Care, and Signaling

  • Prepared Before Weather: Build an all-weather emergency kit, write an Emergency Action Plan, call for help, signal clearly, and care for a weather injury while the crew waits.
  • Build The Kit: Self-reliance means skill plus judgment.
  • Write The Plan: Write the plan before leaving the trailhead.
  • When Emergency Begins: Assess first, call early, treat, shelter, signal, and stay put unless the place becomes more dangerous.
  • Care For Cold: Cold rain can cause hypothermia even when the day does not feel extreme.
  • Heat And Injury Care: Heat exhaustion calls for shade, rest, loosened clothing, cooling cloths, and fluids when the person is awake and able to drink.
  • Signal After SOS: After the SOS, make the search easier.
  • Stay Found: The right mindset is simple: stop, think, observe, plan, then act and reassess.
  • Emergency Kit Audit: Lay out navigation, sun protection, extra clothing, light, first aid, fire, repair tools, extra food, water treatment, and emergency shelter.
  • Emergency Action Plan: Write the route, access points, camps, hazards, alternate exits, rendezvous points, and expected return for the trip.
  • Patient Care Response: Assess the scene and stop the crew from entering the same hazard.
  • Rescue Signaling: Choose the safest visible place near the incident and keep shelter between the crew and severe weather.
Questions people ask
Can you camp in the rain?

Yes, when the plan fits the conditions. Read the forecast for the exact place, rate each hazard, and set a turnaround trigger before launch, such as thunder, rising water or a crew member who cannot stay warm. The book calls turning around, delaying a launch and calling for help early strong choices.

Is it safe to camp in the rain?

It depends on the site and the sky. Camp on high ground that drains, away from dead limbs and out of hollows, and never beside a stream when flooding threatens. A tent is not a lightning shelter. If you hear thunder, move to a substantial enclosed building or hard-topped vehicle and stay 30 minutes after the last thunder.

How do you stay dry camping in the rain?

Pick high ground with drainage. Put the fly or tarp up first so you have a dry work zone, and keep the sleeping bag and dry clothes sealed in dry bags. Make a wet zone by the door for boots and shells, and keep the sleeping bag off wet walls. Never use a stove or flame under or near a tent or tarp.

What should you wear camping in the rain?

Use the 3 W's. Wicking is merino or synthetic next to skin, never cotton. Warmth is fleece or synthetic insulation, with down kept dry. Weather protection is a shell with a hood and adjustable cuffs and hem, plus rain pants when legs will be exposed. Vent early, add warmth before a break, and put the shell on before the base layer is wet.

How do you stay warm camping in cold, wet weather, and what are the signs of hypothermia?

Insulate from the ground, block wind and rain, cover the head and neck, and add a layer before you chill. Early signs are shivering, fumbling and fatigue. Later come confusion, slurred speech and drowsiness. Call 911 for a reading below 95 degrees F or for severe confusion. Remove wet clothing, wrap the core and warm slowly.

How do you handle heat and humidity while camping?

Agree on water, shade and a stop signal before launch. For heat exhaustion, move to shade, loosen clothing, cool the skin and offer cool water if the person is alert. Heatstroke is an emergency: call 911, move the person out of the heat and begin rapid cooling. Give no fluids to a confused or unconscious person.

Is it safe to paddle or camp by a river at flood stage?

The book says a swollen blackwater river is not a test of nerve. If the route, the people and the equipment do not fit the water today, turn around or wait. Treat strainers, undercuts and strong hydraulics as no-go features, wear a fitted PFD, and call 911 for a water emergency. Do not jump in after a swimmer.

How do you light a fire when everything is wet?

Check the local fire rule first. Find dry wood inside a fallen log or dead standing wood where gathering is allowed, split or shave to the dry core, and build on a raised platform. Use feather sticks or petroleum-jelly cotton. A stove often beats wet wood. Never put a flame under a tarp or tent.

How do you make muddy water safe to drink?

Let it settle, pour the clearer layer through a clean cloth, then treat it. Boil at a rolling boil for 1 minute, or filter and then disinfect, since ordinary filters do not remove viruses. Do not use UV on cloudy or tea-colored water. On the Okefenokee refuge, drinking or filtering swamp water is not recommended; bring your own.

What do you do when the weather turns and you need help?

Use STOP: Stop, Think, Observe, Plan. Follow your written emergency action plan: assess the scene, call 911 or use your communicator, then give first aid and shelter the patient. Stay near the incident unless staying is a greater threat. Signal in threes, with three whistle blasts, a pause, then three more.