Skip to content
Home › Wilderness Skills Series › The Blackwater Camping for Beginners Guide
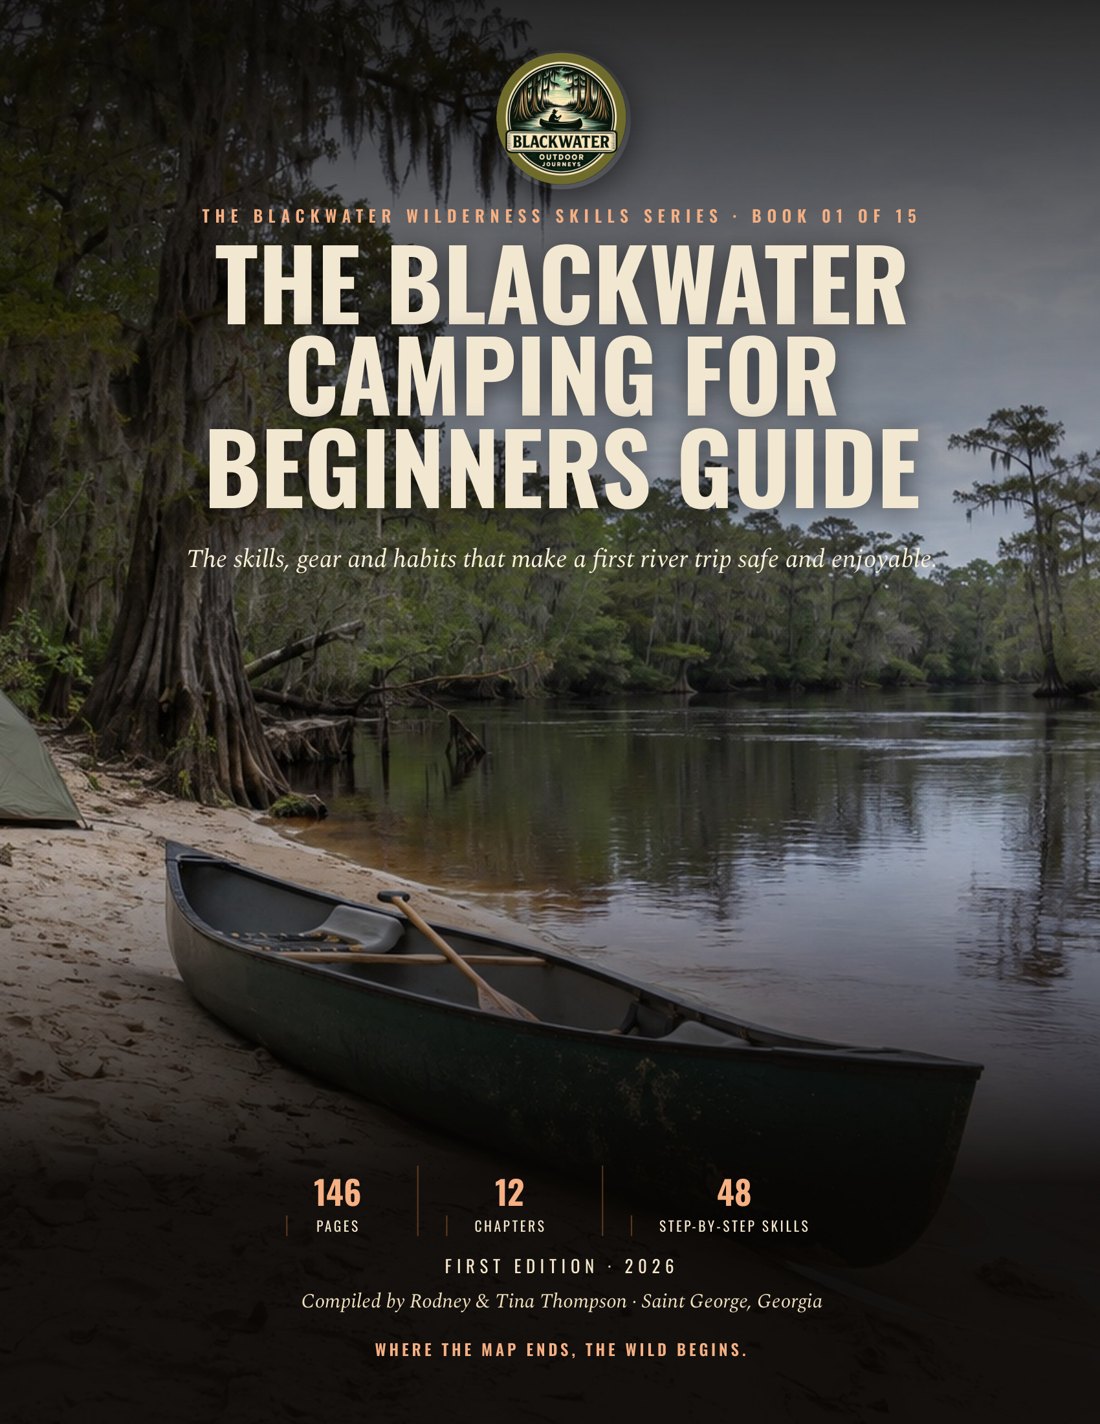
Cover of The Blackwater Camping for Beginners Guide, a printed camping guidebook
The Blackwater Wilderness Skills Series · Book 01

The Blackwater Camping for Beginners Guide

The Blackwater Camping for Beginners Guide is a guidebook from Blackwater Outdoor Journeys that teaches first-time campers the skills for a first overnight on blackwater rivers: safety planning, Leave No Trace, gear, navigation, water and food, wildlife, basic paddling and weather, including the rules that apply on the Okefenokee refuge.

  • 146pages
  • 12chapters
  • Full colorprinted guide
Flip through the book

The first pages of the book, as they print.

Get the full book

Read the whole book on any screen, or hold the printed book in your pack. The printed book comes with the digital edition included.

Digital edition

Read it on your phone or tablet

$12.95 one-time
  • The whole book, page by page, in the flipbook
  • Works on a phone, tablet or computer, so it goes where you go
  • Opens with the email you buy with
Coming soon
Printed book

The full-color book, digital edition included

$24.95 plus shipping
  • The printed 146-page book, full color
  • The digital edition at no extra charge
  • Printed to order and mailed in the U.S.
Coming soon

Save on more books. Order two or more books and each one is 20% off. Come back for another book later and it is 20% off too. The full printed series is 25% off and the full digital series is 50% off. See the savings

Layout preview only. Ordering is not set up yet.

Chapter by chapter
Chapter 1

Getting Ready: Mindset, Planning, Respect

  • Readiness scan: Write the place, activity, people, and expected return window at the top of a page.
  • Resilience reset: Stop moving when a condition surprises you or a group member says the plan feels unsafe.
  • Trip partner introduction: Write where you are from and the kind of outdoor place you know best.
  • SMART goal card: Choose one interest such as hiking, paddling, fishing, photography, or campcraft.
  • Blackwater country: Adopt a prepared, calm mindset, plan a first blackwater outing, treat people and wild places with respect, and write a small outdoor goal you can practice safely.
  • A working ethos: Being outdoors well is not a contest to be the toughest person in the woods.
  • Community and stewardship: Start with an introduction.
  • Small goal to blackwater: Start small enough to finish.
Chapter 2

Essential Safety: Plan for the Unplanned

  • Start with a hazard scan: Build a trip plan that names hazards, contacts, equipment, and a clear return check-in.
  • Leave a trip plan: Tell a reliable person who is not going with you.
  • Carry a response kit: A first aid kit supports training.
  • Respect living hazards: Watch where hands and feet go.
  • Wear a life jacket: Put on a life jacket before the boat touches the water.
  • Hazard and control scan: For every hazard, choose a control.
  • Hand off a trip plan: Give the contact the paper copy or a complete electronic copy before leaving.
  • Rehearse the response kit: Inventory the kit before every trip.
  • Make the water decision: A swollen, murky, fast crossing is a stop sign.
Chapter 3

Leave No Trace: Respecting Our Wild Places

  • The seven principles: Plan, travel, camp, cook, and leave a blackwater site with minimal impact.
  • Noticing each choice: LNT is not about being perfect.
  • Plan before you go: Know the place before you go.
  • Durable ground: Stay on marked trails even when they are wet or muddy.
  • Clean waste: Where local rules allow a cathole, deposit solid human waste in a hole 6 to 8 inches deep and at least 200 feet from water, camp, and trails.
  • Fire and wildlife: A stove is the first choice for cooking.
  • Share the site: Keep voices low and avoid startling animals.
  • Read the site: The last walk is part of the trip.
  • Choose and practice: The practice is simple: match each choice to a principle.
  • On the refuge: The Okefenokee refuge has its own rules, and they replace the general advice here.
  • Make a cathole: Where local rules allow a cathole, deposit solid human waste in a hole 6 to 8 inches deep and at least 200 feet from water, camp, and trails.
  • Kitchen sweep: Pack it in, pack it out.
  • Cold fire check: Soak it until the ashes are cool to the touch, then scatter the cool ashes as the local rule allows.
Chapter 4

Your First Blackwater Trip

  • Start with a small mission: Plan and complete a first overnight blackwater trip with a clear purpose, a legal site, a flexible itinerary, and a useful debrief.
  • Choose the ground: A good destination answers practical questions.
  • Write a flexible itinerary: An itinerary is a sequence, not a prison.
  • Turn the trip into judgment: The trip is not finished when you reach the vehicle.
  • On the refuge: The Okefenokee National Wildlife Refuge shows how strict a permit system can be.
  • First trip brief: Write the trip purpose in one sentence.
  • Site and rule check: Name the land manager and open its current camping or paddling page.
  • Overnight itinerary: Write the travel, arrival, camp setup, evening, sleep, breakfast, breakdown, return, and home blocks in order.
  • Post trip debrief: Write the actual route, weather, water, campsite, and arrival conditions while they are fresh.
Chapter 5

Gear Up: Essential Pack List

Printed in full here from the book.

Every item earns its place

Choose, test, and pack a simple one-night blackwater kit that covers the ten essential systems, shelter, sleep, clothing, and load fit.

  1. Build the safety net A one-night blackwater trip does not need the whole garage. It needs a complete safety net. The ten essential systems are navigation, illumination, sun and insect protection, first aid, repair, fire, shelter, extra food, extra water, and extra clothing. Build the list around the trip, then check every item before the boat leaves the bank or the trail leaves the road.
  2. Navigation and light A map and compass back up the phone. A headlamp and spare batteries keep camp workable after dark. Sunglasses, a hat, sunscreen, and insect repellent handle the southern sun and biting insects. A first aid kit carries wound care, personal medication, and the small repair items that keep a trip moving.
  3. Repair, fire, and shelter A knife or multitool is for repairs and food preparation. Fire starter is a backup system, not a reason to light a fire where rules forbid it. Shelter, extra food, treated water, and a dry clothing layer give you options when rain, delay, or a wrong turn changes the day.
  4. Add boat gear A paddling trip adds gear that a walking trip does not need. Add a life jacket for each person, a paddle for each paddler, a whistle, and dry bags for gear that must stay dry.

The rule. Every item earns its place, and no stove, fire, or flame goes under or near a tarp or tent.

Field check
  • I check every item before the boat leaves the bank.
  • I carry extra food, extra water, and extra clothing.
  • I add a life jacket for each person, a paddle, a whistle, and dry bags.

Safety. Wear a life jacket whenever you are on the water.

Pack for the waterway

Pack for the actual waterway.

  1. Test the answer Do not count comfort as waste. A pillow, dry socks, and a meal you want to eat can keep judgment sharp. Do cut duplicates that do not solve a different problem. Every item should answer one question: What happens if this fails, gets wet, or is missing? Test the answer at home in daylight, then by headlamp. The goal is a compact system you can use without guessing.
  2. Choose a shelter Pack for the actual waterway. A quiet tannin-stained creek under a cypress canopy still brings wet banks, insects, dead limbs, heat, and sudden rain. A two-person backpacking tent is a forgiving first shelter for one person and gear. A tarp is lighter and versatile, but it gives less bug and weather protection and needs practice.
  3. Check the site A hammock needs suitable trees and insulation beneath the sleeper. Check the site rules before carrying or using any shelter system. Choose a level, well-drained campsite away from dead trees, flood paths, and low pockets that collect water. On the Okefenokee refuge you camp only at the platform named on your permit, so ask the refuge what shelter fits there.
  4. Practice the pitch A tent keeps insects out and gives a new camper a simple routine. A tarp saves weight and can be pitched open for airflow, but its protection depends on the pitch, the ground, and the weather. Practice the pitch before the trip. Learn where the ridgeline, corners, guylines, stakes, and doors go before the rain starts.

Remember. Practice the pitch before the trip.

Field check
  • I choose a level, well-drained campsite.
  • I check the site rules before I carry or use a shelter.
  • I practice the pitch before the trip.

Safety. Never put a stove, fire, or flame under or near a tarp or tent.

Shelter and sleep

Sleep is insulation from the ground, insulation from the air, and a dry place for your body.

  1. Sleep is insulation Sleep is insulation from the ground, insulation from the air, and a dry place for your body. The bag rating comes from a lab test with a thermal mannequin, so your pad and clothing change how warm you sleep. Check the forecast and choose the tested comfort rating that matches the sleeper. Down compresses well but loses performance when wet. Synthetic insulation tolerates damp better and usually takes more room.
  2. Choose the shape A mummy shape holds warmth closely. A rectangular shape gives more room to move. The pad matters as much as the bag. Foam is tough. An inflatable pad is comfortable, but it needs a patch kit. Use an inflatable pillow or put clean spare clothes in a sack. Test the entire system at home, then sleep in it before trusting it on the river.
  3. Lightning changes the plan Lightning changes the plan. A tent is not lightning shelter. If you hear thunder, move to a substantial building or an enclosed vehicle with a metal top and the windows up, and stay sheltered for at least 30 minutes after the last thunder. With no shelter nearby, get off hills and ridges, never lie flat, never shelter under an isolated tree, and get away from water. The National Weather Service stopped recommending the crouch in 2008.
  4. Keep rain outside A tent can keep rain off while you sleep, but it cannot make a storm safe. Keep one dry layer protected for camp. Change out of wet clothing early when conditions turn cool or windy.

Remember. A tent is not lightning shelter.

Field check
  • I check the forecast and choose the tested comfort rating.
  • I test the entire system at home.
  • I move to a building or vehicle when I hear thunder.

Safety. Follow the local rule for the site, and never put food or scented items in the tent.

Clothing and pack fit

The pack must fit the body before it carries the gear.

  1. Layer for damp Dress in layers that still work when damp. Start with merino wool or synthetic fabric next to the skin. Add fleece or a light insulated layer when the air cools. Carry a waterproof breathable rain jacket and rain pants. Pack quick-dry pants or shorts, a long sleeve shirt for sun and bugs, and an extra pair of wool or synthetic socks. Avoid cotton for the active layer because wet cotton stays cold against the body. Bring broken-in footwear suited to the bank, trail, or boat.
  2. Fit the pack The pack must fit the body before it carries the gear. Measure torso length and hip size using the pack maker method. Load the pack with the weight you plan to carry for a fitting rehearsal. Set the hipbelt over the top of the hip bones and tighten it snugly. Adjust the shoulder straps so they touch without taking the main load. Set load lifters and the sternum strap only after the belt and shoulders feel right.
  3. Load for reach Walk, bend, and reach. If the belt slips, the torso length is wrong, or a strap creates pressure, stop and refit before adding more gear. Most of the load should ride on the hips, not the shoulders. Put the sleep system at the bottom because it is used last. Put dense heavy items close to your back.
  4. Reach it fast Put rain gear, water treatment, first aid, headlamp, and extra layer where a wet or dark problem can reach them fast.

Remember. Most of the load should ride on the hips, not the shoulders.

Field check
  • I measure torso length and hip size.
  • I load the pack with the weight I plan to carry.
  • I put dense heavy items close to my back.
  • I put rain gear, headlamp, and first aid where I can reach them fast.

Safety. If the belt slips, the torso length is wrong, or a strap creates pressure, stop and refit before adding more gear.

Power, light, and carrying

Power is part of the safety net.

  1. List every device List every device you might bring: phone, GPS, headlamp, camp light, and any small comfort device such as a camp fan or bug zapper. For each device, name the backup before it enters the pack. That might be spare batteries of the exact type, or a charged battery pack with the right short cable. Put the spares together in a waterproof bag. Read the maker’s label for run time and test the setup before the trip.
  2. Protect the plan Cold can reduce battery performance, so keep the power plan where it stays protected.
  3. Choose pack volume Pack choice changes with the job. A daypack should stay close and stable for the day. A one-night pack needs room for shelter, sleep, clothing, food, and water. A larger overnight backpacking pack needs a frame and hipbelt matched to your torso and hips.
  4. Carry the real kit Use the smallest pack that holds the real kit, and check the maker’s size chart for volume. Capacity is not permission to overpack. When the trip is on land, everything is carried on your body. Cut duplicates and heavy comforts first. Keep sleep gear and rain gear dry in a pack liner or dry bags.

Try it. During a group gear swap, someone hands you a bag of unknown contents and asks you to approve it without opening it. Ask what powered devices are included, what backup each one has, whether the spare is protected from water, and whether the loaded pack still fits.

Field check
  • I list every device I might bring.
  • I name the backup for each device before it enters the pack.
  • I keep the power plan where it stays protected.
  • I use the smallest pack that holds the real kit.

Safety. Cold can reduce battery performance, so keep the power plan where it stays protected.

Recheck before leaving

After loading, put the pack on again and recheck the hipbelt, shoulder straps, load lifters, and balance.

  1. Recheck the fit After loading, put the pack on again and recheck the hipbelt, shoulder straps, load lifters, and balance. If the fit changes, refit before leaving the road.
  2. Line the pack Line the pack or bag the way the manufacturer allows, use dry bags for critical gear, tighten compression straps, and keep loose items from dangling into brush or water.
  3. Choose pack volume Choose pack volume for the shelter, sleep system, food, season, and whether water or paddling gear is carried separately.
  4. Keep the rule Keep the shelter clear of cooking areas and any fire site. Never put a stove, fire, or flame under or near a tarp or tent.

Practice it. Learn it on the table: lay out the ten systems and build the full one-night load. Then in the dark: pitch the shelter and find the headlamp, rain layer, and water treatment by touch. Then wet: repeat the load rehearsal after misting the pack and shelter with water.

Field check
  • I put the pack on again after loading.
  • I refit before leaving the road if the fit changes.
  • I use dry bags for critical gear.
  • I keep the shelter clear of cooking areas and any fire site.

Safety. Keep a campfire at least 15 feet from tents, vegetation, and low-hanging branches.

Ten essentials audit

The ten essential systems are navigation, illumination, sun and insect protection, first aid, repair, fire, shelter, extra food, extra water, and extra clothing.

  1. Write the systems Write the ten essential system names on one waterproof checklist.
  2. Place main gear Place the map, compass, headlamp, spare batteries, sun and insect protection, and first aid kit beside the checklist.
  3. Add the backup Add a repair tool, fire starter, shelter, extra food, extra water or treatment, extra clothing, a whistle, and a fitted life jacket for each paddler.
  4. Remove duplicates Mark each item as carried, worn, or packed, then remove duplicates that solve no separate problem.
  5. Test the kit Test the headlamp, phone or GPS backup, water treatment, shelter, and rain layer before loading the pack.

You need: Read it aloud (Read the checklist aloud with the group and keep it with the trip plan.)

Check it. Pass: all ten systems have a named item and each critical item works in a short home test. Fail: a system is represented only by a promise, a dead battery, or an untested item.

Field check
  • I write the ten essential system names.
  • I add a whistle and a fitted life jacket for each paddler.
  • I test the headlamp, phone or GPS backup, and water treatment.
  • I remove duplicates that solve no separate problem.
  • I read the checklist aloud with the group.

Safety. Fire starter is a backup system, not a reason to light a fire where rules forbid it.

Shelter and sleep

Test the entire system at home, then sleep in it before trusting it on the river.

  1. Choose the site Choose a level, drained site away from dead trees, flood paths, cooking areas, and any fire site.
  2. Lay out the system Lay out the tent or tarp, footprint if used, stakes, guylines, sleeping bag, pad, pillow, and repair kit.
  3. Pitch for rain Pitch the shelter taut enough to shed rain, leave ventilation, and keep every flame and stove outside and away from it.
  4. Protect the bag Check the bag rating against the forecast, then protect the bag and dry camp layer from rain and ground moisture.
  5. Practice in the dark Lie on the pad, test the pillow, open and close the shelter, and find the headlamp without looking.

You need: Rehearse again (Pack the sleep system in a protected bag and rehearse the setup again by headlamp.)

Check it. Pass: one person can pitch, enter, ventilate, and break down the shelter by headlamp while keeping the sleep system dry and all flame outside. Fail: the pitch leaks, the sleeper cannot find the exit, or any flame is under or near the shelter.

Field check
  • I choose a level, drained site.
  • I leave ventilation.
  • I keep every flame and stove outside and away from it.
  • I find the headlamp without looking.

Safety. Never use a stove, fire, or flame under or near a tarp or tent.

Fit and load the pack

The pack must fit the body before it carries the gear.

  1. Measure the body Measure torso length and hip size with the pack maker’s method and choose the matching harness range.
  2. Load for rehearsal Load the weight you plan to carry for the fitting rehearsal, including the shelter and sleep system.
  3. Set the hipbelt Set the hipbelt over the top of the hip bones, snug it, then adjust shoulder straps until they touch without carrying the main load.
  4. Correct pressure Set load lifters and sternum strap, walk, bend, and reach, then correct slipping or pressure before adding gear.
  5. Place heavy items Put the sleep system at the bottom, dense heavy items close to the back, and frequently used safety items near the top or in accessible pockets.
  6. Check the balance Line or bag critical gear as appropriate, tighten compression straps, and lift the finished pack to check balance.

Check it. Pass: the hipbelt stays over the hip bones, the pack does not swing when you bend, and rain gear, first aid, light, and water treatment are reachable without unpacking the sleep system. Fail: the shoulders carry the main load, the pack shifts, or critical gear is buried.

Field check
  • I measure torso length and hip size.
  • I load the weight I plan to carry for the fitting rehearsal.
  • I set the hipbelt over the top of the hip bones.
  • I put dense heavy items close to the back.
  • I tighten compression straps and check balance.

Safety. Correct slipping or pressure before adding gear.

Build your power plan

Power is part of the safety net.

  1. List devices Write every powered device on the trip list: phone, GPS, headlamp, camp light, and any fan or bug zapper you choose to bring.
  2. Name each spare Beside each device, write its spare: the correct battery type, or a charged battery pack and the right short cable.
  3. Test the backup Read each maker’s label for run time and test the device with its spare before packing.
  4. Protect the spares Put the spares in a waterproof bag and keep the bag where you can reach it without emptying the pack.
  5. Recheck before leaving Load the pack, then recheck the power bag, the pack fit, and dry protection if you hike to camp, before leaving the road.

Check it. Pass: every powered device has a tested backup, the power bag is waterproof, and the loaded pack still fits. Fail: a device has no spare, the cable is wrong, the run time is unknown, or the backup is loose and exposed to water.

Field check
  • I write every powered device on the trip list.
  • I name its backup before it enters the pack.
  • I put the spares in a waterproof bag.
  • I test the device with its spare before packing.

Safety. Cold can reduce battery performance, so keep the power plan where it stays protected.
Chapter 6

Navigation Basics: Don’t Get Lost!

  • Build the map picture: Blackwater country can look the same in every direction.
  • Map scale and compass: A compass does not know the map.
  • Move by decisions: Practice the full routine beside a blackwater landing.
  • STOP at decisions: At every decision point, stop the group and point to the feature on the map.
  • Make yourself easier to find: Make yourself easier to find.
  • What you need: Read a local topo map, orient it with a compass, follow a route with land and water clues, use an offline GPS backup, and respond safely when you lose your position.
  • Read a blackwater topo map: Navigation starts before launch or before your boots leave the landing.
  • Orient a map and compass: A compass bearing is a tool for holding direction, not a replacement for looking at the ground.
  • Follow a route with handrails: Keep the map oriented as often as the terrain requires.
  • Run the STOP response: If you become disoriented, use STOP.
Chapter 7

Camp Craft and Setup: Home Away From Home

  • Camp craft: Choose a safe campsite, pitch a shelter, run a clean kitchen, and leave a quiet, cold, organized camp behind.
  • Choose the ground: Camp craft starts with a slow walk.
  • Pitch for weather: Clear only loose sticks, rocks and pinecones from the tent footprint.
  • Clean camp kitchen: Set the kitchen on durable, level ground with room to work.
  • Fire and stove: A fire is optional and legal only where the land manager allows it.
  • Zones at night: Give camp four jobs: sleeping, cooking, gathering and bathroom.
  • Campsite hazard scan: Walk the full site boundary and mark durable ground for sleeping, cooking and gathering.
  • Tent pitch: Pull the guylines taut and open the tent’s designed vents before sleep.
  • Stove set-up: Pick bare, level ground in the open, away from tents, tarps and dry brush, at the distance the stove manual gives.
  • Cold fire check: Do not leave until the whole site is cold to the touch.
  • On the refuge: The Okefenokee refuge has its own camp rules, and they replace the general advice here.
Chapter 8

Water and Food for the Trail

  • Water plan: Plan, treat, carry and store water and food for an overnight blackwater trip without fouling the group, the camp or the wildlife.
  • Primary treatment: Boiling is the most reliable method for killing germs.
  • Trail menu: A good trail menu is simple, fast, light and familiar.
  • Wildlife storage: Food storage protects the group and the animal.
  • Clean water station: Set up a small water station in shade, away from the stove, the sleeping area and the wash area.
  • Pre-filter and boil: Bring clear water to a rolling boil for 1 minute.
  • Chemical water treatment: Chemical treatment is light and useful as a backup.
  • No-cook trail meal: A no-cook plan matters when the group is tired, when the local rule bans fire or when a meal needs to happen fast.
  • Field handwash: Do the wash at least 200 feet from water, or where the land manager directs.
  • Bear-safe food storage: Food storage protects the group and the animal.
Chapter 9

Wildlife Awareness and Protection

  • Blackwater wildlife: Recognize common blackwater wildlife, keep a safe camp, avoid dangerous encounters, and respond to bites, stings, and animal attacks.
  • Know the neighborhood: Blackwater country is not empty land.
  • Keep camp safe: Food protection is wildlife protection.
  • Prevent bites: Use an EPA-registered repellent according to its label.
  • If the encounter turns bad: Your first tool is distance.
  • Wildlife distance scan: Watch animals without changing their behavior.
  • Wildlife-resistant camp: Food protection is wildlife protection.
  • Tick and sting check: Use an EPA-registered repellent according to its label.
  • Animal-bite response: Your first tool is distance.
Chapter 10

River Etiquette and Basic Paddling

  • River before launch: Prepare a canoe or kayak, make basic control strokes, read a blackwater current, avoid flow-through hazards, and enter or leave the river with care.
  • Prepare for the river: Before leaving home, check the local forecast, river level, access rules, permits, and the condition of the planned reach.
  • Gear check: A PFD belongs on your body before the boat leaves shore.
  • Etiquette and strokes: Etiquette is safety.
  • Read the bend: Look well ahead, then look again after each bend.
  • Boat and PFD check: A PFD belongs on your body before the boat leaves shore.
  • Forward stroke and correction: The goal is control, not speed.
  • Read current and avoid hazard: Scan the river before you commit to a bend.
  • Stable put-in and take-out: If the route is blocked, get out and carry around it only where the bank is stable and the local rule allows it.
  • River hazards: Calm-looking water is not proof of a safe line.
  • Paddle corrections: The goal is control, not speed.
  • Read the current: Look well ahead, then look again after each bend.
  • Current and rescue: If a capsize happens, keep the PFD on, keep your feet up in moving water, and move toward shore.
  • On the refuge: The Okefenokee refuge sets its own boating rules.
Chapter 11

Weather Wisdom: Reading the Skies

  • Weather wisdom: Read the sky, use a forecast as a decision tool, protect camp from rain and lightning, and recognize heat and cold illness early.
  • Read the sky: Weather wisdom starts with observation.
  • Use forecasts: A forecast is a tool, not a guarantee.
  • Rain, wind, and lightning: Put rain protection on before you are soaked.
  • Heat and humidity: Humidity slows evaporation, so your body may struggle to shed heat.
  • Cold, wet, and sudden change: Cold injury is not limited to freezing weather.
  • Weather decision: Tell every person the plan.
  • Cloud and sky scan: Face the open sky and note cloud shape, height family, color, and whether the cloud is spreading or building.
  • Forecast and hazard check: A forecast is a tool, not a guarantee.
  • Rain and lightning retreat: Put rain protection on before you are soaked.
  • Heat and cold illness response: Stop the activity and check the person and the scene before touching or moving them.
Chapter 12

Leaving Camp Better: The Exit Plan

  • Start the exit: Break camp in a calm order, remove every trace you can, return safely, and turn the trip into a better next plan.
  • Pack in order: The exit order is personal gear, kitchen and food, shelter, then a final sweep.
  • Sweep the site: The final sweep is not a glance from the boat.
  • Restore the site: Restore only what your camp changed.
  • Travel out safely: Before leaving, confirm the group has a route, water, food, and a way to call for help.
  • Dry gear at home: At home, unpack the same day when practical.
  • Use the evidence: A first overnight trip is a beginning, not a finish line.
  • Adjust and refuge rules: Write one lesson in the trip log before the memory gets polished.
  • Morning breakdown order: The exit order is personal gear, kitchen and food, shelter, then a final sweep.
  • Fire and kitchen closeout: Follow the local rule for fire sites, fire bans, and food storage.
  • Final Leave No Trace sweep: The final sweep is not a glance from the boat.
  • Vehicle return and debrief: The trip is not finished at the take-out.
Questions people ask
What do I need for my first camping trip?

The book builds a one-night pack around ten essential systems: navigation, illumination, sun and insect protection, first aid, repair, fire, shelter, extra food, extra water and extra clothing. A paddling trip adds a life jacket for each person, a paddle for each paddler, a whistle and dry bags. Test every item at home first.

How do I plan my first camping trip?

Pick one purpose, keep it to a local overnight, and choose public land that allows the camping you want. Read the land manager's current page for permits, fires and closures, and write a flexible itinerary with a backup. Arrive with daylight left, and leave the plan with a trusted person who is not going.

How can I make a first camping trip safer?

Call 911 for major bleeding, trouble breathing, chest pain, heat stroke, a serious fall or a snake bite. To prevent trouble, scan for hazards and choose a control for each, leave a written trip plan with a reliable person, carry a first aid kit, and wear a life jacket on the water. A phone is useful but is not a plan.

What is Leave No Trace and how do I follow it?

Leave No Trace is seven principles: plan ahead and prepare; travel and camp on durable surfaces; dispose of waste properly; leave what you find; minimize campfire impacts; respect wildlife; be considerate of others. In practice, use an established site, pack out all trash and food scraps, and keep any fire small and fully out.

Can you camp in the Okefenokee?

Yes, with a permit. The book says overnight camping on the Okefenokee refuge needs a permit reserved through the refuge before you go, and you camp only on the platform named on it. Campfires are limited to Canal Run, Floyds Island and Mixons Hammock. Check the refuge page for current rules and closures before every trip.

How do I choose a campsite and set up camp?

Walk the site first. Look up for dead branches, and look down for low ground, flood paths and animal sign. Pick firm, level, well-drained, durable ground, and make camp in daylight. Keep the kitchen apart from the sleeping space, never put food in the tent, and never use a stove or flame in or near a tent or tarp.

How do I get safe drinking water on a river trip?

Treat every natural source as contaminated, and carry two treatment methods. Boiling for 1 minute is the most reliable. A filter of 1 micron or smaller removes parasites, and 0.3 micron or smaller also removes bacteria, but ordinary filters do not remove viruses. On the Okefenokee refuge, drinking swamp water is not recommended; bring a gallon per person per day.

How do I keep food and wildlife apart at camp?

Treat toothpaste, sunscreen, repellent, soap, trash and cookware as food. Keep all of it out of the tent and store it right away under the land manager's rule, such as a canister, locker or approved container. Clean up right after eating, pack out every scrap, and never feed wildlife.

How do I avoid getting lost?

Carry a local topographic map in a waterproof pouch, a baseplate compass, and a phone or handheld GPS with an offline map, spare power, a pencil and a whistle. Check the map at every decision point. If you become disoriented, use STOP: stop, think, observe, plan. If you cannot safely retrace your route, stay put and call 911 when needed.

What should I do about lightning when camping?

A tent is not lightning shelter. If you hear thunder, move to a substantial building or an enclosed vehicle with a metal top and the windows up, and stay sheltered for at least 30 minutes after the last thunder. With no shelter nearby, get off hills and ridges, never lie flat, never shelter under an isolated tree, and get away from water.