Skip to content
Home › Wilderness Skills Series › The Blackwater Canoe Camping Guide
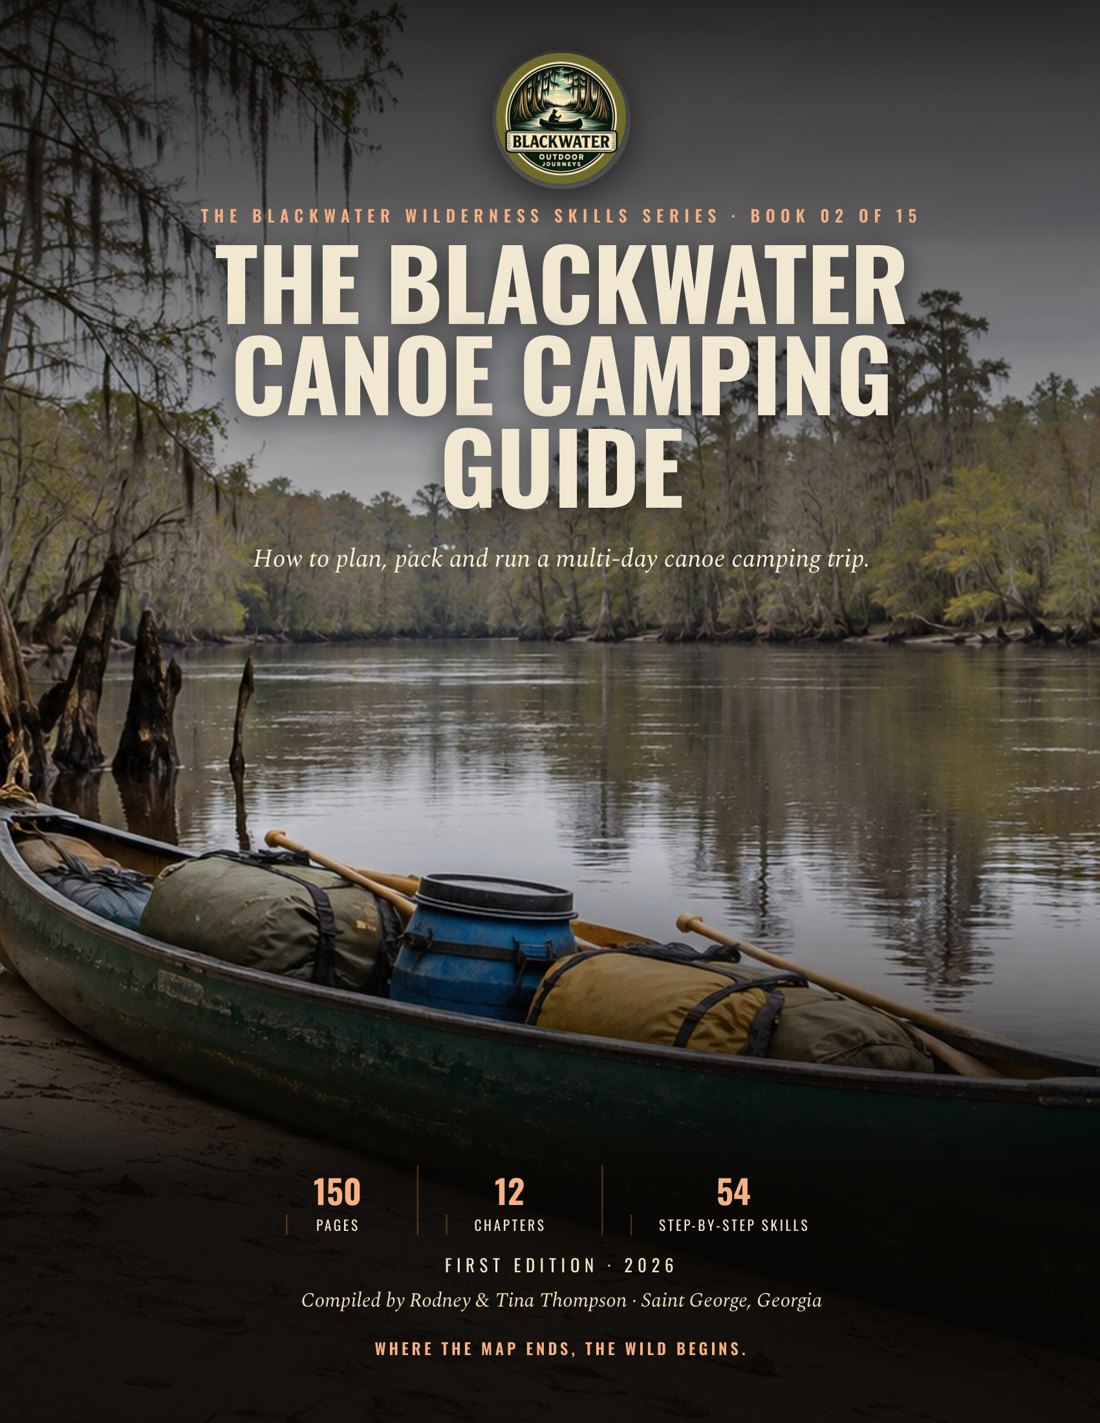
Cover of The Blackwater Canoe Camping Guide, a printed canoe camping guidebook
The Blackwater Wilderness Skills Series · Book 02

The Blackwater Canoe Camping Guide

The Blackwater Canoe Camping Guide is a guidebook from Blackwater Outdoor Journeys that teaches how to plan, pack and run a multi-day canoe camping trip on blackwater rivers, covering gear, packing, no-cooler food, river hazards, portaging, field repairs, first aid planning, weather and route logistics.

  • 150pages
  • 12chapters
  • Full colorprinted guide
Flip through the book

The first pages of the book, as they print.

Get the full book

Read the whole book on any screen, or hold the printed book in your pack. The printed book comes with the digital edition included.

Digital edition

Read it on your phone or tablet

$12.95 one-time
  • The whole book, page by page, in the flipbook
  • Works on a phone, tablet or computer, so it goes where you go
  • Opens with the email you buy with
Coming soon
Printed book

The full-color book, digital edition included

$24.95 plus shipping
  • The printed 150-page book, full color
  • The digital edition at no extra charge
  • Printed to order and mailed in the U.S.
Coming soon

Save on more books. Order two or more books and each one is 20% off. Come back for another book later and it is 20% off too. The full printed series is 25% off and the full digital series is 50% off. See the savings

Layout preview only. Ordering is not set up yet.

Chapter by chapter
Chapter 1

The Call of the Blackwater Expedition

  • Expedition Promise: Plan and lead a calm, self-reliant blackwater canoe expedition with a float plan, a weather response, low-impact habits, and clear crew decisions.
  • Read Blackwater: Blackwater is often tea-colored because organic acids leached from wetland vegetation give the water its color and can make it slightly acidic.
  • Build the Safety Net: A float plan turns a vague trip into information that another person can use.
  • Leave a Clean Line: Plan ahead so the expedition makes less waste and fewer emergency decisions.
  • Leader’s Habit: When the river, weather, or a person changes, stop protecting the schedule and start protecting the crew.
  • Float Plan and Route Brief: Write the launch, route, planned camps, takeout, alternate exits, and expected return on one waterproof page.
  • Blackwater Hazard Scan: Treat every bend as information.
  • Storm and Cold Response: If thunder is heard or threatening weather arrives, stop the activity and get off the water toward safe shelter.
  • Low Impact Closeout: A clean camp protects animals from learning that people mean food.
Chapter 2

The Expedition Gear Locker

  • Build a system: On blackwater, the canoe is your transport and your gear locker.
  • Choose the hull: A longer canoe is a useful expedition starting point because the longer hull tracks well and gives a crew room for a multi-day load.
  • Protect paddlers: Each paddler needs a properly fitted, approved PFD worn on the water.
  • Shelter and sleep: A three-season tent with strong poles, a waterproof fly, ventilation, and a footprint is a dependable blackwater shelter.
  • Cook in open space: A tarp can cover cooking, gear, or an emergency work area, but never place a stove, fire, or flame under or near a tarp or tent.
  • Navigate with two: Navigation is a system too.
  • Pack and land carry: A canoe carries the load on the water.
  • Carry the load: At a landing, everything you need is carried on your body.
  • Complete the kit: Every item earns its place, and every critical function has a backup.
  • Practice the system: Choose and check a canoe camping gear system that carries the load, protects the crew, supports sleep, and keeps navigation working when one tool fails.
  • Stage the canoe: Match its capacity to the real dry bags, food, shelter, water, and repair kit.
  • Stage safety gear: A throw bag, river knife, and bailer or sponge complete the basic response kit.
  • Build the sleep system: A hammock can be comfortable and gentle on durable ground, but it needs a bug net, a rain tarp, and insulation below the sleeper.
  • Run the navigation check: Mark the launch, camps, hazards, bailouts, and takeout on a waterproof map and save the same points in the GPS.
  • Build the power plan: Power planning starts with a complete device list.
Chapter 3

The A-B-C Packing System

Printed in full here from the book.

Sort the load

Pack a blackwater canoe so fast-use gear is reachable, bulk gear rides low and centered, and critical gear stays protected, secured and shared wisely.

  1. Sort into A, B, C Packing starts on the ground. Lay out every item and sort it into A, B or C. A means accessible. Put water, snacks, rain gear, first aid, maps, compass, GPS, sunscreen, insect repellent and a camera where a paddler can reach them without digging. A gear belongs on top or in a thwart bag, but it still must be secured.
  2. B bulk, C critical B means bulk. Put the sleeping system, shelter, cook kit, stove, later meals and clothing bags low in the hull. C means contingency and critical gear. Put the fire kit, communication device, spare clothes, electronics and repair kit in the best protected bags and cases. C gear is the gear you cannot afford to lose or soak.
  3. Access, not luxury The categories describe access and consequence, not luxury. Rain gear is A because weather can turn before camp. A first aid kit is A because an injured paddler should not wait while you unpack camp. A sleeping bag is B because it is needed at camp, but its dry protection makes it a C priority too. Mark that overlap on the outside of the bag. Keep the rule simple: A is reached first, B makes camp, and C protects the trip when the plan breaks.
Field check
  • I lay out every item and sort it into A, B or C.
  • I put water, snacks, rain gear, first aid, maps, compass and GPS where a paddler can reach them.
  • I put the sleeping system, shelter, cook kit and clothing bags low in the hull.
  • I put the fire kit, communication device, spare clothes, electronics and repair kit in protected bags.

Safety. No stove, fire or flame belongs under or near a tarp or tent.

  1. Shared A bag Keep one shared A bag for items the crew uses together, such as maps, sunscreen and insect repellent. Split shared B gear between boats when there is more than one canoe. One boat should not carry every shelter, meal and repair item.
  2. Typical two-paddler load A typical two-paddler load includes a two-person tent, two sleeping bags, two sleeping pads, a cook kit and stove, food for a long trip, group first aid, a water filter, rain gear, clothing, maps, GPS, camera, satellite messenger and repair kit. Sort that load before launch so both paddlers can name the location of every item.
Field check
  • I lay out every item and sort it into A, B or C.
  • I put water, snacks, rain gear, first aid, maps, compass and GPS where a paddler can reach them.
  • I put the sleeping system, shelter, cook kit and clothing bags low in the hull.
  • I put the fire kit, communication device, spare clothes, electronics and repair kit in protected bags.

Safety. No stove, fire or flame belongs under or near a tarp or tent.

Waterproof the inside

Blackwater travel brings rain, splash, humidity, fog, dew and the possibility of a capsize.

  1. Rain and splash Blackwater travel brings rain, splash, humidity, fog, dew and the possibility of a capsize. A dry bag is not a magic shield. Inspect the fabric, seams, buckle and closure. Pack soft goods so they do not force the closure open. Keep sleeping gear and electronics in separate inner protection when their loss would end the trip.
  2. Inner protection Use small waterproof pouches for maps, batteries, medicine and other loose items. Use a hard case when the item needs crush protection as well as water protection.
  3. Roll closure Close the bag according to its design. For a roll closure, align the stiff strips, roll the top at least three times, and fasten the buckle. Place the closure away from direct wave action when the bag is stowed. A properly closed bag can resist splashes, but a fully submerged bag may still admit water through its closure. Do not call a bag waterproof until you have checked its instructions and tested that exact closure.
Field check
  • I inspect the fabric, seams, buckle and closure.
  • I keep sleeping gear and electronics in separate inner protection.
  • I roll the top at least three times when the design calls for a roll closure.
  • I label every bag by purpose and owner.
  • I keep the headlamp accessible.

Safety. A dry bag is not a magic shield.

  1. Labels Label every bag by purpose and owner. Use words that can be read in rain and by headlamp. Pack clothing by use: day, sleep and spare. Keep toiletries together.
  2. Headlamp and whistle Keep the headlamp accessible. Keep the whistle and other small essentials in PFD pockets when appropriate for that PFD. A color system helps, but the written label is the backup when light, fatigue or a wet deck defeats memory.
Field check
  • I inspect the fabric, seams, buckle and closure.
  • I keep sleeping gear and electronics in separate inner protection.
  • I roll the top at least three times when the design calls for a roll closure.
  • I label every bag by purpose and owner.
  • I keep the headlamp accessible.

Safety. A dry bag is not a magic shield.

Trim the canoe

A canoe becomes less forgiving when weight is high, off-center or free to slide.

  1. Weight and capacity A canoe becomes less forgiving when weight is high, off-center or free to slide. Stay within the canoe’s capacity guidance. Put heavy bags on the bottom, near the centerline and near the middle of the boat. Keep the load balanced from side to side and from bow to stern. If paddlers differ greatly in weight, use baggage near the lighter paddler to help keep the hull level.
  2. Level trim Do not pile gear above the gunwales just because there is room. The boat should sit level or with the stern slightly lower, because a stern slightly deeper than the bow tracks better than a bow-down canoe. Seat the heavier paddler in the stern, and do not force a trim that makes the stern too deep.
  3. Secure bags Adjust bags a little at a time. Secure each bag so a sudden stop, wave or capsize cannot turn the load into a shifting hazard. The goal is a low, centered, restrained load that leaves both paddlers room to move and reach A gear.
  4. Calm water test Test before committing to the day. Launch in calm, shallow water where a mistake can be corrected. Check the waterline, side-to-side lean, reach to A gear and the movement of every tied bag. Paddle, stop and turn. If the canoe feels twitchy, if a bag slides, or if a paddler must lean over the gunwale to retrieve an item, return to shore and repack.

Check it. Pass: the canoe sits level with the load low and tied. Fail: a bag slides in the test.

Field check
  • I stay within the canoe’s capacity guidance.
  • I put heavy bags on the bottom, near the centerline and near the middle of the boat.
  • I keep the load balanced from side to side and from bow to stern.
  • I secure each bag so a wave or capsize cannot turn the load into a hazard.
  • I test before committing to the day.

Safety. Keep gear low, centered, evenly distributed and secured.

Crew system

Packing together is a safety briefing with bags around it.

  1. Safety briefing Packing together is a safety briefing with bags around it. Before loading, name the shared shelter, cook kit, water filter, first aid kit and repair kit. Decide which canoe carries each item. Avoid duplicate stoves, filters and oversized kits, but do not remove a safety item merely to save space. Each paddler should know what is personal, what is shared and what must be recovered first after an upset.
  2. Critical gear Critical gear deserves special treatment. Keep communication, fire-starting, navigation backup, spare clothes and repair supplies double-protected and in a protected part of the load. A small critical kit can stay on the person when the manufacturer and local rules allow it.
  3. Kit on the person The National Park Service gives this same principle for packrafts: a person-separated dry bag should hold fire-starting gear, a compass, a mirror, water purification, an emergency blanket and communication gear. Adapt the contents to the canoe, the route and the hazards. Never attach anything in a way that can entangle a swimmer.
Field check
  • I name the shared shelter, cook kit, water filter, first aid kit and repair kit.
  • I keep communication, fire-starting, navigation backup, spare clothes and repair supplies double-protected.
  • I never attach anything in a way that can entangle a swimmer.
  • I run the A-B-C callout.

Safety. Never attach a critical item where it can entangle a swimmer.

  1. A-B-C callout At the end of packing, run the A-B-C callout. One paddler points to each bag while the other names its category, owner and purpose. Then swap.
  2. Reach instead Put the list in the map case. When the storm comes, the crew should reach instead of rummage.
Field check
  • I name the shared shelter, cook kit, water filter, first aid kit and repair kit.
  • I keep communication, fire-starting, navigation backup, spare clothes and repair supplies double-protected.
  • I never attach anything in a way that can entangle a swimmer.
  • I run the A-B-C callout.

Safety. Never attach a critical item where it can entangle a swimmer.

Water, check, gear list

Pack for the first problem, not only for the planned camp: A is reachable, B is low, and C is protected and secured.

  1. Refuge water and food On the Okefenokee refuge, drinking or filtering swamp water is NOT recommended; bring all drinking and cooking water; one gallon per person per day is recommended. Store food and water in hard-sided containers.
  2. Field check Your partner gives you a sealed canoe and a wet map case at dusk. You may touch containers but may not unzip or unbuckle anything. Identify the six items needed for shelter, injury care, route finding, clothing, signaling and field fixes. Then sketch the order in which you would unload the hull after a capsize, including what stays attached to a person.
  3. Table, dark, wet Learn it on the table: sort a complete load into A, B and C, label every bag, and draw the shared gear map. Then in the dark: find rain gear, first aid and the communication device by touch and headlamp. Then wet: close the bags, splash-test them, and repeat the trim check while the staging area is damp.
  4. Gear list Canoe and its owner’s capacity guidance. Dry bags with closures suited to the contents. Waterproof map case or document pouch. Tie-down straps or cordage. Labels or color marks. The crew’s shared gear list.

Check it. Pass: you find rain gear, first aid, and the communication device by touch. Fail: you rummage.

Field check
  • I find rain gear, first aid and the communication device by touch and headlamp.
  • I sort a complete load into A, B and C.
  • I identify the six items needed for shelter, injury care, route finding, clothing, signaling and field fixes.
  • I store food and water in hard-sided containers.

Safety. Wear a properly fitted PFD on the water.

A-B-C load sort

Packing starts on the ground.

  1. Lay every item Lay every personal and shared item on a dry staging area.
  2. Mark fast-use items Mark fast-use items A, camp bulk items B, and contingency or critical items C.
  3. Put shared items Put shared items on a crew list and assign one canoe or one person to each shared item.
  4. Mark two roles Mark any item with two roles, such as a sleeping bag that is B for access and C for protection.

You need: Name every bag (Have each paddler point to every bag and name its category, owner and purpose.)

Check it. Pass: every item has a category, owner and known location, and no shared safety item has two competing owners. Fail: a paddler cannot locate an item by category and label, or shared gear is assigned only by guesswork.

Field check
  • I lay out every personal and shared item on a dry staging area.
  • I mark fast-use items A, camp bulk items B, and contingency or critical items C.
  • I assign each shared item to one canoe or one person.
  • I name every bag’s category, owner and purpose.

Safety. A gear belongs on top or in a thwart bag, but it still must be secured.

Dry bag protection

A dry bag is not a magic shield.

  1. Inspect the bag Inspect the bag, closure, buckle and contents before packing.
  2. Inner protection Place sleeping gear, spare clothes or electronics in their inner protection before putting them in the outer bag.
  3. Leave closure material Leave enough closure material for the bag’s specified seal and keep hard edges away from the fabric.
  4. Align the closure Align the closure, roll or fold it to the manufacturer’s instruction, and make at least 3 rolls when the design calls for a roll closure.

You need: Fasten the buckle (Fasten the buckle, label the bag, and stow the closure away from direct wave action.)

Check it. Pass: the closure is fully engaged, the label is readable, and the protected contents remain dry after a controlled splash test. Fail: the bag has a twisted seal, an unfastened buckle, a closure that will not make the required rolls, or a wet inner layer.

Field check
  • I inspect the bag, closure, buckle and contents before packing.
  • I place sleeping gear, spare clothes or electronics in inner protection.
  • I make at least 3 rolls when the design calls for a roll closure.
  • I fasten the buckle, label the bag, and stow the closure away from direct wave action.

Safety. A properly closed bag can resist splashes, but a fully submerged bag may still admit water through its closure.

Low and centered canoe trim

Stay within the canoe’s capacity guidance.

  1. Read capacity guidance Read the canoe’s capacity guidance and remove any load that exceeds it.
  2. Place heavy bags Place the heaviest bags on the bottom near the centerline and middle of the hull.
  3. Balance weight Balance weight from side to side and adjust fore and aft until the canoe sits level or with the stern slightly lower.
  4. Secure bags Secure bags so they cannot slide, float away or create an entanglement during an upset.

You need: Paddle stop turn (Paddle, stop and turn in calm shallow water, then return to shore and correct any lean, slide or hard reach.)

Check it. Pass: the canoe sits level or slightly stern-low, bags stay put during stopping and turning, and both paddlers can reach A gear without leaning outside the gunwales. Fail: the canoe leans, a bag shifts, or a paddler must reach over the gunwale for normal access.

Field check
  • I read the canoe’s capacity guidance.
  • I place the heaviest bags on the bottom near the centerline and middle of the hull.
  • I balance weight from side to side and adjust fore and aft.
  • I secure bags so they cannot slide, float away or create an entanglement during an upset.
  • I paddle, stop and turn in calm shallow water.

Safety. Do not overload the canoe.

Crew critical-gear callout

Critical gear deserves special treatment.

  1. Write shared list Write the shared gear list with shelter, cook kit, water treatment, first aid, navigation backup and repair gear.
  2. Assign each item Assign each shared item to a canoe and place its location beside the item.
  3. Double-protect gear Double-protect critical gear and keep the most urgent pieces reachable or carried as appropriate.
  4. Name recovery priority Have one paddler point to each item while the other names its location and recovery priority.

You need: Swap roles (Swap roles and correct every answer that depends on memory instead of a label.)

Check it. Pass: both paddlers can identify the location and recovery priority of every shared critical item without opening a bag. Fail: a critical item has no assigned canoe, no protection plan or no known location.

Field check
  • I write the shared gear list with shelter, cook kit, water treatment, first aid, navigation and repair gear.
  • I assign each shared item to a canoe and place its location beside the item.
  • I double-protect critical gear and keep the most urgent pieces reachable.
  • I swap roles and correct every answer that depends on memory instead of a label.

Safety. Never attach anything in a way that can entangle a swimmer.
Chapter 4

No-Cooler Cuisine: Food for the Long Haul

  • No cooler food: Plan, cook, treat water, and secure a clean no-cooler food system for a multi-day blackwater canoe trip.
  • Food that earns its place: A cooler is heavy, takes space, and gives you one more thing to protect.
  • Run a small kitchen: Choose the cooking system for the river, weather, rules, and crew.
  • Treat blackwater: Assume every natural source is contaminated.
  • Keep food and wildlife apart: Food, trash, cookware, toiletries, and dirty stove parts all carry scent.
  • Daily no-cooler meal pack: Pack food that needs no cooler, treat every natural water source, and secure every scent before sleep.
  • Safe stove kitchen: Choose an open, stable cooking spot and set the pot, lid, fuel, water, and backup ignition within reach.
  • Pre-filter and boil: Boiling is the most reliable method.
  • Wildlife-safe food close: Store the food system immediately when cooking ends.
Chapter 5

Reading the River: Navigation and Hazards

  • Read the water: Read blackwater currents and hazards, control a canoe with advanced strokes, scout uncertain water, and portage before a bad line becomes an emergency.
  • Eddy and water level: The boundary between the current and the eddy is the eddy line.
  • Paddle control: Advanced strokes are small tools for precise control.
  • Strainer and sweeper: A ferry is not a rescue plan.
  • Rapids and alligators: Small rapids still need a line.
  • Scout from shore: If you cannot see a clear entry, line and exit, stop, get to shore and scout. Water that looks calm can still pin a canoe.
  • Scout, then portage: Scouting is not failure.
  • Portage with control: With a heavy boat, use partners and call each lift.
  • Paddle control set: A draw moves the canoe toward the paddle.
  • Current and eddy read: A downstream V often marks a gap between obstructions.
  • Hazard approach and scouting: If the line is not clear, stop above the feature and scout.
  • Safe portage: Portage when the bank walk finds no clean line, when wood spans the channel, when a hydraulic cannot be read, or when the group lacks the skill for the feature.
Chapter 6

Campcraft for the Expedition

  • Camp Needs: Choose a safe blackwater campsite, pitch a storm-ready shelter, protect food, manage fire, and leave a clean camp with no trace. Choose the camp in daylight, keep sleep, kitchen and food separate, and leave the site colder and cleaner than you found it.
  • Read the Site: Your campsite is a safety decision before it is a comfort decision.
  • Site Zones: Lay out the camp as three working zones: sleep, kitchen and food storage.
  • Tent and hammock: Pitch for the weather you have, not the weather you hope for.
  • Tarp shelter: A tarp is a fast shelter and a gear roof.
  • Food, fire, wildlife: Food smells travel.
  • Clean Camp: A camp is not finished when dinner is over.
  • Hygiene and Waste: Scrape all food scraps into a trash bag first and pack them out.
  • Toilet and cathole: Dig a cathole 6 to 8 inches deep, at least 200 feet from water, trails and camp.
  • Site Safety Sweep: Walk the proposed site before unloading the canoe.
  • Storm Ready Tarp: Face the shelter’s low side toward the weather and keep the sleeping area on dry ground.
  • Safe food storage: Gather all food, trash and scented items such as toiletries into one pile away from the tents.
  • Camp Dishwashing: Scrape every scrap of food into a trash bag.
  • Cathole: On the Okefenokee refuge, use the composting toilet, not a cathole.
  • Cold Fire Check: Spread the wood and coals apart with a stick.
Chapter 7

Field Repairs and Maintenance

  • River repair: Stop the load, make the safe temporary repair, and retire any safety gear that cannot be trusted.
  • Repair before launch: A blackwater trip gives gear a steady beating.
  • Hull material: Start by identifying the hull.
  • Paddle and PFD: A cracked paddle shaft can be splinted with tape, cordage, or a hose clamp only as a temporary means to reach safety.
  • Shelter and pad: Shelter repairs are fast because rain does not wait.
  • Stove and heat: A weak stove flame is a troubleshooting job, not an invitation to improvise with fuel.
  • Knots: Use the square knot to join equal-size lines when the load is light and the knot will not be shock-loaded.
  • Temporary canoe hull patch: Unload the damaged area, move the canoe to stable ground, and identify the hull material.
  • Paddle and PFD safety decision: Stop paddling and inspect the paddle shaft, blade, grip, and ferrule before the crack grows.
  • Fabric pole pad repair: Clean and dry a torn fly, tarp, or pad with the product-approved cleaner and trim loose threads.
  • Stove and cookware fault check: Move the stove to a clear, ventilated cooking area with no tarp, tent, sleeping bag, or other fabric overhead or nearby.
  • Repair knot dressing: Choose a square knot for equal lines, a sheet bend for unequal lines, or a bowline for a fixed loop.
  • Repair kit: Match the adhesive to the material.
Chapter 8

Wilderness First Aid and Emergency Response

  • First Aid Kit: Build a usable canoe-camping medical system, recognize common and environmental emergencies, start care, signal for help, and make a calm evacuation decision.
  • Injury Care: Small problems become big problems when the crew keeps paddling.
  • Cold Stress: Blackwater country can make a person cold even when the air is not cold.
  • Heat Illness: Heat stroke is a life-threatening emergency.
  • Signal Clearly: When the group is frightened, use S.T.O.P.
  • Reachable First Aid Kit: A wilderness kit must do more than cover a scrape.
  • Common Injury Care: Start with scene safety.
  • Cold Stress Rewarming: Stop travel, protect the patient from wind and water, and assess responsiveness and breathing.
  • Heat Illness Cooling: Send one person to activate emergency medical help while another begins rapid cooling.
  • S.T.O.P. Callout: Treat the patient in front of you, keep the scene safe, cool heat stroke fast, warm hypothermia steadily, and call for help before the group runs out of options.
Chapter 9

Advanced Weather and Environment Reading

  • River Weather: Read blackwater weather and river signals early, move the crew out of lightning and flood danger, and change the day plan before conditions force a bad choice.
  • Cloud Warnings: When thunder roars, leave the water and seek real shelter. The river gets the final vote.
  • Water Can Rise: A blackwater river may rise after rain upstream.
  • Adapt Before Emergency: Run a weather and river check at the start of each travel day and whenever conditions change.
  • Sky and River Scan: Keep your eyes moving from sky to water to bank.
  • Lightning Exit: The best lightning decision is early.
  • Rising Water Camp Move: Mark the route to higher ground before dark.
  • Weather Route Reset: Everyone should know the change before the first canoe moves.
Chapter 10

Expedition Logistics and Route Planning

  • Route visible twice: Build and run a blackwater route plan that joins paper maps, GPS, access rules, shuttles, bailout points, contingency decisions, and a conservative travel estimate.
  • Permission and access: A route crosses more than water.
  • Shuttle before launch: The shuttle is part of the route, not an afterthought.
  • What if route: A strong plan names the trouble before the river names it for you.
  • Time like a paddler: A route is not ready until the map, GPS, access, shuttle, exits, contact plan, and local rules agree.
  • Paper and GPS route card: Build the plan on paper first.
  • Access and permit checks: Check the current official page or office for every put-in, campsite, bailout, and take-out.
  • Vehicle and key shuttle: Decide who carries the primary keys.
  • Bailout contingency card: Mark road-accessible bailouts on both the paper map and the GPS.
  • Conservative day estimate: A best day is not a planning speed.
Chapter 11

Leadership, Teamwork, and Self-Reliance

  • A Crew Is A System: Assign useful roles, communicate clearly on a blackwater river, repair team friction, and lead or follow according to the need in front of you.
  • Brief The Language: Calls fail when every paddler gives a different meaning to the same movement.
  • Friction Is Information: Hunger, fatigue, wet clothing, a missed expectation, and the feeling of being ignored can wear a crew thin.
  • Honest Teamwork: Self-reliance is not pretending you are fine.
  • The Daily Crew Rhythm: A reliable rhythm keeps leadership visible without making it heavy.
  • Crew Practice: On the table, assign the roles and rehearse the calls.
  • Assign And Rotate Roles: Name the leader, navigator, commissary, medical lead, and gear quartermaster before loading the boats.
  • Relay A River Communication: Before launch, say STOP, HAZARD AHEAD, EDDY OUT, and PORTAGE and agree on their paddle meanings.
  • Run A Private Conflict Reset: Move the conversation to a safe, private place and check immediate needs such as food, water, warmth, pain, and rest.
  • Shift Leadership To Skill: The person with the best information leads the moment. Everyone still owns safety.
Chapter 12

After the Trip: Debrief, Gear, and Mastery

  • Takeout Checkpoint: Finish each blackwater expedition with a clean debrief, serviceable gear, a next-skill plan, and a way to pass safe habits to another paddler.
  • Keep the Log: Keep the log as a personal record.
  • Build Mastery: Mastery is not a feeling.
  • Pass It On: A capable paddler becomes a resource for someone newer.
  • Practice Card: The river is your teacher only if you review what it taught you, repair what failed, and pass on what is safe.
  • Expedition Debrief: Write while the wet sand, dark water, wind, and decisions are still clear.
  • Post-trip Gear Reset: Gear care is not housekeeping. It is risk control for the next launch.
  • Deliberate Skill Progression: Choose practice from the debrief.
  • Mentor a New Paddler: Show the safe action.
Questions people ask
How do you pack a canoe for camping?

Sort every item into A, B or C. A is accessible gear, such as water, rain gear, first aid and maps, kept within reach. B is bulk, such as sleeping gear, shelter and the cook kit, packed low in the hull. C is critical gear, such as the fire kit, communication device and repair kit, in your best-protected bags. Tie everything down.

What gear do you need for canoe camping?

The book builds a system around the canoe: a hull that fits the load, a fitted life jacket for each paddler, a spare paddle, whistle, throw bag, river knife and bailer, a dry shelter and sleep system, a map and compass plus a GPS with backup power, and a repair kit. Every tool needs a clear job and a backup.

How do you portage a canoe?

Choose a landing with stable, low-angle ground and walk the bank before you unload. Carry food and critical gear with the group, and make more than one trip if one carry is not safe. Use the canoe yoke when you can, or partners who call each lift. Portage when wood spans the channel, a hydraulic cannot be read, or the group lacks the skill.

What do you eat on a canoe camping trip with no cooler?

Build meals from food that rides in a dry bag without ice: oats, instant rice, couscous, pasta, lentils, beans, tortillas, pouch tuna or chicken, jerky, nuts, nut butter and dried fruit, portioned into daily bags. Dried food is light, takes little space and needs no refrigeration. Keep raw meat separate from ready-to-eat food.

How do you plan a multi-day canoe trip?

Make the route visible twice, on paper and in the GPS, with the put-in, take-out, camps, hazards and legal exits marked. Confirm permission and access at every point, solve the shuttle, and write a what-if response for injury, weather, high water and damaged gear. Plan with a conservative speed, and leave a float plan with a trusted contact.

How do you read a river and avoid hazards?

Treat every bend as new water. A downstream V often marks a gap between obstructions, and an upstream V may point to a rock or shallow obstruction. Current runs faster on the outside of a bend, and eddies sit behind trees and points. Name strainers and sweepers before each bend, scout from the bank when you cannot see a line, and portage if no clean line exists.

How do you load a canoe so it stays stable?

Keep weight low, near the centerline and near the middle of the boat, balanced side to side and bow to stern. The canoe should sit level or with the stern slightly lower. Tie each bag down so it cannot slide in a wave or capsize. Test in calm, shallow water, and if a bag slides or a paddler must lean out to reach gear, return to shore and repack.

How do you fix a canoe or gear in the field?

Pull over, unload the strain and inspect before you repair. Carry a dry pouch with heavy-duty tape, patches, repair putty, cordage, spare buckles, seam sealant, a sewing kit and pliers. Tape is a field hold, not a permanent fix, and a hull taking on water means landing and keeping the load light. Do not repair a damaged life jacket; replace it.

How do you handle weather and rising water on a river trip?

Check the forecast, the river gauge, the sky and the wind each travel day. Rain upstream can raise a river, so never camp where rising water can reach you, and mark the route to higher ground before dark. If you hear thunder, get off the water; a tent or tarp is not lightning shelter. Wait thirty minutes after the last thunder.

What first aid should you carry in a canoe, and when do you call for help?

For a life threat, such as uncontrolled bleeding, a breathing problem, a severe allergic reaction or an unresponsive person, call 911 when a phone connects, or use your satellite messenger or registered personal locator beacon. Keep the kit in a marked waterproof container one paddler can reach. The book is a planning guide, and it says training matters more than the pouch.