Skip to content
Home › Wilderness Skills Series › Canoe Handling Guide: Canoe Strokes and River Skills
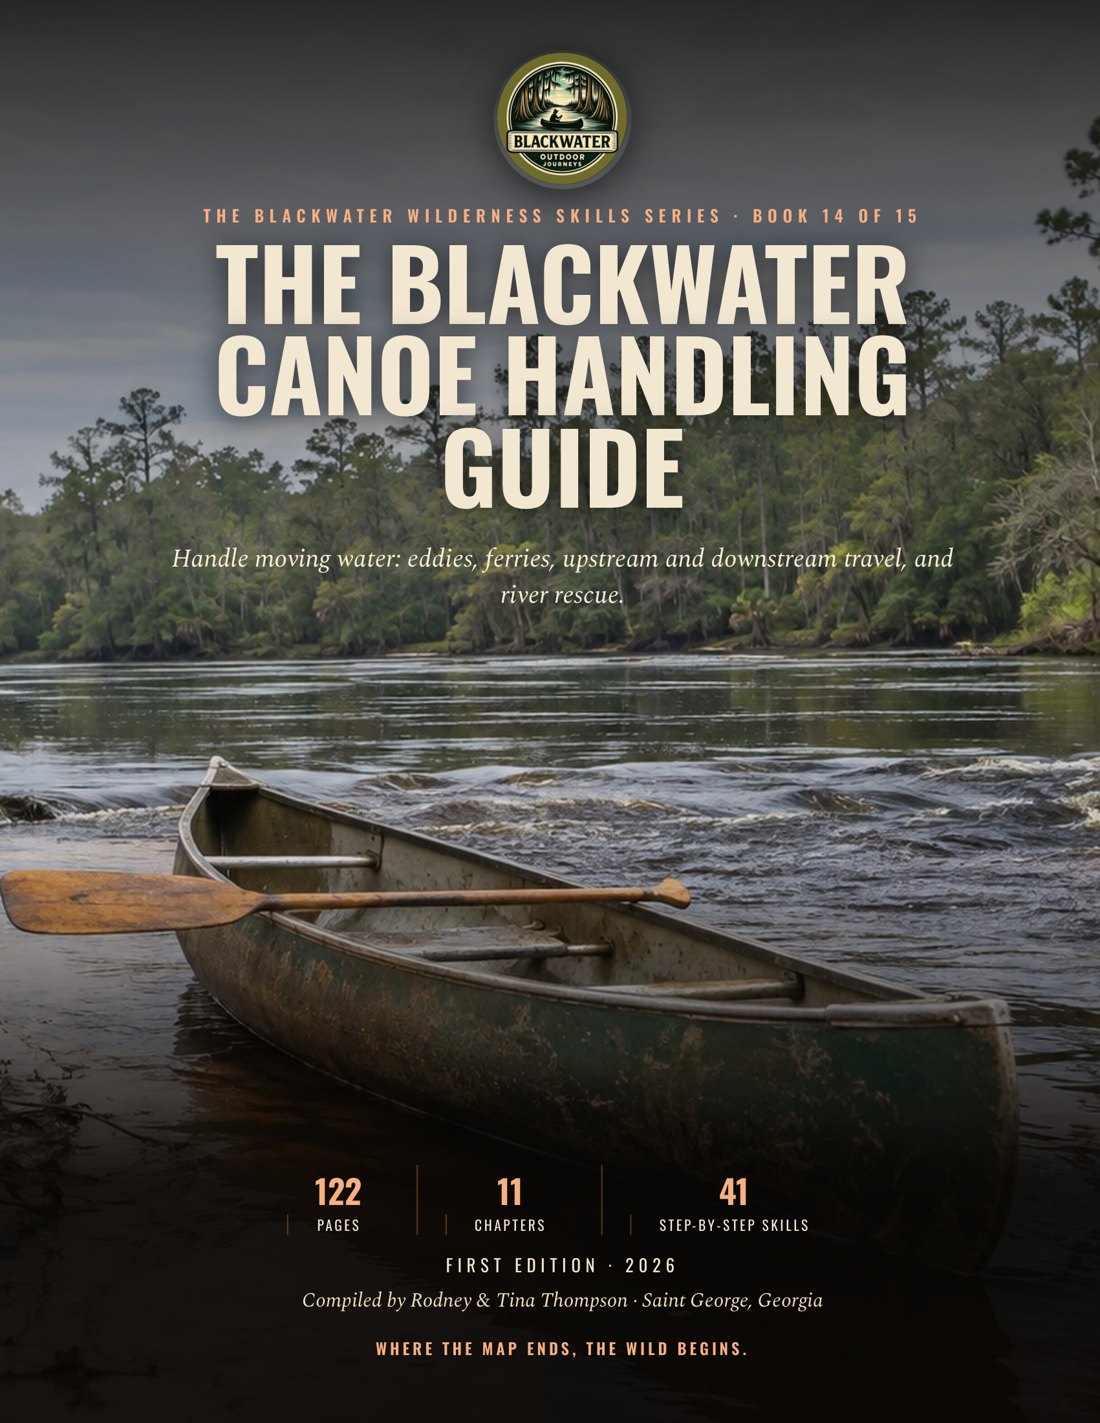
Cover of the Blackwater Canoe Handling Guide showing an aluminum canoe and wooden paddle at the edge of a blackwater river with current
The Blackwater Wilderness Skills Series · Book 14

Canoe Handling Guide: Canoe Strokes and River Skills

The Blackwater Canoe Handling Guide is a printed guide from Blackwater Outdoor Journeys LC that teaches canoe strokes such as the J-stroke, draw and pry, plus reading current, ferries and eddy turns, solo paddling of a tandem canoe, upstream and downstream travel, avoiding strainers and river rescue basics. It is for paddlers who already enjoy blackwater rivers and want more control on moving water.

  • 122pages
  • 11chapters
  • Full colorprinted guide
Flip through the book

The first pages of the book, as they print.

Get the full book

Read the whole book on any screen, or hold the printed book in your pack. The printed book comes with the digital edition included.

Digital edition

Read it on your phone or tablet

$12.95 one-time
  • The whole book, page by page, in the flipbook
  • Works on a phone, tablet or computer, so it goes where you go
  • Opens with the email you buy with
Coming soon
Printed book

The full-color book, digital edition included

$24.95 plus shipping
  • The printed 122-page book, full color
  • The digital edition at no extra charge
  • Printed to order and mailed in the U.S.
Coming soon

Save on more books. Order two or more books and each one is 20% off. Come back for another book later and it is 20% off too. The full printed series is 25% off and the full digital series is 50% off. See the savings

Layout preview only. Ordering is not set up yet.

Chapter by chapter
Chapter 1

Foundations of River Mastery

  • Hull and rocker read: Read a canoe’s design, set its trim, fit the paddle, and drive the hull with your core so the boat responds before the river forces a correction.
  • Canoe trim check: Trim is the bow-to-stern level of the canoe.
  • Paddle fit check: A paddle is an extension of your reach, not a lever you should fight.
  • Core-driven forward stroke: Good canoe movement begins before the blade enters.
  • Read the Hull: A canoe is a set of choices made in wood, composite, plastic, or aluminum.
  • Set the Trim: Trim is the bow-to-stern level of the canoe.
  • Fit the Paddle: A paddle is an extension of your reach, not a lever you should fight.
  • Make the Canoe Move: Good canoe movement begins before the blade enters.
  • What You Need: Your partner says the boat feels twitchy, while the bow keeps wandering into the breeze. From the bank, sketch the weight pattern, name the first adjustment, and explain the observation that would make you abort the launch.
  • Practice the Foundation: Read the hull, set the trim, then make the smallest stroke that gives you control.
Chapter 2

The Core Strokes: J Stroke and Variations

Printed in full here from the book.

Classic J Stroke

Start with a forward power phase.

  1. Reach Forward Rotate the torso toward the catch and reach the blade about 1 foot forward of the knee.
  2. Plant The Blade Plant the blade fully with the shaft as vertical as comfort allows and keep the top hand above the shaft hand.
  3. Pull Toward Hip Unwind the torso and pull straight back toward the hip with the blade square.
  4. Push Outward When the blade reaches the hip, turn the top hand thumb down and push the blade outward.

You need: Recover Forward (Feather the blade out low, then recover forward without pausing between steering and the next catch.)

Check it. Pass: the canoe keeps a steady line, the stroke ends near the knee, and the outward pry is small enough that the hull does not jerk. Fail: the blade travels behind the body, the top hand crosses in front of the face, or the correction turns the canoe past the intended line.

Field check
  • I rotate the torso toward the catch.
  • I reach the blade 1 foot forward of the knee.
  • I keep the top hand above the shaft hand.
  • I pull straight back toward the hip.
  • I recover forward without pausing.

Safety. Keep your body centered and your head up.

Indian Stroke

The Indian Stroke keeps the blade in the water.

  1. Set Forward Catch Set the same forward catch and torso rotation used for the classic J.
  2. Pull To Hip Pull the submerged blade straight back to the hip with a relaxed grip.
  3. Push Away Turn the top hand thumb down and push the submerged blade away from the hull.
  4. Slide Under Water Flatten the blade against the hull and slide it forward under water.

You need: Repeat The Catch (Repeat the catch without lifting the blade or making a splash.)

Check it. Pass: the blade stays under water through the correction and recovery, the canoe stays quiet, and the line remains steady. Fail: the blade breaks the surface, the recovery becomes a wide sweep, or the paddler holds the breath and loses balance.

Field check
  • I set the same forward catch.
  • I pull the submerged blade straight back to the hip.
  • I push the submerged blade away from the hull.
  • I slide it forward under water.
  • I repeat the catch without lifting the blade.

Safety. Never tie yourself to a canoe or a line without a reliable quick release.

Sculling J

The motion is small.

  1. Start Clean Begin with a clean forward power phase and let the canoe settle on its intended line.
  2. Keep Blade Submerged Keep most of the blade submerged beside the hip with the shaft controlled by both hands.
  3. Fan Away Fan the blade slightly away from the canoe without pulling the canoe into a turn.
  4. Fan Toward Reverse the fan slightly toward the canoe while keeping the blade loaded with water.

You need: Recover Into Catch (Repeat the small away and toward motion until the line is held, then recover into the next catch.)

Check it. Pass: the canoe holds a precise line with a quiet, repeated fan and no broad turn. Fail: the paddler makes a full sweep, lets the blade rise clear, or uses a fan so large that the canoe yaws.

Field check
  • I begin with a clean forward power phase.
  • I keep most of the blade submerged beside the hip.
  • I fan the blade slightly away from the canoe.
  • I keep the blade loaded with water.
  • I recover into the next catch.

Safety. Do not make a long sweep or lift the blade to reset.

Reverse J Stroke

The Reverse J is for controlled backward travel.

  1. Look Behind Look behind the canoe and choose an open line before beginning backward travel.
  2. Plant Near Stern Reach near the stern and plant the blade with the power face forward.
  3. Push Toward Hip Push the blade forward toward the hip with the torso and keep the canoe moving straight back.
  4. Draw Inward Turn the top hand thumb up and draw the blade inward to correct the backward path.

You need: Repeat While Clear (Recover close to the water and repeat only while the space behind remains clear.)

Check it. Pass: the canoe backs in a controlled line, the correction begins near the stern, and the paddler checks the space behind before repeating. Fail: the paddler backs blind, plants against an obstacle, or uses a long sweep that spins the canoe.

Field check
  • I look behind the canoe.
  • I choose an open line.
  • I plant the blade with the power face forward.
  • I keep the canoe moving straight back.
  • I check the space behind before repeating.

Safety. Keep clear of strainers and submerged hazards.

Correction Should Disappear

The J Stroke is the steering stroke that lets a solo paddler or stern paddler keep driving on one side.

  1. Power And Line The J Stroke is the steering stroke that lets a solo paddler or stern paddler keep driving on one side. Start with a forward power phase. Finish with a small outward pry. The canoe stays on line without the frantic side switching that wastes time and balance. A refined J is small. If the canoe needs a large hook every time, the power phase is probably pulling too far behind the body or the shaft is crossing the rails.
  2. Tall And Loose Sit tall. Keep the hips loose and the shoulders turned toward the catch. Your arms guide the paddle, but your torso and larger back muscles provide the drive. Keep the top hand above the shaft hand during the power phase. The American Canoe Association teaches a short stroke that ends near the knee, with the blade planted about 1 foot forward of the knee. That keeps the blade square and the path parallel to the canoe.
Field check
  • I sit tall.
  • I keep the hips loose.
  • I keep the shoulders below strain.
  • I let the hull glide between catches.

Safety. Wear a properly fitted PFD.

  1. Small Continuation The correction is a continuation, not a separate stop. As the blade reaches the hip, turn the top hand so the thumb points down. Push the blade away from the hull. Feather the blade out low. The canoe should answer without a hard jerk. Look well ahead, feel the hull under you, and use only enough pry to cancel the turn. Over correction slows the boat and makes the next catch clumsy.
  2. Timing Not Muscle Your grip should be firm enough to control the blade and loose enough to let the shaft rotate. Keep the shoulders below strain and the elbows soft. If the correction feels heavy, shorten the power phase before adding force. In a stern position, let the bow paddler set a predictable rhythm and match it. In a solo position, use the same rhythm but let the hull glide between catches. Smooth travel comes from timing, not muscle.
Field check
  • I sit tall.
  • I keep the hips loose.
  • I keep the shoulders below strain.
  • I let the hull glide between catches.

Safety. Wear a properly fitted PFD.

Four Ways To Hold Line

The classic J has a visible recovery.

  1. Classic And Indian The classic J has a visible recovery. It is the best first form to learn because you can see the power phase and the steering phase. The Indian Stroke keeps the blade in the water. After the power phase, turn the top hand thumb down, push the submerged blade away, flatten it against the hull, and slide it forward under water. It is quiet and continuous.
  2. Sculling J The Sculling J is a fine correction for slow water or a tight line. After the power phase, keep most of the blade under water and fan it slightly away, then slightly toward the canoe. The motion is small. It acts like a hand-sized rudder. Do not make a long sweep or lift the blade to reset.
  3. Reverse J The Reverse J is for controlled backward travel. Plant the blade near the stern with the power face forward. Push the blade forward toward the hip with the core. Then turn the thumb up and draw the blade inward to correct the backward path. Use it to back away from a bank, hold position while judging a passage, or leave a tight space.
  4. All Four Strokes All four strokes share the same discipline. Start with a clean catch. Keep the shaft useful and the hands relaxed. Blend drive into steering. The less visible the correction, the more efficient the stroke.

Rule. Pass: the blade stays under water through the correction and recovery, the canoe stays quiet, and the line remains steady. Fail: the blade breaks the surface, the recovery becomes a wide sweep, or the paddler holds the breath and loses balance.

Field check
  • I start with a clean catch.
  • I keep the shaft useful.
  • I keep the hands relaxed.
  • I blend drive into steering.

Safety. Over correction slows the boat and makes the next catch clumsy.

Practice On Blackwater

Choose a quiet blackwater reach with no strainers, traffic, or submerged hazard in your practice lane.

  1. Choose Quiet Water Choose a quiet blackwater reach with no strainers, traffic, or submerged hazard in your practice lane. Wear your PFD before you leave shore. Check the weather and the canoe before launch. Carry a spare paddle so a lost paddle does not end the trip. Keep your body centered and your head up.
  2. Add Each Stroke Begin with the classic J on one side. Count smooth catches by feel, not by force. Let the canoe run before adding the correction. Then make the correction smaller on each pass. Switch to the Indian Stroke when you can keep the blade quiet. Add the Sculling J only after the canoe is already tracking. Finish with the Reverse J in open water.
  3. Watch The Correction Have a partner watch from shore or from a second canoe. Ask them to watch the top hand, the end of the power phase, and the size of the correction. A watching partner can expose a lifted shoulder, a blade carried behind the body, or a pry that starts too early. The goal is not a dramatic J shape. The goal is a canoe that keeps its line while the paddler stays relaxed.
  4. Calm Practice Learn it on the table: trace power and steering with a dry paddle and say the hand change aloud. Then in the dark: identify the catch, hip, and correction by touch on calm water with a partner. Then wet: repeat each variation on a quiet blackwater reach, shrinking the correction until the canoe tracks with almost no visible hook.

Practice it. Pass: the canoe holds its line with a small, quiet correction. Fail: you switch sides to hold a line or make a large hook every time.

Field check
  • I wear my PFD before I leave shore.
  • I check the weather and the canoe before launch.
  • I keep my body centered and my head up.
  • I count smooth catches by feel.
  • I keep the blade quiet.

Safety. Stay in water and weather within your training.

Canoe And Practice

Make steering a continuation of power. Use the smallest correction that holds your line.

  1. Steady Line Drive a canoe on a steady line and make small, quiet corrections with the classic J, Indian, Sculling J, and Reverse J strokes.
  2. Canoe And Paddle A canoe with a sound paddle and a secure seat or kneeling position A bent shaft or straight shaft canoe paddle

You need: Practice Reach (A calm practice reach with a clear line ahead A properly fitted personal flotation device and a spare paddle)

Field check
  • I wear a properly fitted PFD.
  • I stay in water and weather within my training.
  • I carry a spare paddle.
  • I keep clear of strainers and submerged hazards.
  • I follow local boating rules.

Safety. Follow local boating rules. Keep clear of strainers and submerged hazards.
  1. Leaf Drill Ask a partner to place four floating leaves at different angles in a calm reach. Without naming the move first, choose a response for each leaf, then tell the partner why that response fits. The partner records whether the canoe reaches each leaf without a sudden yaw, splash, or backward collision. Stop the drill if wind or current pushes the leaves toward danger.
  2. Wear A PFD Wear a properly fitted PFD. Stay in water and weather within your training.

You need: Quiet Corrections (The goal is not a dramatic J shape. The goal is a canoe that keeps its line while the paddler stays relaxed.)

Field check
  • I wear a properly fitted PFD.
  • I stay in water and weather within my training.
  • I carry a spare paddle.
  • I keep clear of strainers and submerged hazards.
  • I follow local boating rules.

Safety. Follow local boating rules. Keep clear of strainers and submerged hazards.
Chapter 3

Dynamic Strokes: Draw and Pry

  • Move Sideways: Move a canoe sideways, turn either end, and combine draws and prys without losing balance or shoulder control.
  • The Draw Family: Reach straight out from the hull and place the blade fully under the surface.
  • The Pry Family: The pry is the draw’s mirror.
  • Combine The Forces: The safest dynamic stroke is the one that moves you away from the hazard before the current takes your choice away.
  • Build The Feel: Practice each stroke first with the canoe empty except for the paddler.
  • Basic Draw: A draw pulls the hull toward the submerged blade.
  • Bow Stern Cross Draw: A bow draw swings the bow toward the paddle side.
  • Basic Pry: The pry is the draw’s mirror.
  • Combined Draw Pry Pivot: Dynamic strokes work best as a conversation between the two ends of the canoe.
Chapter 4

Reading the River: Water Dynamics

  • Read the River: The river is always talking.
  • Water Clues: If you cannot see a clean route and a safe exit, get out and scout.
  • Working Water: An eddy forms where an obstacle or point blocks the main flow.
  • River Hazards: A strainer lets water pass while holding solid things.
  • Hold The Boat: Never plan to stand in fast water.
  • Choose the Line: Scout complex water from shore.
  • What You Need: Read the conditions that exist now, not the conditions you hoped for at the put-in.
  • Practice the Read: Read current, surface clues, eddies, and river hazards early enough to choose a safe line or get out and scout.
  • River Scan: Your job is to predict the next decision while you still have room to make it.
  • Eddy Entry and Exit: Entering or leaving an eddy is a maneuver, not a pause in maneuvering.
  • Hazard Portage: Uncertainty is a reason to take out, not a reason to squeeze through.
Chapter 5

Advanced Maneuvers: Ferrying Techniques

  • Moving Water Plan: Use a front ferry, back ferry, eddy turn, and peel out to cross moving blackwater with control while reading the current and preserving an exit.
  • Read The Current: Angle of attack means the canoe centerline compared with the current, not the bank.
  • Control The Boat: Place the canoe so the first stroke builds the line instead of correcting a mistake.
  • Trim And Practice: Trim matters.
  • Front Ferry: Build steady forward momentum before the bow crosses the current seam.
  • Back Ferry: A back ferry slows the boat relative to the current and keeps the downstream route in view.
  • Eddy Turn: Keep momentum as you cross the seam, use small correction strokes, and lean down current into the turn.
  • Peel Out: Keep an exit in mind.
Chapter 6

Tandem Solo: Paddling a Beast Alone

  • Gear And Life Jacket: Set up a tandem canoe for one paddler, kneel near the middle, and steer, launch, and land the long boat alone in wind and light current.
  • Plan The Solo Trip: Scan the blackwater reach before you commit.
  • Plan For A Swim: If the canoe goes over, stay with the boat when it is safe.
  • Kneel Near The Middle: Kneel near the middle, level the canoe, and let the long hull glide.
  • Steer Wind And Practice: Learn it on the table: mark the center thwart on a canoe drawing and place paper packs to level the trim. Then in the dark: find the thwart, the knee pad, and the whistle by touch.
  • Solo Capsize And Swim: A solo paddler who cannot re-enter should stay with the boat, signal, and swim defensively toward shore.
  • Solo Setup And Trim: Test the trim from shore by looking at the waterline at the bow and stern.
  • Board And Land Alone: Float the canoe completely before you climb in, and make sure it is not resting on the bottom.
Chapter 7

Turning and Pivoting: Spinning on a Dime

  • Turn with a plan: Change a canoe’s direction smoothly and quickly with rudders, opposing strokes, power turns, and eddy turns while keeping the boat controlled in blackwater current.
  • Rudders keep the line: A rudder is a small steering correction.
  • Spin and corner: Turn with momentum, keep the bow and stern under control, and never practice a new maneuver where a failed turn can pin the boat.
  • Build the response: Smooth movement beats frantic movement.
  • Practice the turn: When the motion is clean in calm water, add light current.
  • Rudder And Bow Pry: A rudder is a small steering correction.
  • In place pivot: A pivot uses opposing forces at the bow and stern.
  • Powered corner: A power turn is a larger change that combines forward drive with a draw or pry.
  • Eddy entry and peel out: An eddy turn uses current to help the hull rotate.
Chapter 8

Upstream and Downstream Travel

  • Work with river: Travel upstream with less wasted effort, descend with control, and use eddies, current, scouting, and deliberate strokes to keep the canoe in a safe line.
  • Choose the safe line: If you cannot see the line and the exit, stop, land, and scout. Current is a tool only while you remain in control.
  • River gear: Learn it on the table: draw an eddy map with entry, rest, and peel-out arrows. Then in the dark: call the next line and exit before each stroke. Then wet: connect two calm eddies and make a controlled back-paddle while a partner watches from shore.
  • Eddy hop uphill: Use eddy-hopping when the main current is stronger than your sustainable pace.
  • Snub And Carry: Snubbing is a short reverse paddle stroke used upstream to check momentum, brace against current, or pivot around a point.
  • Descend with a plan: Before a rapid, land if needed and walk the bank.
  • Upstream eddy hop: Use eddy-hopping when the main current is stronger than your sustainable pace.
  • Snub And Portage: A shallow, fast reach that is too difficult to paddle is a reason to land and carry the canoe along the bank.
  • Downstream brake: Back-paddling is your brake.
  • Scout standing waves: Rapids are rare on flat blackwater, so this section is for rivers with current. Before a rapid, land if needed and walk the bank.
Chapter 9

River Navigation and Obstacle Negotiation

  • Scout and choose the line: Stop in the last safe eddy before the uncertain water.
  • Run a tight chute: Set the canoe in quiet water with the bow aimed at the chosen entry and the exit in view.
  • Avoid a strainer: Identify the debris line early and move toward open water or shore while there is still room.
  • Land and launch: Choose a stable bank or eddy and identify the upstream approach and the open water below it.
  • See the river: See the hazard early. When the line is not clear, stop, scout, and portage.
  • Commit to a line: A narrow chute rewards preparation.
  • Gear And Practice: Scout a blackwater reach, choose a safe line through moving water, avoid strainers, manage wind, and land or launch in current with a clear exit.
Chapter 10

Advanced River Safety and Rescue

  • Staying Alive: Respond to a canoe capsize, assist a swamped partner, and manage cold, heat, hazards, and rescue gear without adding a second victim.
  • Self Rescue: Once you are clear of the canoe, choose the least complex way home.
  • Help a Partner: Assess before acting.
  • Cold Heat River: Dress for the water, not the air.
  • Rescue Kit: A partner says, “I am fine,” but the paddle is missing and the hull is rotating toward submerged timber. Mark the first decision that stops recovery and sketch the exit route that avoids the timber.
  • Capsize Self Rescue: Take a breath, let the PFD support you, free your legs, and push away from the overturned canoe.
  • Canoe Over Canoe: Assess the swimmer, injury, current, hazards, and escape route before bringing the rescue canoe alongside.
  • Reach Throw Row Go: Protect the person first, use the least risky rescue that works, and never create a second victim.
  • Exposure Response: Move the person from the water, sun, wind, or other exposure while keeping the scene safe.
Chapter 11

The Art of the Canoe Dance

  • Feel and trim scan: Your seat and knees feel a change in trim.
  • Continuous stroke transition: Your next stroke starts before the last one is finished.
  • Condition change: These are changes in demand, not reasons to force the same plan.
  • The dance is a loop: Blend feel, anticipation, stroke transitions, and condition changes into calm, efficient canoe handling on blackwater rivers.
  • Anticipate before you react: Anticipate the water, make the smallest correction that works, and leave before control runs out.
  • Humble attention: Learn it on quiet water: feel one small trim change and blend a forward stroke into a J and pry. Then in the dark: name the current, exit, and one immediate goal by touch and sound. Then wet: repeat in wind or light rain with a partner, stopping before the conditions exceed your control.
  • Ready for the river: A solo paddler in a loaded tandem canoe sees a crosswind, a dark submerged bar, and a tree spanning the outside bend. Explain the order of the decisions, the line you would choose, the stroke transition you would use, and the point where you would turn back or land.
Questions people ask
How do you do a J-stroke in a canoe?

Sit tall and drive a short forward stroke that ends near your knee, with the top hand above the shaft hand. As the blade reaches your hip, turn the top hand so the thumb points down and push the blade away from the hull. Keep the correction small, because it is a continuation of the power stroke. The book also teaches the Indian, Sculling J and Reverse J.

How do you paddle a canoe in a straight line?

Trim the canoe nearly level, with the stern slightly lower, and use a small J stroke on your main side instead of switching sides. Correct early with the smallest stroke that works. If the canoe needs a large hook every time, the power phase is probably pulling too far behind the body.

How do you paddle a tandem canoe by yourself?

Kneel just behind the center thwart, so the thwart nearly touches your chest, with padded knees set wide, and trim the canoe level or slightly low at the stern. Steer a long hull with a small J stroke on your main side and correct early. Do not launch a tandem solo in strong wind or when thunderstorms are possible.

Is it safe to canoe alone?

The book says never boat alone. Practice a tandem solo only within sight of another boat, travel with at least one other boat on a river, and tell someone your route and return time. Wear your life jacket, keep a whistle within reach, dress for the water, and plan for a swim before you launch.

How do you move a canoe sideways?

Use a draw to pull the canoe toward the blade and a pry to push it away. Reach out from the hull, pull or push with your torso, and slice the blade out before it hits the gunwale. Repeated draws and prys on one side move the whole canoe sideways. Practice in calm water first, and never use a hard pry to squeeze past a strainer.

How do you turn a canoe quickly?

Look through the turn and keep enough momentum to steer. A bow draw paired with a stern pry spins the canoe with little travel, and a forward stroke followed by a bow draw makes a quick corner. Practice in a box drill marked with floating markers, and never practice a new turn where a failure could pin the canoe.

What is a ferry and how do you cross current in a canoe?

A ferry crosses current while keeping the bow pointed where you choose. In a front ferry the bow points slightly upstream, and in a back ferry the bow points downstream while you move across. Set the angle before the seam, keep momentum through it, and keep an open exit in sight. Ferries need current, so practice only in water suited to your skill.

How do you read river current and eddies?

The fastest current usually runs along the deepest, narrowest path, often on the outside of a bend. An eddy forms behind an obstacle, and the seam between eddy and current is marked by bubbles and floating debris. A strainer lets water through while trapping a boat or swimmer, so avoid it early and portage. If you cannot see a clean route and a safe exit, get out and scout.

Can you paddle a canoe upstream?

Yes, by working with the river instead of fighting all of it. Use eddies as stepping stones, rest at the upstream limit of each one, and cross the seam at a set angle to reach the next. Snub with a short reverse stroke to check momentum. If a shallow, fast reach is too hard to paddle, land and carry the canoe along the bank.

What should you do if your canoe capsizes?

Your first job is your airway and your group, not the canoe. Clear your legs, push away from the overturned canoe, and in moving water stay upstream of it and face downstream with your feet up. Never swim downstream of a pinned canoe, and call 911 for an unconscious person. Practice rescues in a pool or supervised swim area, not on the Okefenokee refuge.