Skip to content
Home › Wilderness Skills Series › Multi-Day Canoe Trip Guide
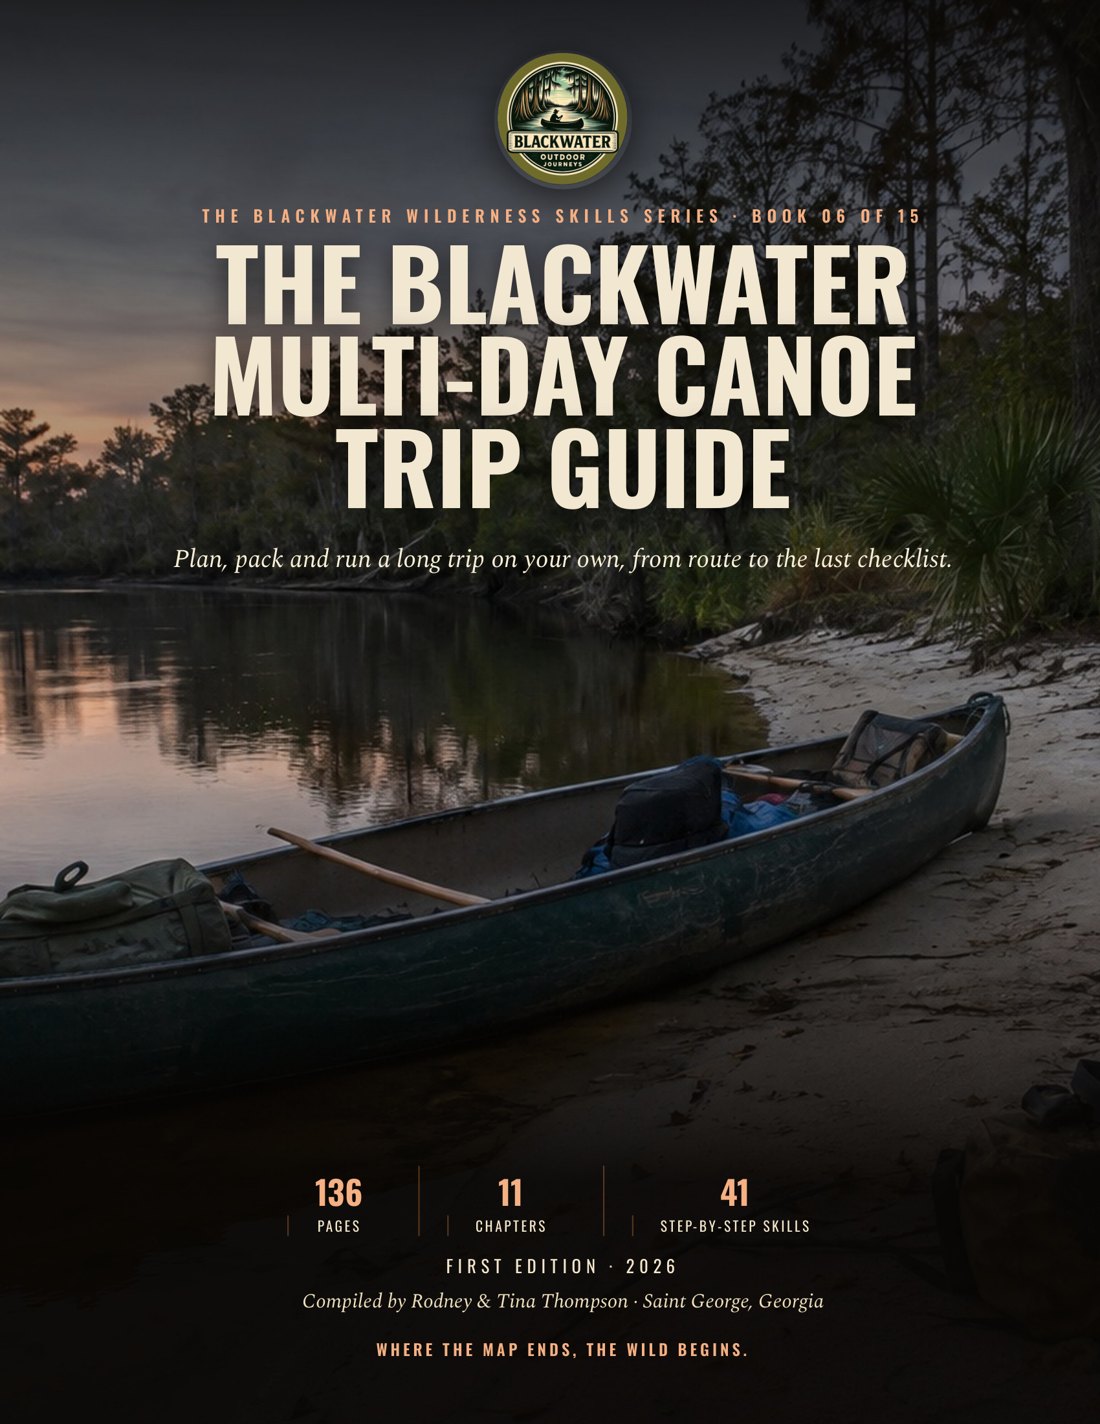
Cover of The Blackwater Multi-Day Canoe Trip Guide, a printed canoe camping planning book
The Blackwater Wilderness Skills Series · Book 06

Multi-Day Canoe Trip Guide

The Blackwater Multi-Day Canoe Trip Guide is a printed guidebook that teaches how to plan, pack and run a long solo canoe camping trip on blackwater rivers. It covers route scouting, gear, navigation, water and food, camp craft, emergency response, check-ins, mindset and pre-trip checklists, for paddlers who want a written plan before they launch.

  • 136pages
  • 11chapters
  • Full colorprinted guide
Flip through the book

The first pages of the book, as they print.

Get the full book

Read the whole book on any screen, or hold the printed book in your pack. The printed book comes with the digital edition included.

Digital edition

Read it on your phone or tablet

$12.95 one-time
  • The whole book, page by page, in the flipbook
  • Works on a phone, tablet or computer, so it goes where you go
  • Opens with the email you buy with
Coming soon
Printed book

The full-color book, digital edition included

$24.95 plus shipping
  • The printed 136-page book, full color
  • The digital edition at no extra charge
  • Printed to order and mailed in the U.S.
Coming soon

Save on more books. Order two or more books and each one is 20% off. Come back for another book later and it is 20% off too. The full printed series is 25% off and the full digital series is 50% off. See the savings

Layout preview only. Ordering is not set up yet.

Chapter by chapter
Chapter 1

Foundations of the Solo Expedition

  • Solo why and risk audit: Learn it on the table: write the why and complete the risk audit. Then in the dark: run the camp sweep by headlamp and find the micro-trash. Then wet: choose a durable blackwater landing and camp spot in rain, keeping your water, food, and waste routine separate.
  • Leave No Trace kitchen sweep: Pack it in, pack it out.
  • Wildlife tree boundary: Give wildlife room, keep food and scraps under control, and never turn a close look into a wildlife encounter.
  • Solo starts with a reason: Set a clear purpose, audit your solo risk honestly, and choose a low-impact blackwater camp routine you can repeat alone.
  • Read blackwater country: Blackwater is lowland water shaped by leaves, wet soils, and floodplain forests.
  • Risk is a personal audit: Write the risk audit before the gear list.
  • Leave No Trace kitchen: Leave No Trace is a set of seven principles taught by the Leave No Trace Center for Outdoor Ethics.
  • Minimize campfire impacts: Use a lightweight stove for cooking.
  • The whole inspection crew: Solo means you are the whole risk check and the whole Leave No Trace crew. Stop early, leave living things alone, and pack out every scrap.
Chapter 2

Route Reconnaissance and Selection

  • See the river: Read a blackwater route from topo maps and imagery, mark safe access and exits, and choose a legal route with camps and hazards identified before launch.
  • Build the route: Work from a clean copy of the map.
  • Choose by risk: A beautiful line on a screen is not a route decision.
  • Read blackwater topo: Start with the USGS topo.
  • Build route sheet: Work from a clean copy of the map.
  • Screen river hazard: Use a stop rule for hazards.
  • Route sheet tools: At the table, trace a blackwater route and mark every unknown. In the dark, find the same waypoints on the offline map and paper map. Wet, stop before a real bend, identify the safe landing, and refuse any route that depends on a live signal or an unverified exit.
Chapter 3

Gear System Design and Optimization

  • Build the system: Build a light, redundant gear system for a 7-day solo blackwater trip, then prove that every critical item works before launch.
  • Layer for river: Use a wicking base layer made from merino or synthetic fabric.
  • Water food repair: Carry two ways to navigate: a waterproof paper map and baseplate compass, backed by a handheld GPS or phone with offline maps.
  • Keep camp steady: Minimal hygiene protects health and keeps the camp from becoming a wildlife attractant.
  • Launch table check: Learn it on the table: sort the Big Three and label every dry bag. Then in the dark: find the map, communicator, treatment, headlamp, and repair kit by touch. Then wet: pitch shelter, separate the wet zone, protect the sleep layer, and make one repair in rain.
  • Big Three loadout: Lay out the shelter, sleep system, and pack on a dry floor.
  • Layer and dry zone: Pack a wicking base layer, damp-capable insulation, waterproof shell, sun protection, and quick-drying footwear.
  • Water navigation pack: Place the waterproof paper map and baseplate compass in one reachable pocket.
  • Repair and morale: Make a small controlled tear in scrap fabric and patch it with the packed tape or nylon patch.
Chapter 4

Navigation Mastery and Contingency Planning

  • Stay found by building layers: Navigate a blackwater route with map and compass, use electronics as a backup, and act on a written Plan B when conditions change.
  • Fix your position: A position fix is stronger when more than one clue agrees.
  • Move through low visibility: Fog, heavy rain, darkness and glare shrink the world.
  • Write the Plan B: Learn it on the table: orient a map, correct one bearing, plot a position fix and write one Plan B. Then in the dark: follow a short compass leg to a marked feature and run STOP when the feature is missing. Then wet: protect the map, compass and device while planning a safe portage around a blackwater logjam.
  • Correct magnetic bearing: Read the current declination for the route and date, then write its east or west direction beside the intended map bearing.
  • Confirm a position: A position fix is stronger when more than one clue agrees.
  • Run STOP: When you realize you are off track, run STOP: Stop, Think, Observe, Plan.
  • Build a contingency card: Build the contingency card at home.
Chapter 5

Water and Food Logistics for Extended Trips

  • Water Is a System: Treat blackwater, build a shelf-stable ration, and keep food, wash water and waste under control on a solo expedition.
  • Build Food for Route: Use the food label, not memory.
  • Clean Camp Routine: Wash before handling food, before eating, after using the latrine, after raw meat and after first aid.
  • Fuel and Fire Discipline: A canister stove is a choice, not a guarantee.
  • Needs for the Route: Learn it on the table: build one day of labeled rations and run the water steps with tap water. Then in the dark: find the treatment label, mark the bottle and set the timer by feel. Then wet: pre-filter in rain, keep clean and dirty containers apart, and secure food before cooking.
  • Pre Filter and Boil: Boiling is the most reliable field method.
  • Chemical Water Treatment: Chemical treatment needs the exact dose and contact time on its label.
  • Camp Water Setup: Keep treated water separate from dirty water.
  • Daily Ration and Storage: Choose shelf-stable food for a blackwater solo route.
Chapter 6

Camp Craft and Shelter Solutions

  • Safe camp needs: Choose a safe blackwater camp, rig a weatherproof shelter, manage a legal low-impact fire, and tie the working knots that keep a solo camp together.
  • Pick camp, pitch shelter: A good camp is high, dry, quiet, and easy to leave.
  • Fire and knots: First decide whether a fire is legal, allowed at this site, and wise in the current wind and dryness.
  • Dry bags and fire gear: Learn it on the table: scan a room-sized camp map, sort dry and wet gear, and tie every knot. Then in the dark: scan overhead and find the exit by touch. Then wet: tension the tarp, split damp wood to expose dry fibers, and close every dry bag without letting rain into the sleep system.
  • Site hazard scan: Walk the proposed camp and identify durable ground, drainage, water, wildlife signs, and an exit to higher ground.
  • Hammock tarp shelter: A hammock gives airflow and keeps you above wet ground, but it does not forgive poor tree choice.
  • Wet country fire: First decide whether a fire is legal, allowed at this site, and wise in the current wind and dryness.
  • Five camp knots: Learn knots on a dry line before you need them wet and cold.
Chapter 7

Emergency Preparedness and Risk Management

  • Slow The Scene: Assess a blackwater emergency, give immediate self-aid, signal clearly, and choose a safer action when wildlife or weather turns the trip sideways.
  • Self Rescue: A suspected fracture stays in the position found.
  • Snake Bite, Then Heat Stress: Gently wash the area with soap and water if you can do so without moving around.
  • Heat And Cold: Confusion, slurred speech, seizure, collapse, or very hot skin can mean heat stroke.
  • Build The Kit: Learn it on the table: lay out the first aid kit, whistle, mirror, communicator, shelter, dry layer, and light, then give an emergency message aloud. Then in the dark: find each item by touch. Then wet: repeat after soaking the outside of the pack, and keep the signal gear usable.
  • Wildlife And Weather: Your dry bag split open in a capsize, you are shivering, and a thunderhead rises beyond the next bend. Without opening a phone, list the order in which you will warm your body, use your kit, and call for help.
  • Scene Assessment: Stay calm.
  • Snake Bite Response: Get away from the animal without a second bite.
  • Heat And Cold Care: Call 911 for an emergency.
  • Signal Wildlife Weather: Signal early when the problem is real.
Chapter 8

Communications and Safety Protocols

  • Before You Launch: Learn it on the table: fill the contact brief and send a test message. Then in the dark: find the SOS menu without activating it and read your message from the notebook. Then wet: put the device and power bank in their waterproof cases, move to an open sky position, and complete a check-in without exposing the electronics to rain.
  • Build The Line Home: Solo travel removes the partner who would notice a bad decision.
  • Make Check Ins Useful: A check-in is not a vague thumbs-up.
  • Blackwater Response: Dense cypress and tupelo cover can block a clear sky view.
  • Emergency Contact Brief: Write your name, activity, travel method, vehicle description, route, planned camps, put-in, take-out, and expected return.
  • Satellite Check In: Charge the communicator, confirm its subscription, inspect the housing and port, and send a test message before departure.
  • SOS And Overdue Response: Assess whether the problem is life-threatening, true disorientation without safe self-rescue, or immediate danger; if not, use a normal message and your plan.
Chapter 9

Psychological Fortitude and Solo Mindset

  • Solitude is the load: Going alone removes the person who normally shares the work, checks your judgment, and absorbs a bad moment.
  • When fear rises: Stress may show up as a racing heart, tight muscles, shallow breathing, poor sleep, a sour stomach, or a mind that jumps ahead.
  • Decide with OODA: Under pressure, use the four-part OODA loop: Observe, Orient, Decide, Act.
  • Morale and the journal: A solo trip needs a rhythm.
  • Practice before departure: Learn it on the table: write your purpose card, run one OODA scenario, and complete one journal entry.
  • Purpose and risk card: Write one sentence that explains why this expedition matters to you.
  • OODA decision reset: Observe and write the objective facts about position, weather, water, daylight, body, and gear.
  • Breathing and grounding: Put down any tool or paddle and move to a stable place away from the bank edge, stove, and fire.
  • Daily morale journal: After camp is secure, write the date, location, body condition, and mood in the journal.
Chapter 10

Operations Plan: Synthesis and Execution

  • What The Plan Needs: Build, brief, use and improve a trip-ready Operations Plan for a solo blackwater expedition.
  • Run The Plan: If the ERP cannot be followed when tired, wet and alone, the Operations Plan is not finished.
  • One Working Document: A solo trip needs one working document.
  • Six Core Sections: Build the plan in six core sections: Executive Summary, Participant Information, Route Overview and Itinerary, Logistics, Emergency Response Plan (ERP), and Appendices.
  • Logistics, ERP, Appendices: Logistics holds transport, food, water, fuel, batteries, permits and check-ins.
  • When Parts Disagree: If the ERP says a satellite communicator is needed, the gear list must name it, list its power source and show a spare power method.
  • Daily Route Table: Make one route table for each day of the seven-day trip.
  • Margin And Finish: A blackwater route can slow under strain, fallen trees, low water, heat, rain or a portage.
  • Map And Coordinates: Show direction, camps, water, hazards, alternates and extraction points.
  • Write The ERP: Write the ERP as actions, not hopes.
  • Injury And Lost: What can I fix now?
  • River, Map And Device: Compare the map, last known point and planned route.
  • SOS And The Contact: A communicator SOS contacts a response center, which notifies responders, and two-way communication continues during the emergency.
  • Gear And Food Lists: Build the gear appendix by system: navigation, communication, shelter, clothing, water, food, cooking, first aid, repair, lighting, life jackets and documents.
  • Water, Fuel, Waste: Restate the water source plan, treatment method, storage containers and the point where you switch to reserve water.
  • Transport And Check-ins: Add a transport page.
  • Brief The Contact: Before launch, sit with the trusted contact and walk every page.
  • Run And Close The Plan: Leave the final plan before departure.
  • Improve The Plan: Record the actual route, water and fuel use, missed check-ins, weather, hazards, equipment failures, useful camps and decisions that reduced risk.
  • Six-section Operations Plan: Write the trip, dates, launch, takeout and purpose in the Executive Summary.
  • Route Extraction Table: Enter the date, start point, planned mileage, travel time, camp and finish point for each day.
  • Emergency Response Plan: Choose severe injury, lost or unsafe river and write the immediate hazard and assessment questions.
  • Contact Brief Debrief: Hand the trusted contact the final paper or digital plan before departure.
Chapter 11

Pre-Expedition Checklists and Final Prep

Printed in full here from the book.

Physical mental rehearsal

Your rehearsal must include the real motions: lifting a wet boat, getting in and out, walking a muddy bank, reaching a dry bag, and making camp while tired.

  1. Write the scenarios Write the trip motions and hard scenarios that must be practiced before departure.
  2. Train whole body Train aerobic work and whole-body strength at a level appropriate for your health, increasing gradually.
  3. Repeat route tasks Repeat the route tasks with the actual loaded pack, clothing, dry bags, and shelter.
  4. Safe action Talk through a storm, forced portage, clogged filter, damaged bag, and loneliness, naming the next safe action.

You need: Repair the gap (Record pain, failure, or hesitation and repair the gap before the go or no-go review.)

Check it. Pass: the loaded rehearsal is completed without a hidden gear or body problem, and the next action for every rehearsed scenario is stated aloud. Fail: pain, equipment failure, or confusion is dismissed instead of corrected.

Field check
  • I write the trip motions and hard scenarios before departure.
  • I train aerobic work and whole-body strength at a level appropriate for my health.
  • I repeat the route tasks with the actual loaded pack, clothing, dry bags, and shelter.
  • I say the next safe action aloud.
  • I record pain, failure, or hesitation and repair the gap before the go or no-go review.

Safety. Do not train yourself to push through a failed safety condition.

Triple check access pack

Run the gear check in three passes.

  1. Mark item presence Mark presence for every item, life jacket, battery, repair part, meal, water container, and document on the written list.
  2. Test every function Test function on lights, communicator, offline maps, compass, filter, shelter, rain layer, and repair kit.
  3. Inspect for damage Inspect damage on fabric, buckles, cords, insulation, batteries, cookware, and stove fittings.
  4. Place gear within reach Repack food by day, keep heavy items low and central, and place emergency and water gear within reach.

You need: Repack same order (Set up the complete load at home, then repack it in the same order and record any correction.)

Check it. Pass: every life-critical item is present, tested, undamaged, and reachable in the planned order. Fail: a critical item is missing, untested, damaged, buried under other gear, or packed without a backup plan.

Field check
  • I mark presence for every item, life jacket, battery, repair part, meal, water container, and document.
  • I test lights, communicator, offline maps, compass, filter, shelter, rain layer, and repair kit.
  • I inspect fabric, buckles, cords, insulation, batteries, cookware, and stove fittings for damage.
  • I keep heavy items low and central and emergency and water gear within reach.
  • I repack the load in the same order and record any correction.

Safety. Wear your life jacket whenever the canoe is underway.

Weather river go no go

A forecast is a changing decision input.

  1. Open exact forecast Open the exact-area National Weather Service forecast and record the forecast time, warnings, thunderstorm risk, wind, rain, and heat concerns.
  2. Check gauge conditions Check the route gauge and recent rain, then compare the reading with the local authority’s safe range and known hazards.

You need: Write the gates (Write three weather gates, two river gates, and two personal or gear gates in plain language.)

Safety. Leave the water when thunder threatens and never enter moving floodwater.

  1. Mark the decision Mark GO or NO-GO beside every gate and stop if one critical gate fails.
  2. Tell the contact Tell the emergency contact the decision, the evidence, the new plan, and the next review time.

Check it. Pass: the written decision names current forecast and gauge evidence, local rules, failed gates, and the action that follows. Fail: the decision relies on memory, a generic town forecast, an old gauge reading, or hope that a warning will miss the route.

Field check
  • I record the exact-area forecast time, warnings, thunderstorm risk, wind, rain, and heat concerns.
  • I review the detailed forecast 24 to 48 hours before departure.
  • I write three weather gates, two river gates, and two personal or gear gates in plain language.
  • I mark GO or NO-GO beside every gate and stop if one critical gate fails.
  • I compare the route gauge and recent rain with the local authority safe range and known hazards.

Safety. Leave the water when thunder threatens and never enter moving floodwater.

Emergency contact brief

The contact brief is part of the gear.

  1. Give route details Give the contact the route, planned camps, put-in, take-out, exits, permits, vehicle details, and latest decision sheet.
  2. Explain check in Explain the check-in method, the missed-check-in response, and the exact condition that changes the plan.
  3. Show message format Show the contact the emergency message format with location, condition, route, access, and need.
  4. Use agreed process Tell the contact to use the agreed emergency process and not enter a dangerous area for a private search.

You need: Confirm the plan (Confirm the contact can find the documents and repeat the plan back without guessing.)

Check it. Pass: the contact can state where you are expected to be, what a missed check-in means, who to call, and what information to provide. Fail: the contact has only a date, a vague destination, or an instruction to wait and hope.

Field check
  • I give the contact the route, planned camps, put-in, take-out, exits, permits, vehicle details, and latest decision sheet.
  • I explain the check-in method, the missed-check-in response, and the exact condition that changes the plan.
  • I show the contact the emergency message format with location, condition, route, access, and need.
  • I tell the contact not to enter a dangerous area for a private search.
  • I confirm the contact can find the documents and repeat the plan back without guessing.

Safety. Give the contact a clear instruction: do not launch a private search into a dangerous area.

Prepare before departure

Finish a written pre-expedition check, rehearse the hard moments, and make a calm go or no-go call for a solo blackwater launch.

  1. Start preparation Final preparation starts before the pack is closed. Build endurance with regular walking, paddling, or other aerobic work. Add strength for the legs, hips, back, abdomen, shoulders, and arms. Practice with the load you will actually carry. Add flexibility work. Increase work gradually. Pain, illness, a new blister, or a tired mind is information, not a challenge to ignore. Fix the small problem at home.
  2. Use a baseline Use the CDC adult baseline of at least 150 minutes of moderate activity each week and muscle work on at least 2 days each week as a health starting point, then adjust with a qualified clinician for your condition. This is not a promise that you are ready for a solo trip. Your rehearsal must include the real motions: lifting a wet boat, getting in and out, walking a muddy bank, reaching a dry bag, and making camp while tired. During the weeks before departure, protect sleep and nutrition.
  3. Practice hard moments Use visualization, positive affirmations, and small controlled discomforts to make hard moments familiar without taking needless risks. Close your eyes and walk through a thunderstorm on open water, a forced portage, a clogged filter, a damaged dry bag, loneliness, and a missed check-in. Say the next safe action aloud. A written route should show the planned camp, water collection points, hazards, legal access, and emergency exits. Your emergency contact needs the same route, not a vague promise to call later.
  4. Delay while easy Do not train yourself to push through a failed safety condition. The purpose of the rehearsal is to make a good decision familiar. The purpose of the final check is to find a reason to delay while delay is still easy.

Rule. Pass: you can name your rehearsal and your delay trigger. Fail: you push through pain.

Field check
  • I practice with the load I will actually carry.
  • I protect sleep and nutrition during the weeks before departure.
  • I say the next safe action aloud.
  • I keep the same route with the emergency contact.
  • I find a reason to delay while delay is still easy.

Safety. Do not train yourself to push through a failed safety condition.

Pack for access

Run the gear check in three passes.

  1. Three passes Run the gear check in three passes. First check presence. Every item on the written list is in the pack, including a life jacket for every person aboard, batteries, repair parts, food, water containers, navigation, communication, first aid, shelter, clothing, and sanitation supplies. Second check function. Turn on lights, confirm the communicator can send, open offline maps, inspect the compass, test the filter, and make sure the shelter and rain layer can be deployed.
  2. Check damage Third check damage. Look for cuts, bent parts, dead batteries, wet insulation, worn cord, cracked buckles, and loose stove fittings. Repackage food by day so the next meal is obvious. Protect fragile items in hard containers. Keep heavy items low and near the center of the pack. Put snacks where a tired paddler can reach them without emptying the boat.
  3. Reach water gear Keep the filter, pre-filter, chemical backup, dirty-water bag, first aid, light, whistle, communicator, and shelter layer reachable. Carry treated water only in clean containers with tight covers. Where dispersed camping is allowed, wash hands and dishes at least 200 feet from water, and follow the site rules for wash water and food storage.
  4. Dress rehearsal Do a full dress rehearsal at home. Wear the clothing. Load the pack. Put the boat on the vehicle. Set up and take down shelter. Make the water system work. Pack it again in the same order. Check the site rules before you leave, because fire sites and food storage rules vary by place. Before every Okefenokee trip, confirm closures and fire restrictions with the refuge.

Rule. Pass: three passes are done and the load is repacked. Fail: a critical item is buried.

Field check
  • I check presence, function, and damage.
  • I carry a life jacket for every person aboard.
  • I keep heavy items low and near the center of the pack.
  • I keep the filter, pre-filter, chemical backup, dirty-water bag, first aid, light, whistle, communicator, and shelter layer reachable.
  • I check the site rules before I leave.

Safety. Wear your life jacket whenever the canoe is underway.

Read weather water

Start with the National Weather Service forecast for the exact river area, not the town where you live.

  1. Review the forecast Start with the National Weather Service forecast for the exact river area, not the town where you live. During the week before departure, review the long-range outlook. Review the detailed forecast 24 to 48 hours before departure and the latest forecast on launch morning. Also check watches, warnings, radar, and lightning information. A forecast is a changing decision input. Write down what you saw and the time you saw it. Check the river gauge that represents your route.
  2. Compare conditions USGS Water Data for the Nation provides current and historical streamflow information, but a gauge is not the riverbank. Compare the reading with the local rule, known hazards, recent rain, access, and your own skill. A rising river, newly covered hazard, closed road, unsafe put-in, or water level outside your planned experience is a no-go until a safer plan exists. Three weather gates are simple. There is no active warning that makes the route unsafe. The forecast does not put you on open water during a threatening thunderstorm.
  3. Leave dangerous water You have a shelter and exit plan for heat, rain, wind, or falling water. If thunder threatens, leave the water and seek a substantial building or hard-topped vehicle when available. A tent or tarp is not lightning shelter. Wait 30 minutes after the last rumble of thunder. Never walk into moving floodwater. Make two river gates. The gauge and recent conditions fit the safe range you established from the local land manager or river authority, and every known strainer or portage has a current plan. Make two personal or gear gates.
  4. Stop when gates fail You are rested enough to make decisions, and every life-critical item passes presence, function, and damage checks. One failed critical gate means delay, route change, or cancel. Tell the contact, protect the reservation if possible, and go home without shame.

Rule. Pass: all seven gates are written. Fail: a failed gate is ignored.

Field check
  • I review the detailed forecast 24 to 48 hours before departure.
  • I check the river gauge that represents my route.
  • I leave the water when thunder threatens and wait 30 minutes after the last rumble.
  • I never walk into moving floodwater.
  • I stop when one failed critical gate means delay, route change, or cancel.

Safety. Leave the water when thunder threatens and never enter moving floodwater.

Make the final call

Write GO or NO-GO beside each gate.

  1. Set the call Write GO or NO-GO beside each gate. A go call requires a legal route, a known put-in and take-out, a usable emergency exit, a current forecast, an acceptable river condition, a complete and tested load, a body that can do the work, and a mind willing to turn around. Put the date and time on the sheet. Keep the sheet with the route plan and leave a copy with the emergency contact. The contact brief is part of the gear.
  2. Brief the contact Explain the route, planned camps, check-in method, missed-check-in response, extraction points, vehicle information, permits, and the exact conditions that change the plan. Give the contact a clear instruction: do not launch a private search into a dangerous area. Use the agreed emergency process and give responders the route, last known position, clothing, equipment, medical facts, and the time of the last message.
  3. Stop a no go If the call is no-go, stop the launch sequence. Do not drive to the put-in hoping conditions improve. Do not turn one failed gate into a private argument.
  4. Return to training Change the date, shorten the route, choose a safer waterway, or return to training. The wilderness will still be there. Good preparation ends with judgment, not pride.

Rule. Pass: GO or NO-GO is written beside each gate. Fail: the contact has only a date.

Field check
  • I write GO or NO-GO beside each gate.
  • I keep the sheet with the route plan and leave a copy with the emergency contact.
  • I give the contact a clear instruction not to launch a private search into a dangerous area.
  • I stop the launch sequence if the call is no-go.
  • I choose a safer waterway or return to training.

Safety. Give the contact a clear instruction: do not launch a private search into a dangerous area.

Practice And Refusal

A failed critical gate is a no-go. Delay is a skill.

  1. Learn it on the table Learn it on the table: complete the three-pass gear check and speak the emergency contact brief.
  2. Then in the dark Then in the dark: find the light, map, communicator, first aid, shelter layer, and water kit by touch.
  3. Then wet Then wet: repeat the function check with wet hands and a damp pack exterior, and stop if a failure appears.
  4. Write your refusal On launch morning, a warning covers the route, the river climbs, and a headlamp fails. Write your refusal, notification, substitution, and evidence log.

Practice it. Pass: you refuse the launch and log the evidence. Fail: you drive to the put-in hoping.

Field check
  • I complete the three-pass gear check and speak the emergency contact brief.
  • I find the light, map, communicator, first aid, shelter layer, and water kit by touch.
  • I repeat the function check with wet hands and stop if a failure appears.
  • I write my refusal, notification, substitution, and evidence log.

Safety. If the call is no-go, stop the launch sequence.

Final check items

Finish a written pre-expedition check, rehearse the hard moments, and make a calm go or no-go call for a solo blackwater launch.

  1. Checklist and pen Waterproof checklist and pen
  2. Critical items Packed expedition load and every critical item

You need: Forecast and gauge (Current National Weather Service forecast and local river gauge data)

Field check
  • I carry the waterproof checklist and pen.
  • I check every critical item.
  • I review the current forecast and local river gauge data.
  • I keep the written route, permits, emergency exits, and contact plan.
  • I rehearse paddling, loaded walking, shelter, and water work.

Safety. A rising river, newly covered hazard, closed road, unsafe put-in, or water level outside your planned experience is a no-go until a safer plan exists.
  1. Route and contact Written route, permits, emergency exits, and contact plan
  2. Safe rehearsal place A safe place to rehearse paddling, loaded walking, shelter, and water work
Field check
  • I carry the waterproof checklist and pen.
  • I check every critical item.
  • I review the current forecast and local river gauge data.
  • I keep the written route, permits, emergency exits, and contact plan.
  • I rehearse paddling, loaded walking, shelter, and water work.

Safety. A rising river, newly covered hazard, closed road, unsafe put-in, or water level outside your planned experience is a no-go until a safer plan exists.
Questions people ask
How do you plan a multi-day canoe trip?

Start with a route sheet drawn from the legal put-in to the take-out, with camps, water, hazards and emergency exits marked. Then write one operations plan with six sections: summary, participant information, route, logistics, emergency response plan and appendices. Make a route table for every day, build in a margin, and brief a trusted contact before you launch.

What should go on a canoe camping checklist?

Build it by system: navigation, communication, shelter, clothing, water, food, cooking, first aid, repair, lighting and a life jacket for every person aboard. Then run three checks: presence, function and damage. Keep the filter, first aid, light, whistle, communicator and shelter layer within reach. Do a full dress rehearsal at home first.

How do you prepare for a solo canoe camping trip?

Write your reason for going, then audit your real ability in navigation, paddling, water treatment, first aid, camp craft, weather and stress. For each weak area, write the practice that closes it and the condition that makes you turn around. Carry two ways to navigate and two ways to communicate, and give a contact your route and plan.

How do you navigate and stay found on a river trip?

Layer your tools: a paper map and compass first, then matching the map to the land and water, then a GPS or phone with offline maps. Mark decision points and write a Plan B for each. If you realize you are off track, run STOP: stop, think, observe, plan. Return to your last known point before you go further.

How much food and water do you need for a multi-day canoe trip?

The book cites about 2,200 to 3,000 calories a day for an active adult aged 19 to 50, more on hard days. Pack shelf-stable food labeled by day. Treat every natural water source. On the Okefenokee refuge, drinking or filtering swamp water is not recommended; bring all drinking and cooking water, with one gallon per person per day recommended.

How do you set up a check-in plan, and what if you are overdue?

Choose a two-way satellite communicator and learn it before the trip. Pick two or three contacts, set a check-in schedule and give them your route, camps, return time and the point at which to contact authorities. Write a missed-check-in plan. Use SOS only for life-threatening injury, true disorientation or immediate danger, not for ordinary lateness.

What do you do for a snake bite or heat illness on a trip?

For a suspected venomous bite, sit or lie down, keep the limb at or just below heart level, remove tight items, and send SOS or call for emergency help. Do not cut, suck, ice or tie it. For heat stroke, with confusion, slurred speech or very hot skin, call 911 and cool the person quickly, but never in alligator water.

How do you set up camp with a hammock and tarp in wet country?

Choose high, dry, durable ground and look up for dead limbs. Hang from healthy trees using tree-friendly webbing at least 1 inch wide, and hang the bug net before the rain fly. For a tarp, run a ridgeline, stake the corners and pitch low and tight. Never put a stove or flame under or near a tarp or tent.

How do you handle fear or loneliness on a solo trip?

Name the feeling instead of arguing with it, and treat it as a cue to pause. Sit where you cannot fall in the water, slow your breathing and ground yourself by noticing what you see, hear and feel. Make the next task small, keep a steady camp routine and write in a journal. If fear becomes overwhelming, stop the trip and use your emergency plan.

How do you decide whether to go or turn back?

Write a stop rule before you launch and a written GO or NO-GO beside each gate: weather, river level, a tested load, your rest and a usable emergency exit. One failed critical gate means delay, a route change or cancel. On the water, turn back when the route, weather, injury, equipment or your own state moves outside what you can manage.