Skip to content
Home › Wilderness Skills Series › Hunter's Guide
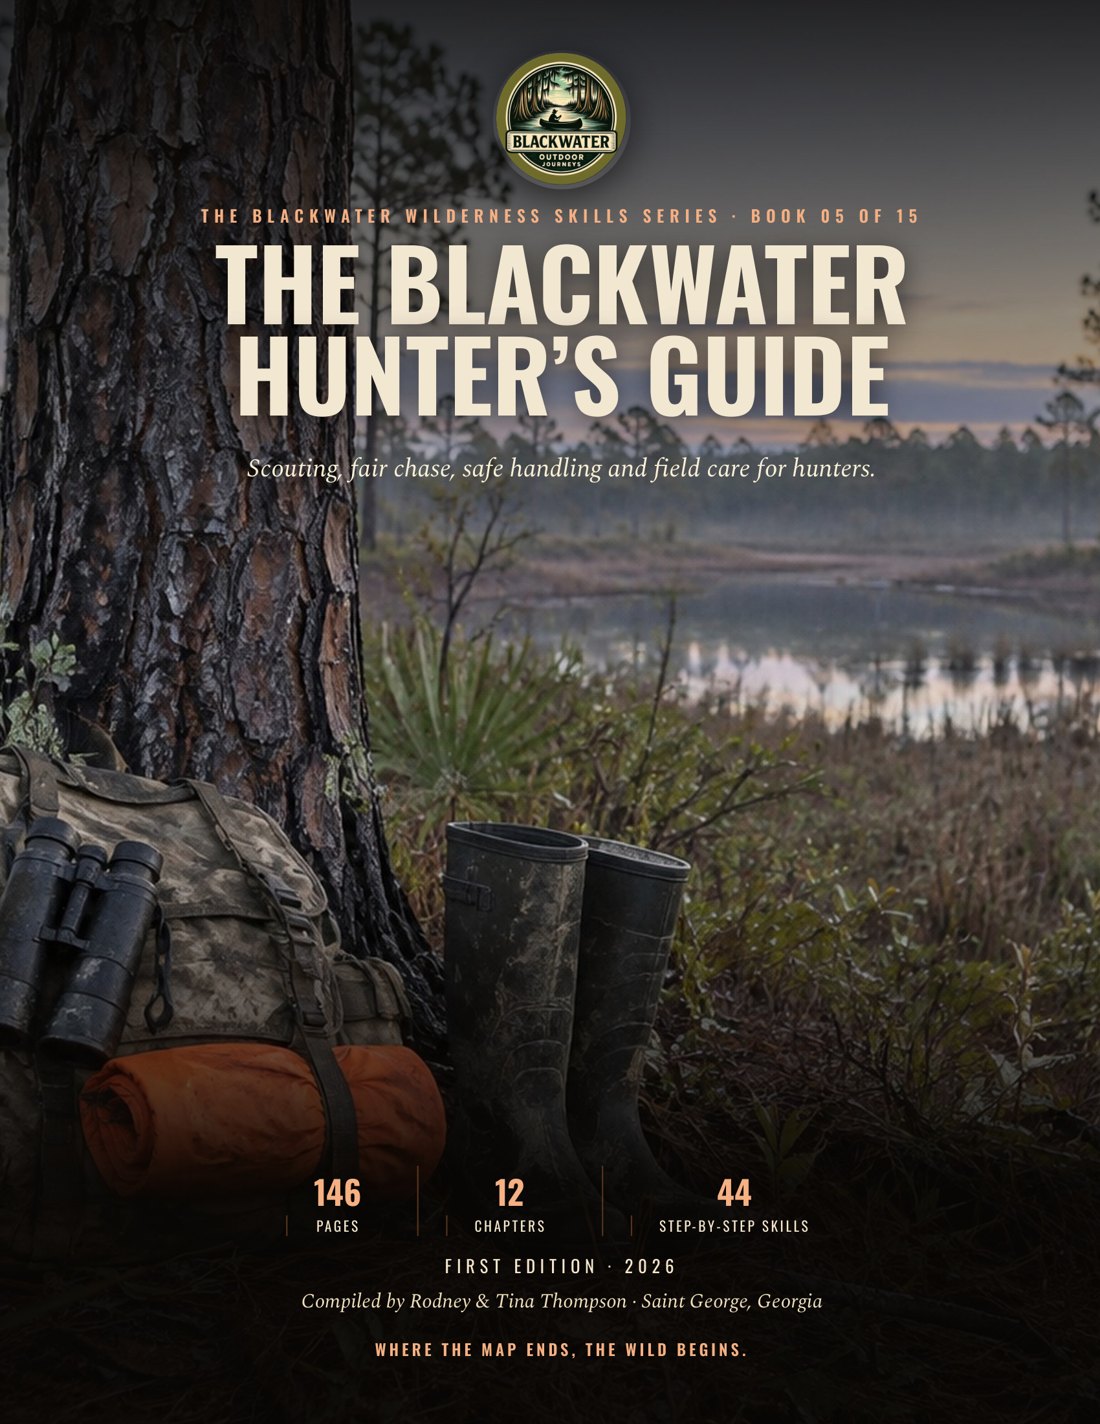
Cover of The Blackwater Hunter's Guide, a printed guidebook for deer and hog hunters
The Blackwater Wilderness Skills Series · Book 05

Hunter's Guide

The Blackwater Hunter's Guide is a printed guidebook for deer and hog hunters in blackwater swamp and river country. It covers fair chase, map and ground scouting, reading sign, tree stand safety, river access by canoe, scent and wind, shot placement, tracking after the shot, field dressing and gear. Hunters should always follow the current rules from their state wildlife agency.

  • 146pages
  • 12chapters
  • Full colorprinted guide
Flip through the book

The first pages of the book, as they print.

Get the full book

Read the whole book on any screen, or hold the printed book in your pack. The printed book comes with the digital edition included.

Digital edition

Read it on your phone or tablet

$12.95 one-time
  • The whole book, page by page, in the flipbook
  • Works on a phone, tablet or computer, so it goes where you go
  • Opens with the email you buy with
Coming soon
Printed book

The full-color book, digital edition included

$24.95 plus shipping
  • The printed 146-page book, full color
  • The digital edition at no extra charge
  • Printed to order and mailed in the U.S.
Coming soon

Save on more books. Order two or more books and each one is 20% off. Come back for another book later and it is 20% off too. The full printed series is 25% off and the full digital series is 50% off. See the savings

Layout preview only. Ordering is not set up yet.

Chapter by chapter
Chapter 1

The Ethical Predator and Foundations

  • Hunt Before Woods: Plan and conduct a lawful, fair chase hunt that respects wildlife, landowners, public land users, and the conservation system that supports wild places.
  • Conservation Partnership: The conservation system is a partnership.
  • Fair Chase And Ground Rules: Fair chase is the ethical, sportsmanlike, lawful pursuit of free-ranging wildlife without an improper or unfair advantage.
  • Lawful Access Check: Learn it on the table: build a regulation and access checklist from a real tract. Then in the dark: read it by headlamp.
  • Fair Chase Decision: At dusk, a deer stands beyond a closed gate and your map ends at a ditch. Decide whether you may follow, whom you contact, and when the search ends.
  • Leave Tract Better: Then wet: repeat the departure check at a blackwater landing without leaving a trace.
Chapter 2

Digital Reconnaissance: The Map Room

  • Map Room Filter: Build a digital scouting file that turns a blackwater property into a legal, wind-aware field plan with marked terrain, cover, water, access, and observation points.
  • Read Shape First: A topographic map uses contour lines to show the shape and elevation of land.
  • Layer Habitat: A digital pin is a hypothesis. Verify it on the ground, and follow your state wildlife agency’s current regulations.
  • Moving Air Journal: Wind is part of the route, not an afterthought.
  • Topo Shape Read: Learn it on the table: print a blackwater parcel and mark boundary, water, cover, access, and wind.
  • Layered Habitat Screen: Then in the dark: rebuild the waypoint file by headlamp from your paper notes.
  • Wind Aware Sit Screen: Then wet: compare the forecast with the air at the river and write what changed.
  • Scout Journal Loop: Your printed parcel map shows a bend, a flooded flat, young pines, and one gate. Without opening an app, sketch the order of your review, label a primary and fallback glassing position, and write four signs that would make you abandon both positions.
Chapter 3

Boots-on-the-Ground Scouting

  • The Ground Is The Map: Walk a blackwater tract, confirm what the map suggested, and mark food, water, cover, bedding, trails, and pinch points without educating the deer.
  • Habitat Layers: Start at the edge of the tract and glass before you enter thick cover.
  • Route Between Needs: A game trail becomes useful when it connects real needs.
  • Season And Pressure: Pressure changes the value of cover.
  • Turn Notes Into Plan: Your partner hands you a sketch of a wetland approach marked active. You have not visited it. The dry line passes close to a resting pocket. Write a go or no-go brief using fact, assumption, consequence, and a verification task.
  • Habitat Audit: Learn it on the table: draw a blackwater tract and connect food, water, cover, bedding, and a pinch point. Then in the dark: name the compass, pencil, and binoculars by touch.
  • Trail And Pinch Point: Treat every mapped hotspot as a hypothesis until current ground sign, habitat, access, and a clean exit support it.
  • Seasonal Scout: Then wet: repeat the audit after rain and mark the routes that turned loud or flooded.
Chapter 4

Reading the Language of the Wild (Sign)

  • Track Freshness Read: Then in the dark: use a headlamp to photograph a harmless practice track and dictate the log without stepping on it.
  • Sign Chain Read: Learn it on the table: sort printed pictures into track, scat, rub, scrape, browse, bed and trail, then write one observation and one inference for each.
  • Low Impact Log: Then wet: repeat beside a muddy blackwater trail after rain and mark every freshness clue that rain may have changed.
  • Read the Sign: Read tracks, scat, rubs, scrapes, browse, beds and trails, judge freshness without guessing, and log a clean picture of animal use.
  • Freshness Clues: Freshness is a judgment, not a promise.
  • Deer and Hog Sign: A scrape is a patch where a deer has pawed away leaves and soil.
  • Beds and Trails: Read the whole chain, disturb nothing, and call uncertainty honestly.
  • Make the Log Useful: At a tannin-dark creek margin, four unlabeled photographs show a hoof mark, broken branch, pellet cluster, and bare patch. Rank them by confidence, state your next observation, and name what evidence would overturn your first call.
  • Pocket Guide: Include a ruler or tape measure in the photograph for scale, kept beside rather than on the sign.
Chapter 5

Tree Stand and Elevated Hunting Safety

Printed in full here from the book.

Ground Safety

Inspect an elevated stand, fit a full-body fall-arrest system, climb with three points of contact, haul gear safely, and leave a clear emergency plan.

  1. Leave The Ground When your feet leave the ground, safety becomes the hunt. A ladder stand, climbing stand, or hang-on stand can put you above a blackwater bottom, a pine edge, or a cypress run. Follow the local rule for any blind or stand placement.
  2. Look Over Parts Before you load the truck, lay out every part. Look over bolts, welds, cables, tree straps, chains, climbing-stick straps, platform joints, seat hardware, and any wood. Search for rust, cracks, bent parts, animal chewing, dry rot, loose stitching, cuts, frayed webbing, or a buckle that will not close and release as designed.
  3. Remove Frayed Parts A small fray is not a field repair. Remove a frayed part from service and follow the manufacturer’s replacement instructions. Never trust a stand because it held you yesterday.
  4. Ground Practice Practice at ground level with a responsible adult. Put the harness on, adjust it, connect the tether, move around the tree, and deploy the suspension relief device. Learn the system before a dark climb, not while you are hanging from it.

Check it. Pass: every part is laid out, inspected, and removed from service if frayed. Fail: you skip an inspection.

Field check
  • I lay out every part.
  • I search for rust, cracks, bent parts, or frayed webbing.
  • I remove a frayed part from service.
  • I practice at ground level with a responsible adult.

Safety. A small fray is not a field repair.

Harness Fit

Read the stand and fall-arrest instructions together.

  1. Read Instructions Read the stand and fall-arrest instructions together. Check the harness label and the manufacturer’s service or replacement guidance. Fit is personal. The waist belt sits where the instructions show it.
  2. Close The Buckles Leg straps are snug enough to keep the harness from riding up or letting you invert. Buckles are closed, webbing is flat, and the tether is connected to the harness attachment point named by the manufacturer. Do not improvise a chest harness, belt, or rope system.
  3. Inspected Stand An inspected tree stand, ladder, climbing system, or hang-on system used exactly as its manufacturer directs.
  4. Fall-Arrest System A manufacturer-approved full-body fall-arrest system with harness, tether, tree strap, and suspension relief device. A safety system you cannot operate is only weight in your pack.

Check it. Pass: you read the instructions, and the harness fits with flat webbing and closed buckles. Fail: you improvise a belt or rope system.

Field check
  • I read the stand and fall-arrest instructions together.
  • I check the harness label.
  • I keep the webbing flat and the buckles closed.
  • I do not improvise a chest harness, belt, or rope system.

Safety. Do not improvise a chest harness, belt, or rope system.

Stay Connected

A lifeline or fall-arrest rope is the connection that follows you.

  1. Follow The Lifeline Attach the lifeline at the base as directed by the manufacturer, run it to the stand, and keep the tether connected while ascending, while seated, while standing, and while descending. The connection begins before your first step and ends after your last foot returns to the ground. A waist-high attachment leaves more room to fall. When you are in the stand, keep the tree strap above your head and the tether as short as the system permits without stopping your movement.
  2. Use The System Use the system that came with the stand or a system approved for that use. Read its knots, sliders, carabiners, labels, and limits. A Prusik-style slider may be part of a lifeline, but do not tie or replace one from memory. Keep the rope clear of sharp edges, hot exhaust, chainsaws, and anything that can cut or melt it.
  3. Haul Rope And Phone A haul rope, whistle, charged phone or personal locator beacon, and small first-aid kit.

You need: Written Return Plan (A written location and return plan shared with a responsible person.)

Check it. Pass: the tether stays connected from the ground to the stand and back. Fail: you start a climb unconnected.

Field check
  • I attach the lifeline at the base as directed by the manufacturer.
  • I keep the tether connected while ascending, while seated, while standing, and while descending.
  • I keep the tree strap above my head.
  • I keep the rope clear of sharp edges.

Safety. Keep the rope clear of sharp edges, hot exhaust, chainsaws, and anything that can cut or melt it.

Three Points

Climb slowly.

  1. Keep Contact Keep two hands and one foot, or two feet and one hand, in contact with the ladder, climbing sticks, or tree. Test each step before you commit your weight. Wet leaves, dew, mud, bark, and blackwater humidity can turn a sound route slick.
  2. Raise The Load Secure an unloaded firearm or other hunting gear to the haul rope, and raise or lower it only after you are safely connected and in the stand or on the ground. Keep the muzzle pointed in a safe direction and follow the manufacturer’s instructions for your equipment.
  3. Stable Route A climber needs a suitable tree and a stable route. A hang-on needs every climbing component secured as directed. A ladder stand needs a sound ladder, platform, and attachment. If the tree, stand, strap, or route feels wrong, descend while connected and stop the hunt. A wobble is information. Treat it as a failure until you inspect and correct the cause.
  4. Do Not Rush Stop when you need to reposition. Do not rush because light is fading. Do not climb with a pack, bow, firearm, or other heavy load.

Check it. Pass: you name your three points of contact at every move. Fail: you carry a load in your hands.

Field check
  • I keep two hands and one foot in contact with the tree.
  • I test each step before I commit my weight.
  • I do not climb with a pack, bow, firearm, or other heavy load.
  • I secure an unloaded firearm to the haul rope.

Safety. Do not climb with a pack, bow, firearm, or other heavy load.

Recovery Plan

Tell a responsible person where you will hunt, where the stand sits, the route you expect to use, and when you expect to return.

  1. Tell A Person Give your responsible person the name or coordinates of the access point if you have them. Say what to do if you miss the return time. Update the plan when you move the stand or change the exit. A phone in a dry case, a whistle, and a personal locator beacon can help, but none replaces a person who knows where to start looking. Carry a small first-aid kit.
  2. Freeze And Stay If the stand shifts, a strap fails, a branch breaks, or your footing changes, freeze. Keep three points of contact and stay attached. Do not jump. Do not reach for a falling item. If you can safely reverse the route, descend slowly. If you cannot, call or signal for help.
  3. Suspension Relief If you fall and the fall-arrest system leaves you suspended, deploy the suspension relief device and step into it so your legs can bear some weight. Follow the device instructions.
  4. Inspect After A Fall After any fall, hard swing, or unusual load, retire the fall-arrest system and inspect the stand before another use. A harness or tether can look normal after catching a fall and still be damaged.

Check it. Pass: a responsible person knows the stand, route, and return time. Fail: you jump or reach for a falling item.

Field check
  • I tell a responsible person where I will hunt.
  • I keep three points of contact and stay attached.
  • I do not jump.
  • I deploy the suspension relief device.

Safety. Do not jump. Do not reach for a falling item.

Weather And Rules

Changing weather adds friction.

  1. Weather Changes Grip Rain makes steps slick. Heat and humidity make gloves and webbing hard to manage, and a cold wet morning changes grip. Pack so you can keep both hands available. Wear footwear that fits the stand and gives reliable traction. No hunt is worth a hurried climb, an uninspected strap, or a quiet emergency that nobody knows about.
  2. Follow Regulations Stand design, placement, access, tagging, licenses, seasons, bag limits, legal hours, hunter orange, bait, and firearm transport rules differ by jurisdiction and can change. Follow your state wildlife agency’s current regulations before you hunt. Also check the property manager’s rules. Public land may have extra restrictions on tree damage, unattended stands, access, or stand removal. Private land still requires permission and respect for the landowner’s conditions.
  3. Choose Equipment Choose equipment that matches the tree and the route. Do not cut a tree, drive hardware into it, or leave equipment where the land manager forbids it. On the Okefenokee refuge, injuring any plant is prohibited. Keep the platform, ladder, and ropes out of travel lanes. Do not create a hazard for another hunter, paddler, landowner, or wildlife worker.
  4. Safe Climb Hunting is not a contest against darkness, weather, or a close animal. If you cannot make a safe climb, you do not climb. If the shot would force you to twist, stand outside the stable part of the platform, or lose your connection, you pass. The ethical decision is the one that sends you home with the whole crew and leaves the blackwater woods in good shape.

Check it. Pass: you can state the rules, the weather limit, and the climb you refuse. Fail: you hurry a climb or cut a tree.

Field check
  • I pack so I can keep both hands available.
  • I follow current regulations before I hunt.
  • I choose equipment that matches the tree and the route.
  • I do not create a hazard for another hunter.

Safety. If you cannot make a safe climb, you do not climb. Follow the local rule for stand placement and equipment.

Safe Hunt

At a dawn drill, your partner reports a damaged webbing edge. State whether the outing continues, name the first person you notify, and give the exact sequence for a platform shift during the return route.

  1. Mark It Out Of Service A stand that flexed, slipped, or struck the tree needs the same inspection. Mark it out of service until the manufacturer or a qualified person tells you it is safe.
  2. Call For Help Signal, call 911 when you can, and work toward the manufacturer’s stated self-rescue method. A suspension is an emergency, even when you feel calm.
  3. Unloaded While Hauling Never climb with a firearm, bow, pack, or heavy load. Keep the firearm unloaded while hauling.

You need: Inspect Before You Trust (Inspect before you trust. Harness from the ground up. Three points of contact. Haul every load.)

Check it. Pass: you name your next step after a fall, a wobble, or a haul. Fail: any load is carried while climbing.

Field check
  • I mark a stand out of service after a fall.
  • I signal and call 911 when I can.
  • I keep the firearm unloaded while hauling.
  • I inspect before I trust.

Safety. If suspended, use the suspension relief device, signal, and call 911 when possible.

Pre Climb Inspection

Learn it on the table: inspect and fit the complete system while naming each part.

  1. Lay Out Parts Lay out the stand, climbing parts, haul rope, full-body harness, tether, tree strap, and suspension relief device on clean ground.
  2. Inspect Parts Inspect bolts, welds, cables, straps, webbing, stitching, buckles, D-rings, platform joints, seat parts, and wood for damage or contamination.
  3. Remove Suspect Parts Read the stand and fall-arrest instructions, then remove any suspect part from service instead of making an improvised repair.
  4. Adjust The Harness Put on the harness and adjust the waist and leg straps until the manufacturer’s fit instructions are met and the webbing lies flat.
  5. Practice The Connection Practice the connection and suspension relief device at ground level with a responsible adult before the hunt.

Check it. Pass: every component is accounted for, undamaged, correctly fitted, and understood by the hunter. Fail: any fray, crack, bent part, failed buckle, unknown replacement date, or unpracticed device remains in the system.

Field check
  • I lay out the stand, climbing parts, haul rope, and full-body harness.
  • I inspect bolts, welds, cables, straps, and webbing.
  • I remove any suspect part from service.
  • I adjust the waist and leg straps.
  • I practice the connection at ground level.

Safety. Never climb with a firearm, bow, pack, or heavy load.

Connected Climb

Then wet: repeat the inspection and three-point climb on the ground beside a slick blackwater trail.

  1. Attach At Ground Attach the lifeline and harness connection at the ground as directed by the manufacturer before your first climbing step.
  2. Clear The Route Clear loose branches, wet leaves, mud, and other obstacles from the route without damaging the tree or property.
  3. Keep Three Points Climb slowly while keeping two hands and one foot, or two feet and one hand, in contact with the ladder, sticks, or tree.
  4. Stop If It Binds Keep the connection above you with the least slack that still permits movement, and stop if the system binds or the stand shifts.

You need: Descend Connected (Descend by the same deliberate system, staying connected until both feet are back on stable ground.)

Check it. Pass: the hunter stays connected from ground to ground and can name the three contact points at every move. Fail: any climb begins unconnected, a load is carried in the hands, or a contact point is abandoned while moving.

Field check
  • I attach the lifeline and harness connection at the ground.
  • I clear loose branches, wet leaves, mud, and other obstacles.
  • I keep two hands and one foot in contact.
  • I keep the connection above me with the least slack.
  • I stay connected until both feet are back on stable ground.

Safety. Stay connected from the ground to the stand and back to the ground.

Safe Gear Haul

Then in the dark: practice finding the tether and relief device by touch at ground level.

  1. Unload And Secure Unload the firearm completely and secure every hunting item to a sound haul rope before raising or lowering it.
  2. Keep Hands Available Climb or descend with both hands available, then move the load only after you are safely connected and stable.
  3. Clear The Load Keep the load and rope clear of people, branches, sharp edges, hot surfaces, and the stand’s moving parts.
  4. Freeze And Stay If the stand wobbles or a component fails, freeze, keep three points of contact, stay attached, and reverse the route only when stable.
  5. Use Relief Device If suspended after a fall, deploy the suspension relief device, signal or call 911, and follow the manufacturer’s self-rescue instructions.

Check it. Pass: hands stay free during movement, the firearm is unloaded before hauling, and the hunter can reach and use the relief device while connected. Fail: any load is carried while climbing or an emergency plan depends on jumping, catching a falling item, or waiting silently.

Field check
  • I unload the firearm completely.
  • I secure every hunting item to a sound haul rope.
  • I keep both hands available.
  • I keep three points of contact and stay attached.
  • I deploy the suspension relief device and call 911.

Safety. If suspended, use the suspension relief device, signal, and call 911 when possible.
Chapter 6

The River Hunt: Silent Access and Strategy

  • River Approach: Plan and run a quiet, safe blackwater river approach that protects the paddler, avoids river hazards, and lands in cover without advertising the hunt.
  • Water Before Trip: The boat must fit the water and your skill.
  • Quiet Boat: Wear the PFD while the boat is underway.
  • Backup Plan: A phone in a dry case is useful, but it is not your only plan.
  • Current Work: Let the current work downstream when the route and conditions allow.
  • Moving Map: Read the water as a moving map.
  • River Trap: Wear the PFD, read the next bend, and go around every strainer. No deer is worth forcing a river hazard.
  • Wind And Cover: Watch the wind before choosing which bank to follow.
  • Access Permission: The river gives you access, not permission.
  • Quiet Strokes: Noise carries across still water.
  • Safe Cover: Quiet access protects the hunt
  • Clean Landing: At the landing, keep the boat low and the movements deliberate.
  • Clean Transition: The goal is a clean transition, not a dramatic arrival.
  • River Kit: Then in the dark: find the whistle, map, and headlamp by touch.
  • River Safety Rig: Inspect the boat, paddle and drain or flotation features before loading.
  • River Route Hazards: Stop paddling before each bend and scan the current, surface texture, bank and channel opening.
  • Quiet Concealed Landing: Then wet: practice a controlled landing and rehearse the capsize priorities on shore.
  • Float Plan Priorities: Without opening your pack, name the order you would solve a missing partner, a torn seam, and a blocked channel. State the decision that ends each problem.
Chapter 7

The Scent War: Deception and Concealment

  • Know The Nose: Control the source, then own the wind. Cover scent never replaces wind sense.
  • Wash And Store: Storage is the next layer.
  • Wind Is The Rule: Wind carries the scent cone.
  • Read The Thermals: Thermals are air moving because the ground and air warm or cool.
  • Keep The Hunt Clean: Build a clean-in, clean-stored, wind-aware scent routine for a hunt and place your access and stand so your odor leaves the deer’s travel and bedding areas.
  • Clean And Store: A clean system buys margin.
  • Screen The Stand: Your notebook shows deer entering a palmetto funnel from the east, and a puff bottle at the proposed sit alternates north and south. Sketch a decision tree with three branches: proceed, reroute or cancel, each with one defensible observation.
  • Field Scent: Then wet: walk a blackwater access route after rain, read the swirl at the creek edge and choose the clean exit.
  • Scent Audit: Then in the dark: run the scent audit by headlamp and use a wind checker by feel.
Chapter 8

Shot Placement and Ballistics

  • Shot Decision: Choose a safe shot angle, place a deer or hog shot through the vital area, match the projectile to the animal and your equipment, and practice until your ethical limit is honest.
  • Hog Angles: Hogs change the problem
  • Projectile Ethics: For archery, a fixed blade is durable and built for penetration.
  • Practice Limit: Practice until your ethical limit is honest.
  • Equipment And Rules: The shot is a decision before it is a squeeze
  • Read Deer Anatomy: On the table, label deer and hog angle cards.
  • Read Hog Shield: Ask a partner to present three unlabeled silhouettes. Announce only “ready,” “hold,” or “reject.” Then sketch the route from entry to exit.
  • Match The Projectile: Wet, repeat the routine in rain gear from a stable position, then inspect the equipment and log what changed.
  • Practice The Limit: In the dark, identify the safe no-shot decision by touch and memory.
Chapter 9

The Sacred 30: Post-Shot Protocol

  • After The Shot: Do not push a wounded animal. Mark the evidence, wait for the hit, and recover with discipline.
  • Wait Before Trailing: Mark the stand and last-seen points before leaving them.
  • Discipline In Doubt: When in doubt, back out, preserve the trail, and bring help.
  • Start At Impact: Begin at the exact place the animal stood.
  • Read The Blood: A phone waypoint can support the marks, but it is not a substitute for looking at the ground.
  • Read The Evidence: Blood on one side of a stem can show the animal passed that side.
  • Search In Darkness: On graph paper, invent a creek bend, a palmetto island, and a brush tunnel. Add a start symbol, a helper symbol, and a stopping boundary. Explain who reads the ground, who watches the route, and how your sketch prevents duplicate searching.
  • Close The Record: The best recovery record is plain.
  • Reaction And Wait: Sit still and replay the event.
  • First Blood Marking: Learn it on the table: lay a clean trail of paper marks, hair, leaves, and harmless red food coloring, then write the recovery record. Then in the dark: find the marks by headlamp without stepping on them.
  • Read Blood And Hair: Blood is evidence, not a diagnosis by color alone.
  • Lost Trail Search: Then wet: repeat beside a blackwater edge after rain and practice stopping at the last confirmed sign.
Chapter 10

Field Dressing and Initial Meat Care

  • Respect the Meat: Field dress recovered game cleanly, cool the meat fast, and move it to a processor or controlled storage without wasting the harvest.
  • Open and Empty: Position the animal on its back with the hindquarters slightly raised if the ground allows.
  • Cool Fast: Cooling is the first priority.
  • Protect the Surface: Plan the extraction before you cut.
  • Hogs And Safe Meat: Move it cleanly and know when to stop
  • Clean Setup: Learn it on the table: arrange the complete kit and rehearse the order with a clean towel as the carcass.
  • Clean Evisceration: Then in the dark: locate each tool by touch and identify the clean bag by feel.
  • Rapid Cooling: Then wet: practice building a raised, shaded hanging point beside a blackwater landing without placing meat or dirty tools in the water.
  • Clean Transport: At a shaded blackwater landing, you are handed a dressed carcass, a tarp, a knife, a saw, gloves, a cooler, and empty bags. Sketch the staging layout, mark the contamination boundary, and name what would make you reject the load.
Chapter 11

Advanced Strategies and Adaptations

  • Start With Evidence: Read changing deer behavior, adjust a hunt to rut, late-season food, weather and pressure, and stay within current wildlife rules.
  • Read the Rut: Before the rut, bucks make rubs and scrapes and search travel corridors between bedding and feeding areas.
  • Weather Changes Setup: A light rain can cover foot noise and scent, while heavy cold rain can keep deer in cover.
  • Pressure Teaches: A pressured deer can recognize a localized threat around a stand, food plot or feeder.
  • Rut Phase Sign Read: Start at the edge of cover and record fresh rubs, scrapes, tracks, beds, browse and mast without walking through the bedding area.
  • Weather Window: Check the forecast for rain, air temperature, wind direction, wind speed and warnings before leaving home.
  • Pressure Reset: Change the plan when the deer, wind, weather or pressure gives you new evidence. Follow your state wildlife agency’s current regulations.
  • Legal Species Check: Name the animal from clear field marks before you act, and do not rely on movement, sound or a guess in poor light.
Chapter 12

Gear and Loadouts for the Hunter

  • Gear earns its place: Gear earns its place or stays home. Follow your state wildlife agency’s current regulations.
  • Layer for changing conditions: Use three working layers.
  • See clearly before you decide: Binoculars are the first identification tool.
  • Pack the 10 Cs: Pack each item where a cold, wet hand can find it. Keep the light, map and first-aid kit out of the bottom of the pack.
  • Maintain the tools: Build, inspect and use a quiet hunting loadout for changing weather, glassing, river travel and an unexpected night out.
  • Layering system check: Then in the dark: add the layers, find the light and read the map by feel.
  • Optics and map setup: Then wet: seal the map and optics, load the canoe, and rehearse the decision to turn around before conditions outrun your gear.
  • 10 Cs day-pack build: Learn it on the table: build the 10 Cs pack and identify every pocket by touch.
  • Tool and river inspection: A squall reaches the put-in while your canoe lists toward a cypress knee. The map is soaked, the headlamp will not light, and the paddle leash has parted. In order, name the three actions that protect people first, then state the condition that ends the outing.
Questions people ask
What is fair chase in hunting?

Fair chase is the ethical, sportsmanlike, lawful pursuit of wild, roaming game without an improper or unfair advantage. It protects the animal's chance to detect, evade and escape. The agency rule controls the legal line, and your own line should be at least as strict. Your range is the distance you have tested and can repeat, not the farthest shot you ever made.

How do you scout for deer on public land?

Use the map as a filter, not proof. Check land status, access, contours, water, cover and wind, and mark waypoints with a reason and what would disprove them. Then walk in with a question and let the ground answer it. Look at where food, water and cover meet, and leave if wildlife changes behavior because of you. Read the tract rules first.

How do you read deer and hog sign?

Read several clues together, never one mark. A deer track is split, a hog track is broader, and rubs, scrapes and browse show how deer use the ground. Hog rooting turns the soil in broad patches. Call each sign fresh, old or uncertain and name the clue. Photograph scat from above with a scale, and do not handle it.

How do you use a tree stand safely?

Inspect every part before the trip and retire anything frayed. Practice with your harness on the ground. Stay connected to a lifeline from the ground to the stand and back, keep three points of contact, and never climb with a firearm or heavy load in your hands. Tell someone your stand, route and return time. If a fall leaves you hanging, use the suspension relief device and call 911.

Can you use a canoe to reach a hunting spot?

The book treats the river as a quiet way in. A river gives you access, not permission, so check landowner permission, boating rules and your state wildlife agency's current regulations, including the rule for firearms in boats. Unload the firearm before you board, wear a snug PFD, avoid strainers and tell someone your route and return time.

How do you control scent and use the wind when hunting?

Wind is the rule. Set up downwind or crosswind so your odor misses the trail, bedding and feeding lines, and check the air with a wind checker at the stand. Wash clothes in unscented detergent, store them sealed and use sprays only as a last layer. If the wind turns toward the deer, leave quietly instead of trying to spray your way out.

Where do you aim on a deer or a hog?

On a broadside deer, aim just behind the near front leg, about one third of the body depth up from the lower chest. Quartering away is the useful angle for a hog, which can carry a dense shoulder shield. Do not rely on a head shot. If you cannot see the lane, the background or the path, pass on the shot.

What do you do after the shot, and how long do you wait before tracking?

Sit still, replay the event and mark the stand, the last-seen point and the time. Wait times vary by agency and by the hit; the book cites 15 to 30 minutes up to an hour or more, and longer for a poor or unknown hit. Start at the impact point, walk beside the trail and mark each confirmed blood spot.

How do you field dress a deer and keep the meat clean?

Keep the meat cool, clean and dry. Wear eye protection and gloves, open the animal without puncturing the gut, empty the cavity and move it into shade off the ground. Use breathable game bags, not plastic. Cool meat to below 40°F quickly and cook venison to 160°F. Wild hogs can carry brucellosis, so always wear gloves.

What gear should a deer hunter carry?

Think in working layers: a moisture-moving base layer, an insulating layer and a quiet outer layer, with dry spare socks. Add binoculars, a rangefinder and the 10 Cs day pack: cutting tool, combustion device, cover, cordage, cotton material, container, light, compass, cargo tape and canvas needle. On the water add a fitted PFD and a paddle leash.