Skip to content
Home › Wilderness Skills Series › Woodsman Guide: An Advanced Bushcraft Book
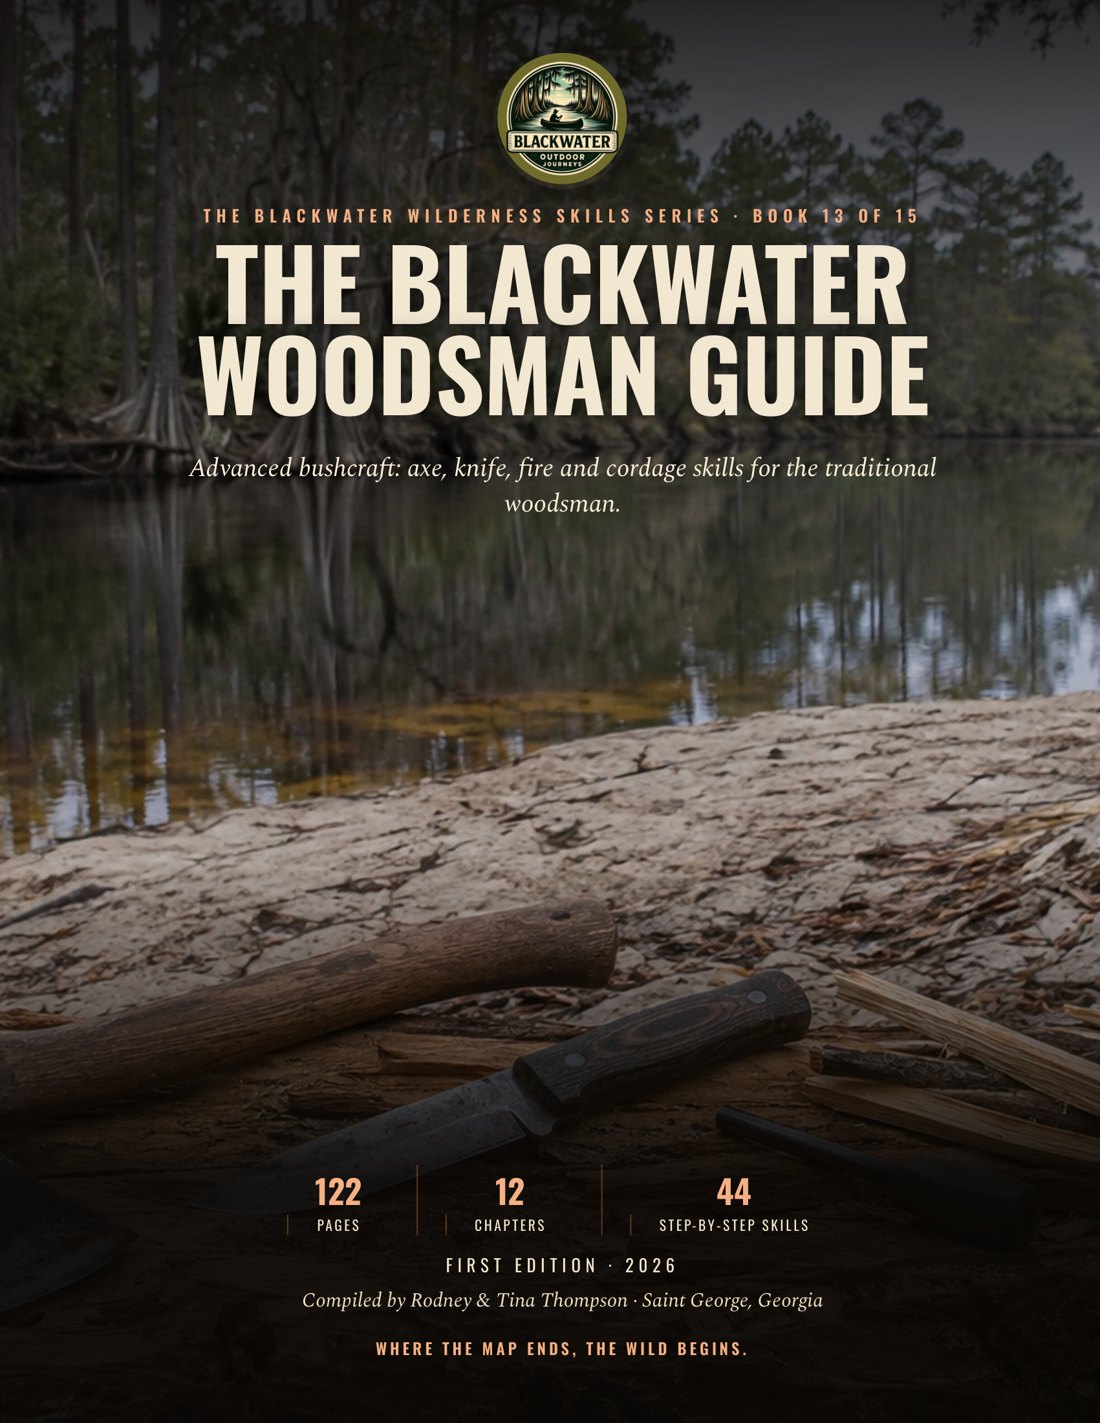
Cover of the Blackwater Woodsman Guide showing a camp axe, a fixed-blade knife and fire tools on a sandy bank beside a dark cypress river
The Blackwater Wilderness Skills Series · Book 13

Woodsman Guide: An Advanced Bushcraft Book

The Blackwater Woodsman Guide is a printed advanced bushcraft book from Blackwater Outdoor Journeys LC. It teaches axe and knife work, sharpening, tarp shelters, knots and lashings, bow and hand drill fire, plant cordage, foraging cautions and map-and-sky navigation for blackwater country and the Okefenokee in Georgia, for campers willing to practice with patience.

  • 122pages
  • 12chapters
  • Full colorprinted guide
Flip through the book

The first pages of the book, as they print.

Get the full book

Read the whole book on any screen, or hold the printed book in your pack. The printed book comes with the digital edition included.

Digital edition

Read it on your phone or tablet

$12.95 one-time
  • The whole book, page by page, in the flipbook
  • Works on a phone, tablet or computer, so it goes where you go
  • Opens with the email you buy with
Coming soon
Printed book

The full-color book, digital edition included

$24.95 plus shipping
  • The printed 122-page book, full color
  • The digital edition at no extra charge
  • Printed to order and mailed in the U.S.
Coming soon

Save on more books. Order two or more books and each one is 20% off. Come back for another book later and it is 20% off too. The full printed series is 25% off and the full digital series is 50% off. See the savings

Layout preview only. Ordering is not set up yet.

Chapter by chapter
Chapter 1

The Woodsman’s Spirit and Philosophy

  • A Way Of Seeing: Build a woodsman’s awareness practice that turns observation, patience, resourcefulness, resilience, and stewardship into daily field habits.
  • Rules And Sit Spot
  • Stay With The Place
  • Resilience And Water
  • The Field Drill
  • What You Need
  • Sit Spot Observation Log
  • Peripheral Awareness Scan
  • Low Impact Decision
Chapter 2

Axe Mastery: The Heart of the Woodsman

  • Respect the edge: A sharp, sheathed axe in a clear work area is a tool. An exposed edge, a crowded circle or a doubtful tree is a stop sign.
  • Controlled stroke: Start with the cut, not the swing.
  • Limb from the safe side: A branch can spring when its load changes.
  • Felling Needs Training: This guide teaches limbing and splitting wood that is already on the ground.
  • Check the work: A good axe session ends with the same care that began it.
  • Axe Work Gear: Choose, inspect, carry and use an axe for controlled notching, limbing and splitting of wood that is already down, and know why felling a standing tree needs a trained instructor.
  • Axe safety and stance: A sharp bit bites and stays in the cut, and Chapter 4 shows how to keep one.
  • V-cut and split firewood: The cut opens as chips leave.
  • Assess And Walk Away
Chapter 3

Knife Craft: Precision and Purpose

  • Knife safety and grips: Cut away from your body, keep the blood circle clear, and sheath the knife when it is not in your hand.
  • Feather stick: A feather stick turns dry wood into fine tinder without separating the curls from the stick.
  • Utility notches: A notch is a joint, not decoration.
  • Precision tool: Use a fixed blade with calm control to make tinder and clean utility notches while keeping every part of your body outside the blade path.
  • Build the blood circle: Picture a sphere around the blade and its handle.
  • Make a feather stick: Choose dry, straight-grained softwood.
  • Cut useful notches: Measure twice and cut once.
Chapter 4

Sharpening Systems: Keeping Your Edge

Printed in full here from the book.

What Sharp Means

Keep the angle steady, use light pressure, raise the burr, remove the burr, and test before the tool goes to work.

  1. A Sharp Edge A sharp edge is a thin apex where two bevels meet. A dull edge is rounded, damaged, or folded. It asks you to push harder. More force makes a slip more likely. A sharp tool is safer because it needs less force, but only when you control it. Keep the edge pointed away from your body, keep your free hand out of its path, and stop when attention wanders.
  2. Match The Bevel Match the bevel to the job. A low angle makes a keen slicing edge but wears faster. A higher angle stands up better to chopping and rough work. One abrasive maker’s guide lists knife angles between 10 and 30 degrees, and the American Knife and Tool Institute recommends 10 to 15 degrees. Forest Service guidance describes a typical double-bit axe as sharpened to about 18 degrees on the clear-wood side and up to 28 degrees on the limbing side. Keep the maker’s bevel when you can, then keep that same angle on every stroke.
  3. The Burr The burr is a tiny wire of steel pushed to the opposite side as the abrasive reaches the apex. It is evidence, not the finished edge. Feel for it lightly by moving a clean fingertip from the spine toward the edge, never along the edge. Work one section at a time until the burr runs from heel to tip. Then reduce pressure and remove it. A burr that remains will fold, tear, and give a false sense of sharpness.
Field check
  • I keep the edge pointed away from my body.
  • I keep my free hand out of its path.
  • I stop when attention wanders.
  • I keep the same angle on every stroke.

Safety. Keep every edge pointed away from your body. Do not sharpen beside a fire, under a tarp, or inside a tent.

  1. Store The Stone Sheath a knife when it is idle. Store a stone so it cannot slide.
  2. Knife With Dull Section A knife with a known dull section.

You need: Stone Or Plate (A sharpening stone or diamond plate with a stable base.)

Field check
  • I keep the edge pointed away from my body.
  • I keep my free hand out of its path.
  • I stop when attention wanders.
  • I keep the same angle on every stroke.

Safety. Keep every edge pointed away from your body. Do not sharpen beside a fire, under a tarp, or inside a tent.

Choose The System

Use the system you will actually carry and use.

  1. Choose The System A stone, a diamond plate, a ceramic rod or a guided sharpener can all work, so follow the maker’s instructions for the one you own. A coarse abrasive removes damaged metal. A finer abrasive polishes the edge, and a medium abrasive between them refines the bevel when your system has one.
  2. Avoid Fast Heat Avoid a fast electric grinder for a valuable woods tool, because it takes off large amounts of steel and can overheat the blade and spoil its temper. If you use a powered wheel, follow its manual, keep the guard in place, wear eye protection, and keep sparks and fragments away from people and dry tinder. Hand work gives you more feel and less heat.
  3. Control The Angle Color the bevel with a marker. Lay the bevel against the abrasive and make a short test stroke. Look at the marker. A clean stripe across the bevel means your angle matches. A stripe only at the shoulder or the edge means your angle is wandering. Lock your wrist. Move your arm, not just your fingers. On a long blade, work in sections and overlap each section. Use light, even pressure. Brute force hides poor control.

You need: A Stable Base (Start with a stable bench or a stone on a non-slip surface.)

Check it. Pass: the marker shows an even stripe across the bevel. Fail: the stripe sits only at the shoulder or the edge, or the stone slides.

Field check
  • I start with a stable bench or a stone on a non-slip surface.
  • I color the bevel with a marker.
  • I lock my wrist.
  • I use light, even pressure.

Safety. Wear eye protection around powered abrasives.

The Knife Routine

Clean the blade and inspect it before you sharpen.

  1. Inspect The Blade A bent tip, deep chip, loose handle, or cracked stone needs attention before abrasive work. Set the stone so the knife cannot run into your hand. Begin on a coarse stone only when the edge needs repair. Work until a continuous burr forms. Move to a medium stone with lighter pressure. Move to a fine stone only after the bevel is even. A fine stone cannot rescue an edge that never reached the apex.
  2. Draw The Knife Follow the stone maker’s direction for stroke style. A simple safe routine is to draw the knife across the stone from heel to tip, with the cutting edge leading and pointing away from your hands, while keeping the bevel flat at the chosen angle, then repeat on the other side. Do not saw the edge into the stone. Do not lift the spine halfway through a stroke. Keep the same angle at the heel, belly, and tip.
  3. Test The Edge When the burr has moved from side to side, lighten the pressure. Alternate a few strokes per side. Finish with spine-first passes on a charged leather strop. The strop pulls the edge away from the leather, so it does not dig in and round the apex. Wipe the blade clean. Test with paper held vertically. A good edge makes a clean slice. A torn cut means the burr remains, the angle wandered, or a section was missed.

You need: Hold The Paper (Test slowly. Hold the paper by its top edge, well above the blade.)

Check it. Pass: the burr is stropped away and the paper slices cleanly. Fail: the paper tears or the angle wandered.

Field check
  • I clean the blade and inspect it before I sharpen.
  • I work until a continuous burr forms.
  • I keep the same angle at the heel, belly, and tip.
  • I finish with spine-first passes on a charged leather strop.
  • I test with paper held vertically.
  • I hold the paper by its top edge, well above the blade.

Safety. Keep every edge pointed away from your body.

Axe And Field Touch Up

Choose a sharpening system, raise and remove a burr, sharpen a knife and axe with a steady angle, and maintain both edges in the field.

  1. Secure The Axe An axe is sharpened with the head secured. Clamp it in a vise or brace it solidly on a log. Never work on a loose head. Keep the bit directed away from your legs and hands. Use the coarse side of a puck only when the edge needs metal removed. Follow the existing bevel with small circular or back-and-forth strokes. Raise a slight burr, turn the head, and repeat. Then refine with the fine side. The goal is an even, durable working edge, not a fragile razor.
  2. Touch Up In Camp In camp, carry a puck stone, a small diamond card, a ceramic rod, or a leather strop. Touch up at the first sign of drag, tearing, or a folded section. Clean grit and sap from the tool before you work. Use light strokes and check the edge often. Small maintenance keeps a minor loss of bite from becoming a long restoration session. After sharpening, wipe the blade, protect it with its sheath, and keep the abrasive dry or oiled as its maker directs.
  3. Learn It On The Table Learn it on the table: mark a knife bevel, raise a burr, strop it, and cut paper. Then in the dark: identify the stone faces and run the burr check by touch. Then wet: secure an axe on a dry log, keep grit out of the edge, and sheath the tool before rain reaches the kit.
Field check
  • I clamp the axe in a vise or brace it solidly on a log.
  • I keep the bit directed away from my legs and hands.
  • I touch up at the first sign of drag, tearing, or a folded section.
  • I protect the blade with its sheath.
  • I keep the abrasive dry or oiled as its maker directs.

Safety. Never sharpen a loose axe head. Do not sharpen beside a fire, under a tarp, or inside a tent.

  1. Axe Puck A dual-grit axe puck or suitable axe stone.
  2. Leather Strop A leather strop and compound.

You need: Paper And Eye Protection (Clean paper, a marker, and eye protection.)

Field check
  • I clamp the axe in a vise or brace it solidly on a log.
  • I keep the bit directed away from my legs and hands.
  • I touch up at the first sign of drag, tearing, or a folded section.
  • I protect the blade with its sheath.
  • I keep the abrasive dry or oiled as its maker directs.

Safety. Never sharpen a loose axe head. Do not sharpen beside a fire, under a tarp, or inside a tent.

Angle And Burr Detection

Start with a stable bench or a stone on a non-slip surface.

  1. Secure The Stone Secure the stone on a non-slip surface and clean the knife.
  2. Color The Bevel Color the bevel with a marker and make one light test stroke at the chosen angle.
  3. Adjust The Angle Adjust until the abrasive removes the marker across the bevel instead of only at one edge.
  4. Work One Section Work one section until a burr can be felt from heel to tip on the opposite side.

You need: Move From Spine (Move the fingertip from spine toward edge to check the burr without sliding along the edge.)

Check it. Pass: the marker is removed evenly and a continuous burr is detectable from heel to tip. Fail: the marker remains in a band, the angle changes between strokes, or the burr has gaps.

Field check
  • I secure the stone on a non-slip surface.
  • I color the bevel with a marker.
  • I work one section until a burr can be felt from heel to tip.
  • I move the fingertip from spine toward edge.
  • I keep the wrist locked and use light, even pressure.

Safety. Keep every edge pointed away from your body.

Knife Sharpening Progression

  1. Start Coarse Start on the coarse abrasive only if the edge needs repair, and work each side until the burr reaches the full edge.
  2. Refine Medium Refine both bevels on the medium abrasive with lighter pressure and the same angle.
  3. Polish Fine Polish on the fine abrasive, alternating sides so the burr becomes small and weak.
  4. Strop Spine First Strop spine-first with compound to remove the remaining burr.

You need: Make The Cut (Wipe the blade and make a careful vertical paper cut.)

Check it. Pass: the edge has an even bevel, no detectable wire edge, and slices paper cleanly. Fail: paper tears, the edge catches, or a burr remains after stropping.

Field check
  • I start on the coarse abrasive only if the edge needs repair.
  • I refine both bevels on the medium abrasive.
  • I polish on the fine abrasive, alternating sides.
  • I strop spine-first with compound.
  • I make a careful vertical paper cut.

Safety. Hold the paper by its top edge, well above the blade.

Axe Puck Sharpening

An axe is sharpened with the head secured.

  1. Secure The Head Secure the axe head in a vise or brace it firmly on a log with the bit directed away from your body.
  2. Follow The Bevel Follow the existing bevel with the coarse puck using small circular or back-and-forth strokes.
  3. Raise The Burr Raise a slight burr, turn the head, and repeat until both sides meet at the edge.
  4. Refine Both Sides Refine both sides with the fine puck face and wipe away abrasive residue.

You need: Sheath The Axe (Sheath the axe and inspect the edge before moving it or using it.)

Check it. Pass: the head stayed fixed, both bevels meet evenly, and the edge has no loose wire. Fail: the head shifts, the bevel is rounded, or the bit points toward a person.

Field check
  • I secure the axe head in a vise or brace it firmly on a log.
  • I keep the bit directed away from my body.
  • I use small strokes and only light pressure.
  • I refine both sides with the fine puck face.
  • I sheath the axe and inspect the edge.

Safety. Never sharpen a loose axe head. Sheath tools when idle.

Field Edge Maintenance

In camp, carry a puck stone, a small diamond card, a ceramic rod, or a leather strop.

  1. Stop At Drag Stop at the first sign of drag, tearing, or a folded section instead of forcing the tool through work.
  2. Clean And Choose Clean sap and grit from the blade and choose the puck, diamond card, ceramic rod, or strop that matches the damage.
  3. Use Light Strokes Use light, controlled touch-up strokes at the established bevel and check both sides often.
  4. Remove The Burr Remove the burr with alternating light strokes or a spine-first strop.

You need: Store The Abrasive (Wipe the edge, sheath the tool, and store the abrasive as its maker directs.)

Check it. Pass: the tool cuts with light force, the edge has no folded wire, and the tool is clean and sheathed. Fail: the user keeps forcing a dull edge, leaves grit or sap on it, or carries it exposed.

Field check
  • I stop at the first sign of drag, tearing, or a folded section.
  • I clean sap and grit from the blade.
  • I use light, controlled touch-up strokes.
  • I remove the burr with alternating light strokes.
  • I wipe the edge, sheath the tool, and store the abrasive as its maker directs.

Safety. Do not sharpen beside a fire, under a tarp, or inside a tent. Sheath tools when idle.
Chapter 5

Advanced Tarpology: Shelters from the Sky

  • Read the campsite: A tarp cannot rescue a bad site.
  • Pitch the storm shelter: Pitch low and steep when rain is driving.
  • Rig the ridgeline: A ridgeline is the spine of the Baker and many storm pitches.
  • The site is first: A good pitch starts with a good site. Read the ground, then make the tarp low, taut, and ventilated.
  • Choose the shape
  • Build the ridgeline
  • Make it dry: Lay a groundsheet inside the roof, with no edge sticking beyond the tarp to collect runoff.
  • Tarp camp: Choose a safe blackwater campsite and pitch a tarp that sheds rain, blocks wind, vents moisture, and leaves little trace.
Chapter 6

The Woodsman’s ‘5 Knots’ and Lashings

  • Cordage System: Dress, set, inspect, and recheck every knot. Cordage is not a life-support system.
  • Tie Load Inspect: Tie and inspect the five core camp knots, tension a line, and lash two poles into a dependable field joint.
  • Poles as One
  • Cord and Poles
  • Inspect Cordage
  • Tie Three Hitches: Start with the bowline when you need a fixed loop that will not cinch down on the anchor.
  • Lash Two Poles: A lashing is a group of wraps that binds poles together.
Chapter 7

No-Nail Camp Furniture: Crafting Comfort

  • Furniture Starts With A Plan: Build the simplest stable triangle, then test it empty before trusting your body or your food to it.
  • Build For The Load
  • Make Comfort Leave No Scar: A good basecamp is built around work flow.
  • Sound Wood And Seat Fit: Select sound wood and build a stable stool, camp table, cooking tripod, and drying rack with notches, lashings, gravity, and safe camp layout.
  • Lashing Frame Camp Table: A table needs two frames and a top that cannot rack sideways.
  • Cooking Tripod And Pot Hanger: The cooking tripod is a triangle in space.
  • Drying Rack Safe Kitchen: Learn it on the table: tie one square lashing and one tripod lashing around scrap sticks. Then in the dark: identify each joint by touch and find a loose wrap. Then wet: build the layout on damp ground, level the furniture, and walk every cord before loading it.
Chapter 8

Firecraft Beyond the Basics

  • Fire Has a Job: Choose a fire lay for the job, make an ember with a bow or hand drill, manage the fire with purpose, and use a coal to hollow a small wooden vessel.
  • Friction Is a Conversation: Match the lay to the job, feed the fire in small stages, and put it out with drown, stir and feel.
  • Run the Fire: Once the flame catches, manage the triangle instead of feeding it blindly.
  • Coal Burning: Coal burning is controlled charring, not a shortcut around carving.
  • Practice and Needs
  • Purpose-built Fire Lay: A small fire is easier to control, cook over and put out.
  • Bow Drill Ember: A friction ember is made from heat and fine dry dust.
  • Hand Drill Ember: A hand drill asks your palms to do the spinning.
  • Fire Management
  • Coal-burned Bowl
Chapter 9

Natural Cordage and Container Craft

  • Prepare bast fiber: Identify a suitable fiber, process it without damaging the stand, reverse-wrap a dependable cord, and make a simple bark or gourd container.
  • Reverse wrap cordage: Natural fiber is not a certified climbing or rescue line.
  • Fold bark container: A bark container is a folded box, not a carved trough.
  • Make cured gourd container
  • Read the plant: If you cannot identify the plant and confirm the local collection rule, do not cut it. Practice with prepared fiber instead.
  • Ret pound scrape dry: Retting loosens the natural gums that hold bast fiber to the woody core.
  • Reverse wrap rhythm: Reverse wrapping works because two strands are twisted in one direction and crossed in the other.
  • Respect the material
  • Guide And Tools
  • Basin And Notebook: Learn it on the table: fold paper, reverse-wrap scrap twine, and test a bark pattern. Then in the dark: identify each prepared bundle by touch and keep the join under your thumb. Then wet: make a short cord and a laced box after rain, dry the fibers, and inspect every join before use.
Chapter 10

Foraging and Plant Lore for the Woodsman

  • Knowledge and Plants: Identify a small set of plants with care, harvest only when it is legal and sustainable, and handle plant food and minor first-aid questions without guessing.
  • Season and Look Alikes
  • Limits And Record: If you cannot prove the plant, the part, the place, and the preparation, leave it alone.
  • Guides And Kit: Learn it on the table: compare labeled photographs of one edible and one medicinal plant with their look-alikes. Then in the dark: practice describing the plant from your notebook without touching it. Then wet: repeat the site check at a blackwater edge and record runoff, permission, patch health, and the reason you chose not to harvest.
  • Positive Plant Identification: Begin with the plant in front of you, not with a meal in your head.
  • Ethical Patch Harvest: Walk the edge of a patch first.
  • Pokeweed Safety Lesson: Pokeweed is another hard lesson.
  • Minor First Aid: Treat them as study plants, not replacements for medical care.
Chapter 11

Navigation by Nature and Map Reading

  • Read the Ground: Read a topo map of blackwater country, orient yourself with land and sky, and travel a planned route when electronics are unavailable.
  • Plan a Route: No single natural clue earns your trust. Cross-check the map, land, sun, stars, and water before you commit.
  • Use the Sun: The sun rises generally in the east and sets generally in the west.
  • Use Stars and Clues: On a clear night in the Northern Hemisphere, find the Big Dipper and use the two stars at the outer edge of its cup as pointers.
  • Topo Map Terrain Brief
  • Shadow Tip and Watch
  • Polaris Night Check
  • Route Leg and Checkpoint
Chapter 12

The Woodsman’s Mindset and Leave No Trace

  • Forecast And Kit: Use a resilient decision process, run a low-impact camp, and pass on woodsman skills without damaging the place that teaches them.
  • First tool is judgment: Leave the wild as close to unchanged as you can. When safety and impact conflict, protect life first, then repair and remove every avoidable trace.
  • Read the site: A good site is found, not made.
  • Complete Leave No Trace camp
  • Lifelong woodsman
  • Next right thing loop: Treat every obstacle as a puzzle.
  • Storm response: If a storm forces an unplanned stop, do not solve the emergency by creating a larger one.
  • Kitchen sweep: Kitchen discipline is stewardship in miniature.
  • Stewardship handoff: Passing on the craft means more than demonstrating a knot or tool.
  • Practice check
Questions people ask
Is this advanced bushcraft book for beginners?

Each chapter starts with safety checks and teaches one skill at a time, from the axe and knife to sharpening, tarps, knots and fire. Chapters end with pass and fail page checks and a practice card that moves from the table to the dark to wet conditions. The book asks for patience, and it sends you to a trained teacher for friction fire and tree felling.

How do you use an axe safely?

Inspect the head, helve and wedge before every session, wear eye protection, gloves and stout boots, and clear at least a 10-foot radius around the work. Stand wide, use both hands on a power stroke, and sheath the axe whenever it leaves your hand. The book teaches limbing and splitting wood that is already down. Felling a standing tree needs a trained instructor.

How do you sharpen an axe or a knife with a stone?

Hold one steady angle on every stroke, and color the bevel with a marker to check it. Work one grit until a burr runs the length of the edge, then lighten up, remove the burr, and finish a knife with spine-first passes on a strop. Brace an axe head solidly first and never sharpen a loose head.

What is a feather stick and how do you make one?

A feather stick turns dry, straight-grained softwood into fine tinder, with the curls still attached to the stick. Use the thumb push grip, push a shallow shaving away from your body, and rotate the stick for a fresh face. Keep every body part out of the blade path, which the book calls the blood circle, and keep the tinder away from sparks until the fire site is legal and ready.

How do you start a fire with a bow drill?

Build the tinder bundle first, then seat the spindle in a shallow socket with a notch cut in the fireboard. Start with slow strokes, speed up once dark dust gathers, and stop only when a glowing coal survives a pause. The book says friction fire is hard to learn from words alone, so learn it with an experienced teacher.

How do you make cordage from plants?

Start with a plant you can identify for certain and confirm the local rule, because collecting any plant is prohibited on the Okefenokee refuge. Bast fiber from inner bark is retted in a separate basin, pounded, scraped, dried, then reverse-wrapped into an even cord. Practice with jute twine where you cannot collect. Natural cord is not a rescue line.

Which knots does a woodsman need for camp?

The book teaches five camp knots: the bowline for a fixed loop, the taut-line hitch for adjustable tension, the trucker’s hitch for a tight ridgeline, and the clove hitch and two half hitches for poles and posts. It also teaches a square lashing for poles that cross. Dress every knot and recheck it, and never use camp knots for climbing, rescue or suspending a person.

How do you set up a tarp so it sheds rain and does not trap moisture?

Choose level, durable ground above the wet edge and away from dead limbs, then hang a taut, centered ridgeline with a drip line so water leaves the cord before it reaches the fabric. Face the low side into the wind and leave a high side open so the shelter can breathe. Keep every stove, fire and flame away from the tarp.

How do you forage safely?

Confirm the whole plant, the part you want and its look-alikes in two reliable guides, because a common name is not proof and there is no universal edibility test. Ask permission, follow the local rule, and take only a small share. Collecting any plant is prohibited on the Okefenokee refuge. If anyone eats an unknown plant, call Poison Control at 1-800-222-1222.

How do you find your way without a GPS?

On a topo map of flat blackwater country, read the water first, then plan each leg with a handrail, an attack point and a sign that you went too far. The book also teaches the shadow tip method, the watch method and finding Polaris from the Big Dipper. No single natural clue earns your trust, so cross-check the map, land, sun and stars.