Skip to content
Home › Wilderness Skills Series › Outdoor Gear Guide: Choose, Sharpen, Repair and Store Camping Gear
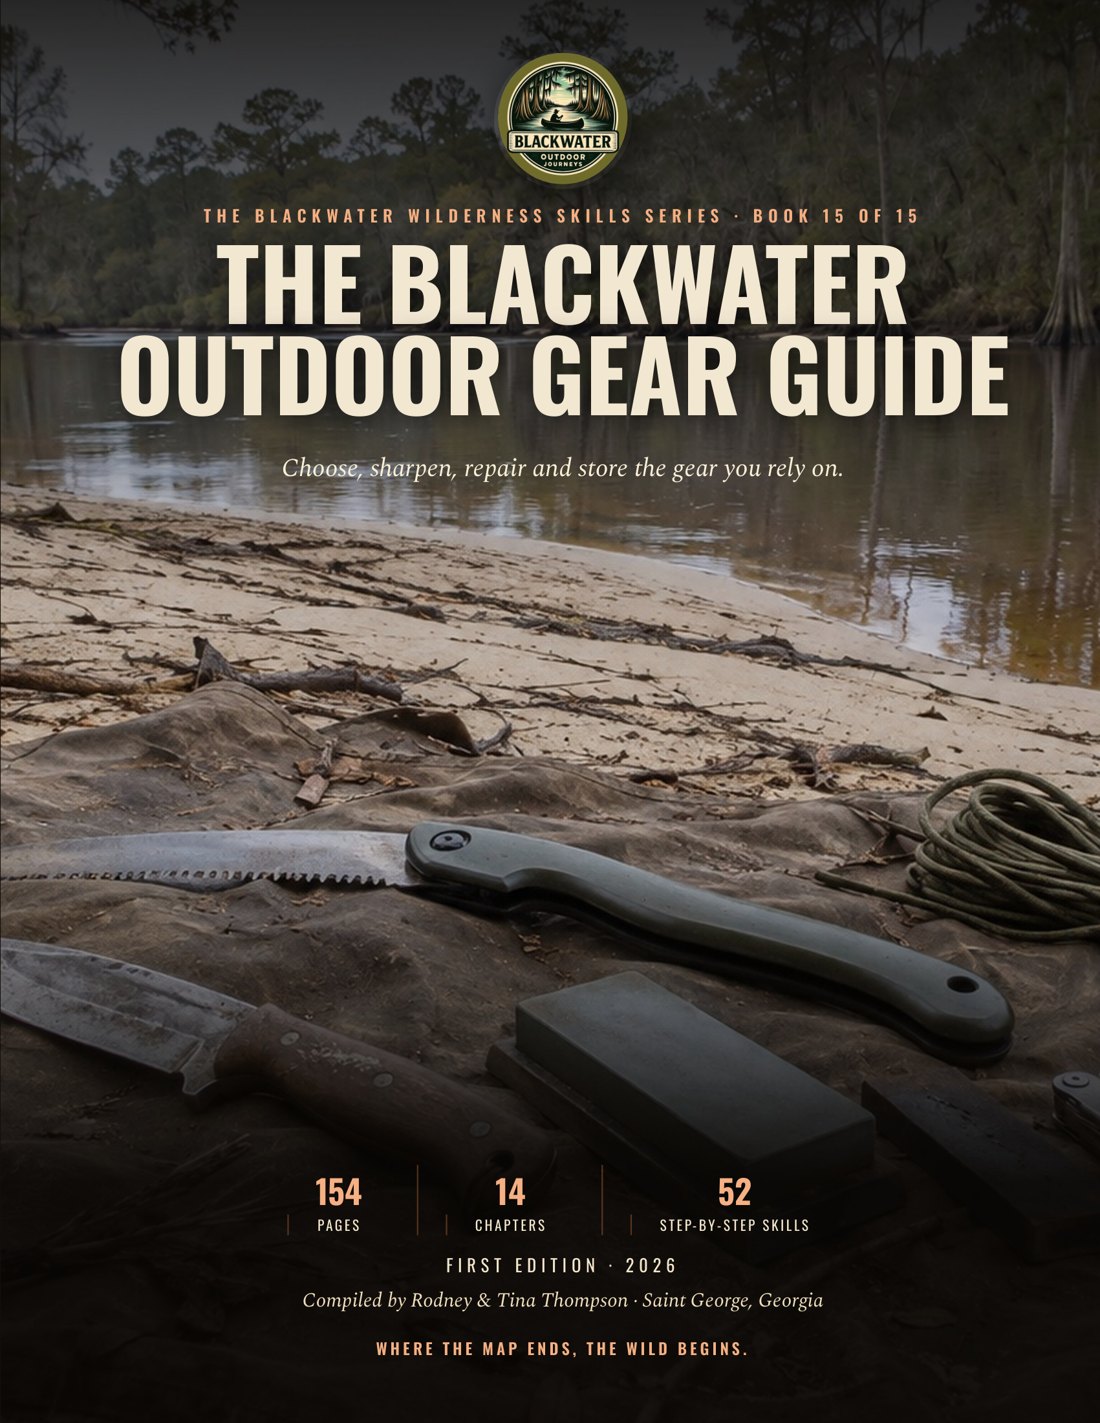
Cover of the Blackwater Outdoor Gear Guide showing a camp knife, folding saw, sharpening stone and coiled cord laid on a canvas tarp beside a blackwater river
The Blackwater Wilderness Skills Series · Book 15

Outdoor Gear Guide: Choose, Sharpen, Repair and Store Camping Gear

The Blackwater Outdoor Gear Guide is a printed camping gear guide from Blackwater Outdoor Journeys LC that explains how to choose gear for wet blackwater trips, understand knife steel, sharpen blades, stay dry, fit and load a pack, treat water, repair shelters and zippers, and clean and store gear so it is ready for the next trip. It is a care-and-skills guide, not a product list.

  • 154pages
  • 14chapters
  • Full colorprinted guide
Flip through the book

The first pages of the book, as they print.

Get the full book

Read the whole book on any screen, or hold the printed book in your pack. The printed book comes with the digital edition included.

Digital edition

Read it on your phone or tablet

$12.95 one-time
  • The whole book, page by page, in the flipbook
  • Works on a phone, tablet or computer, so it goes where you go
  • Opens with the email you buy with
Coming soon
Printed book

The full-color book, digital edition included

$24.95 plus shipping
  • The printed 154-page book, full color
  • The digital edition at no extra charge
  • Printed to order and mailed in the U.S.
Coming soon

Save on more books. Order two or more books and each one is 20% off. Come back for another book later and it is 20% off too. The full printed series is 25% off and the full digital series is 50% off. See the savings

Layout preview only. Ordering is not set up yet.

Chapter by chapter
Chapter 1

The Buy Once, Cry Once: Gear Foundations

  • Buy on purpose: Choose a dependable blackwater gear kit by matching the environment, activity, duration, materials, and essential systems before you spend money.
  • Read the material: Every material is a trade.
  • Build the core kit: Use the Ten Essentials as a systems check.
  • Review and field check: Make the failure review concrete.
  • Trip needs screen: Write the environment, activity, and trip duration at the top of the page.
  • Material and failure check: Turn the item over and identify its fabric, metal, coating, joins, fasteners, and moving parts.
  • Core kit systems audit: Lay out navigation, sun and insect protection, insulation, illumination, first aid, fire, repair, nutrition, hydration, and shelter.
Chapter 2

Blade Metallurgy: The Heart of Your Edge

  • Needs: Choose and care for a knife steel and grind that fit wet blackwater work.
  • Field check: At the table, identify an unlabeled knife only from its maker documentation, then defend whether it belongs in a wet fish camp.
  • Steel system: A knife is a system.
  • Stainless steel: Stainless steel uses chromium to form a thin protective oxide layer.
  • HRC tradeoff: A harder blade can also be less forgiving under impact and slower to sharpen.
  • Choose the job: A woodwork knife benefits from a strong edge and a grind that is simple to maintain.
  • Geometry: A Scandi grind is a practical teaching grind, though the edge can be damaged by prying or hard knots.
  • Match the task: Choose a fixed blade for simple cleaning and heavy work, or a folder only when you can keep its lock and pivot clean.
  • Gear decision: If you need one blade for many jobs, favor a balanced geometry over an extreme edge.
  • Care routine: Do not soak the knife or leave it on a rack to air dry.
  • Handle and store: Cut away from your body.
  • Steel and HRC decision: Read the maker’s marking or specification and write the exact steel name.
  • Grind and task match: Look along the blade and identify the bevel shape as flat, hollow, Scandi, convex, or chisel.
  • Wet-blade care routine: Rinse away fish slime, plant residue, salt, and food from the blade after use.
Chapter 3

Sharpening Mastery: Shaving Sharp Edges

Printed in full here from the book.

Start with the edge

Set the bevel first, refine it second, and strop with the cutting edge trailing.

  1. A dull knife slips A dull knife slips. It also makes you push harder, which puts fingers in the path of a miss. Sharpen before the blade is fully dull. Small, regular touch-ups preserve the shape of the edge and take less metal than a rescue job. Never use a knife as a pry bar, hammer, or screwdriver. Wipe sap, salt, plant residue and grit from the blade after work. Store it in a sheath when it is not in your hand.
  2. Choose an edge Choose an edge for the job. A low angle cuts very cleanly but has less durability. A higher angle gives up some fine cutting feel and handles harder work better.
  3. Per-side angles One sharpener maker lists 20 degrees per side for light hunting work, 25 degrees per side for heavy hunting work, and 30 degrees per side for a heavy-use camp knife. Those are per-side angles, not inclusive angles. A 20 degree per-side edge is 40 degrees inclusive. Match the maker’s existing bevel when you can.
  4. What you need Set, refine, strop and maintain a dependable outdoor knife edge with a freehand stone or a guided system. A stable work surface. A sharpening stone or guided sharpener. A leather strop. A permanent marker. A clean sheath.

Check it. Pass: you state the angle per side. Fail: you mix per-side and inclusive angles.

Field check
  • I have a stable work surface.
  • I have a sharpening stone or guided sharpener.
  • I have a leather strop, a permanent marker, and a clean sheath.
  • I keep fingers behind the cutting edge.

Safety. Never pry, hammer, or screwdriver with a knife.

Hold the angle

The angle matters less than holding it.

  1. Color the bevel If you do not know it, color the bevel with a marker, make one light pass, and adjust until the abrasive removes the marker across the bevel instead of only at the shoulder or apex. The angle matters less than holding it. A freehand edge can become slightly convex, and that is acceptable on a hard-use camp blade.
  2. Freehand or guided A guided system helps a new sharpener repeat the same angle. Freehand gives you a field skill that works with a pocket diamond stone, ceramic rod, or bench stone. Either method succeeds when the stone meets the whole bevel and the hand does not rock.
  3. Coarse to fine A sharpening stone removes metal. Coarse abrasive sets a new bevel or repairs damage. Medium abrasive establishes a working edge. Fine abrasive refines the scratches and leaves a cleaner bite. Extra-fine abrasive polishes. Always move from coarse to fine. A fine stone cannot efficiently repair a rolled edge, and polishing a crooked bevel only makes a crooked bevel shiny.
  4. Stone work Water stones cut quickly and can leave a fine finish, but they need the preparation and flattening stated by their maker. Oil stones are durable and suit many hard steels. Diamond stones cut aggressively, work on hard steels and do not need flattening in the same way, but light pressure matters. Use the stone’s instructions for lubrication. Keep a non-slip base under any loose stone. A moving stone is a hand injury waiting to happen.

Check it. Pass: the marker clears across the whole bevel. Fail: only the shoulder or apex is touched.

Field check
  • I color the bevel with a marker.
  • I adjust until the abrasive removes the marker across the bevel.
  • I move from coarse to fine.
  • I keep a non-slip base under any loose stone.

Safety. Keep a non-slip base under any loose stone.

Build the edge

The burr is your progress signal.

  1. Follow the burr The burr is your progress signal. As the abrasive reaches the apex, it folds a small wire edge toward the opposite side. Stay on one grit until you can feel or see a continuous burr along the edge. Then work the other side with an even stroke count. Do not jump to the fine stone while a section still has no burr. The fine stone is for refining a set edge, not guessing where the edge is.
  2. Stropping is finishing Stropping is the finishing move. It removes the remaining burr and aligns the apex. Lay the bevel on the leather at the same angle used on the stone. Pull the blade with the cutting edge trailing. Never push the edge into the leather. That cuts the strop and can damage the edge.
  3. Maintain the edge Keep pressure light. Lift straight at the end of a pass instead of rocking over the tip, which rounds the edge. A strop is also a maintenance tool. A few light passes before the knife feels dull can preserve a working edge. If stropping no longer restores control, return to the appropriate abrasive. Do not keep polishing a damaged edge.
  4. Test with control In camp, a small diamond stone is a practical backup. Brace it so it cannot slide, keep fingers behind the cutting edge, and make short, controlled passes that follow the existing bevel. Test the result without waving a sharp blade near skin.

Check it. Pass: a continuous burr shows before you use the fine stone. Fail: you polish a crooked bevel.

Field check
  • I stay on one grit until I can feel or see a continuous burr.
  • I work the other side with an even stroke count.
  • I pull the blade with the cutting edge trailing.
  • I lift straight at the end of a pass.
  • I make a controlled cut in a piece of clean cord or soft wood.

Safety. Test the result without waving a sharp blade near skin.

Practice and field work

A strop is also a maintenance tool.

  1. Field touch-up For a field touch-up, brace a small diamond stone, follow the existing bevel with light passes, wipe the blade clean, and sheath it. More important for field work, make a controlled cut in a piece of clean cord or soft wood. The edge should enter without a forced push, leave a continuous cut, and show no snagging spot. Clean the blade, dry it and sheath it. A sharp knife is controlled gear, not a toy.
  2. Canoe crew Your canoe crew finds a nick near the tip after cutting wet cordage. In a five-minute pause beside the landing, name the safest order for protecting the crew, choosing a pocket abrasive, checking the repair, and packing the blade. Include one reason a shiny bevel can still be a failed repair.
  3. Learn it on the table Learn it on the table: mark a practice bevel, find the angle, raise a burr, refine it, and strop it. Then in the dark: find the stone, the strop, and the sheath by touch, with the knife left in its sheath. Then wet: dry your hands and blade, brace the stone, and complete a controlled field touch-up without rushing.

You need: Pack the blade (Wipe sap and corrosive residue away, dry the blade, and sheath it before packing.)

Check it. Pass: the edge cuts cleanly and the dry blade is sheathed. Fail: you pack it wet.

Field check
  • I brace a small diamond stone.
  • I follow the existing bevel with light passes.
  • I wipe the blade clean, dry it and sheath it.
  • I find the stone, the strop, and the sheath by touch with the knife sheathed.

Safety. A sharp knife is controlled gear, not a toy.

Set and verify angle

Secure the stone or guided system on a stable, non-slip surface and close or clamp the knife as the tool maker directs.

  1. Secure the stone Secure the stone or guided system on a stable, non-slip surface and close or clamp the knife as the tool maker directs.
  2. Choose the bevel Choose the existing bevel or select 20 degrees per side for light outdoor cutting, 25 degrees per side for hard use, or 30 degrees per side for a heavy camp knife.
  3. Mark the bevel Color the bevel with a permanent marker and make one light pass with the abrasive.
  4. Read the pattern Read the scratch or marker pattern, then raise or lower the spine until one pass reaches the bevel instead of only its shoulder or apex.

You need: Hold the angle (Hold that angle through the full heel-to-tip stroke and repeat on the other side.)

Check it. Pass: the marker clears across the bevel and the angle stays steady from heel to tip on both sides. Fail: only the shoulder or apex is polished, the bevel widths differ badly, or the blade rocks during a stroke.

Field check
  • I secure the stone on a stable, non-slip surface.
  • I select 20, 25, or 30 degrees per side to match the job.
  • I color the bevel with a permanent marker.
  • I hold that angle through the full heel-to-tip stroke.

Safety. Secure the stone so it cannot slide.

Sharpen through progression

Always move from coarse to fine.

  1. Start coarse Start with the coarse abrasive only when the edge needs reshaping, damage removal, or a new bevel.
  2. Raise the burr Work one side with light, even strokes from heel toward tip until a burr can be felt along the opposite side.
  3. Match the strokes Match the stroke count on the second side until its bevel reaches the apex and the burr transfers.
  4. Refine the burr Move to the fine abrasive and use light alternating passes to refine the scratch pattern and reduce the burr.
  5. Inspect the edge Clean the blade and stone, then inspect the full edge before deciding whether it needs more refinement or a strop.

Check it. Pass: a continuous burr was established before the next abrasive, the two bevels are even, and the final scratch pattern is finer than the starting pattern. Fail: a section has no burr, the edge still snags, or a finer stone was used to hide an unset bevel.

Field check
  • I start with the coarse abrasive only when the edge needs reshaping.
  • I work one side with light, even strokes from heel toward tip.
  • I match the stroke count on the second side.
  • I move to the fine abrasive.
  • I inspect the full edge.

Safety. Keep fingers behind the cutting edge.

Strop and field touch-up

Stropping is the finishing move.

  1. Brace the strop Brace the leather strop on a stable surface and apply compound to the working side if the strop maker calls for it.
  2. Pull the blade Lay the bevel on the leather at the sharpening angle and pull from heel toward tip with the cutting edge trailing.
  3. Lift straight Lift straight at the tip, flip the knife, and repeat with light pressure without rocking the blade.
  4. Use 12 strokes Start with 12 strokes on each side of the compound side, then repeat on the smooth side when using a double-sided paddle strop.
  5. Touch up in camp For a field touch-up, brace a small diamond stone, follow the existing bevel with light passes, wipe the blade clean, and sheath it.

Check it. Pass: the edge trails on every leather stroke, the leather is uncut, the tip is not rounded, and the knife makes a clean controlled cut without a snag. Fail: the edge is pushed into the leather, pressure is heavy, the strop is cut, or the blade still has a rough section.

Field check
  • I brace the leather strop on a stable surface.
  • I pull from heel toward tip with the cutting edge trailing.
  • I lift straight at the tip.
  • I start with 12 strokes on each side of the compound side, then repeat on the smooth side.
  • I wipe the blade clean, and sheath it.

Safety. Never push the edge into the leather.

Chapter 4

Staying Dry in the Wild

  • Read a shell rating: Find the hydrostatic-head rating and the care label on the garment.
  • Build dry layers: The base layer touches skin.
  • Restore a DWR finish: Durable water repellent, or DWR, is the finish on the outside face fabric.
  • Respond to chilling: If a person becomes cold, confused, clumsy, or unusually sleepy, stop the trip task.
  • Wet is a safety problem: Choose, layer, test, and maintain rain clothing that keeps a blackwater trip dry and lets you respond early to chilling.
  • Shell before you buy: Hydrostatic head is a fabric test.
  • Build the three-layer system: Stay dry by layers and action: wick at the skin, insulate the core, block wind and rain, and adjust before you sweat or chill.
  • DWR is maintenance: Durable water repellent, or DWR, is the finish on the outside face fabric.
  • Run a wet-weather routine: Before leaving, put on every layer and move as if you are paddling, portaging, or reaching for a dry bag.
Chapter 5

Rope Skills and Knots

  • Cordage system: Choose cordage for the job, tie six useful knots, inspect the line, and keep a camp rig secure without confusing utility cord with life-safety rope.
  • Strength permission: Treat every cord as a system. Read the label, stay within the maker’s working load limit, inspect before use, and never turn camp utility cord into life-safety gear.
  • Read the line: Before every serious use, look at the whole line and run it through your hands.
  • The six knots: Dress every knot so its strands lie clean and parallel.
  • Useful camp rig: A tarp line needs a sound anchor, a cord that matches the job, and a way to adjust tension without leaning your body into the system.
  • Care after rain: At breakdown, untie rather than yank loaded knots tight.
  • Hands know: Practice on a table first.
  • Cordage inspection: Read the cord label for material, diameter, minimum breaking strength, working load limit, and permitted use.
  • Bowline and figure eight: Form a small loop in the working end and leave enough tail to finish the knot and its backup.
  • Clove and taut line: Use the clove hitch for a quick attachment to a post, pole, or paddle shaft when the load stays steady.
  • Sheet bend and prusik: The prusik is a friction hitch that grips a main rope when loaded and slides when slack.
Chapter 6

Wilderness Shelters

  • Choose The System: A shelter is a system, not a single piece of gear.
  • Choose Insulation: Choose insulation as a pair.
  • Find The Site: Walk the site in daylight.
  • Pitch For Rain: A dry, ventilated shelter on safe durable ground beats a clever shelter pitched in a wet hole.
  • Shelter Needs: Choose, site, pitch, and inspect a shelter and sleep system that stays dry, ventilated, and secure in blackwater country.
  • Practice The System: Learn it on the table: identify tent, tarp, hammock, bag, pad, fly, footprint, and vents.
  • Three Season Tent: A three-season tent ventilates for spring through fall.
  • Tarp Hammock System: A hammock keeps you above wet ground and breathes well, but it needs sound trees, tree-safe straps, an underquilt or pad, and a separate rainfly.
  • Bag And Pad System: Write the expected low temperature and choose a bag by its comfort rating, not its marketing name or lower limit alone.
Chapter 7

Pack Systems and Efficient Loading

  • A pack system: Pick the system that matches the load and the trip.
  • Fit the suspension: Torso length matters more than your height.
  • Load by zones: Pack from the bottom and middle upward.
  • Make a dry system: Rain, paddle splash, wet banks and a dropped pack can ruin a dry sleep system.
  • Test before trail: Lay the pack down and find the item you would need in rain, darkness or an injury.
  • The system: Learn it on the table: measure your torso, fit the pack with a realistic load and draw the zones.
  • Torso measurement: Have a helper find the C7 vertebra at the base of your neck while you tip your head forward.
  • Load zones: Lay out the complete trip load and separate soft bulky items, dense heavy items and frequent-access items.
  • Liner and dry bag: A pack liner is the first broad barrier.
  • Loaded pack test: A loaded pack should feel stable, not merely full.
Chapter 8

Fire and Fuel Systems: Warmth and Sustenance

  • Fire and fuel: Build, use, and safely end a small fire or outdoor stove routine in humid blackwater country.
  • Fire is a system: Fire needs heat, fuel, and oxygen. Choose a legal site, keep fuel small, and leave only when the fire is cold.
  • Stoves and cooking fire: A canister stove is compact and simple.
  • The cooking fire: A cooking fire should be small and purposeful.
  • Put the fire to bed: A fire is not out when the flame disappears.
  • Blackwater fire choices: Rain changes the job.
  • Wet weather tinder ladder: A spark is not a fire until the tinder holds a flame.
  • Choose a fire lay: The fire lay is a choice.
  • Outdoor canister stove setup: Run every fuel burner outside, in open air.
  • Drown stir drown feel: Drown the fire with water.
  • Fire triangle diagnosis: The fire triangle gives you control.
Chapter 9

Navigation and Communication

  • The map: Read a blackwater topo map, navigate with a corrected compass and offline electronics, and leave a trip plan that can bring help to you.
  • The compass: A compass does not replace the map.
  • Offline electronics: A dedicated GPS unit can be rugged and accurate.
  • Get a message through: Cell service may fail in remote country.
  • Trip kit: Never let a battery, signal or memory be the only thing between you and the way home.
  • Blackwater topo map: Start with a paper topographic map, not with a glowing screen.
  • Corrected bearing: Set the local declination on the compass, then lay it on the map with its edge along the line from your position to the feature.
  • Offline navigation: Save the map, route and waypoints before leaving service.
  • Trip plan check: Leave a trip plan with a trusted person before launch.
Chapter 10

Wilderness First Aid and Survival Kits

  • Your kit is a plan: Build a first aid and survival kit for the crew and country, use it for common injuries and exposure illness, and keep it ready to grab.
  • Kit is a plan: Out there, you are your own first responder.
  • Remote trip tools: A remote trip earns more: an irrigation syringe, wound-closure strips, a moldable splint, a tourniquet for a trained user, and a CPR mask.
  • Keep it waterproof: Customize the kit to the trip, keep it reachable and dry, and treat exposure illness early.
  • Stop clean treat cover: Make the scene safe before touching the patient.
  • Blisters are friction: Blisters are friction injuries.
  • Cold rain and heat: Rain, sweat, and immersion can strip heat in mild weather.
  • Practice before the trip: Run a dry drill for a cut, a hot spot, a sprain, a wet patient, and an overheated patient.
  • Grab and go kit: Build for the route, weather, crew, and care people already need.
  • Clean and cover a wound: Make the scene safe, put on gloves, and find the source of bleeding.
  • Support a sprain: A sprain needs protection from more damage.
  • Cold or heat illness: Move the person out of rain, wind, or direct sun and check responsiveness and breathing.
Chapter 11

Water Purification and Hydration

  • Find water: Choose a safer blackwater source, treat it with a method that fits the water and the trip, and run a clean hydration system.
  • Clarify water: Assume every natural water source is contaminated until you treat it, and keep the clean side of the system clean.
  • Match treatment: A mechanical filter is a barrier, not a promise.
  • Use treatment: Let it cool with the lid on.
  • Carry clean water: Build the system around two jobs: dirty water comes in, treated water stays clean.
  • Hydrate with a plan: Sip regularly during humid travel instead of waiting until you are desperate.
  • What you need: At dusk, your canoe party reaches dark water after a storm. You have a labeled filter, chlorine dioxide treatment, two bottles, a cloth, and no safe place for a fire. Explain how you identify the dirty side, clarify and filter the sample, start the chemical clock, prevent cap contamination, and decide what to do if the water may contain chemical pollution.
  • Pre-filter and boil: In a blackwater river, tea color is not proof of safety.
  • Filter then disinfect: Chemical disinfectants are light and useful as a backup.
  • Clean hydration station: Choose a shaded treatment spot away from the stove, fire, fuel, latrine, and wash area.
Chapter 12

Footwear and Foot Care: Your Foundation

  • Footwear system: Your feet are your transportation, shock absorbers, and traction.
  • Fit before miles: Fit is the first blister defense.
  • Socks and moisture: Socks are part of the fit.
  • Wet feet plan: Wet feet need a plan.
  • Hot spots alarm: Stop at the first hot spot. A minute of foot care can save the rest of the trip.
  • Foot check rhythm: Make foot care part of the rhythm, not a rescue.
  • Footwear fit screen: Put on the socks, insole, and footwear you will use on the route.
  • Sock moisture rotation: Choose a merino or synthetic sock that fits smoothly inside the tested footwear.
  • Hot spot defense: Stop when you feel it.
  • Blister care: Small intact blisters are usually best protected and left intact.
Chapter 13

Gear Repair and Maintenance

  • Fabric patch: Treat a tear as soon as you find it.
  • Pole and buckle repair: A broken pole can turn a sound shelter into a puddle.
  • Zipper recovery: Never force a stuck slider.
  • Blade maintenance: Clean first, inspect for damage, then sharpen. See Chapter 3 for sharpening steps.
  • Repair kit: Stop the failure, make the smallest safe temporary repair, and mark the item for a permanent repair before the next trip.
  • Shelter pack repairs: A broken pole can turn a sound shelter into a puddle.
  • Maintain blades and saws: Wipe a knife blade after every use.
  • Repair plan: Build a compact repair kit, make temporary repairs to shelter, clothing, zippers, and packs, and keep blades and tools ready in wet blackwater country.
Chapter 14

Long-Term Gear Storage and Preservation

  • Ready gear: A rainstorm has ended and your gear is spread across a small blackwater cabin. Sort the gear into a safe storage order, identify three items that must not enter a sealed bin, and write the first repair you would schedule before the next trip.
  • Storage at takeout: Do not call a trip finished when the canoe reaches the truck.
  • Mildew and moisture: Mold control begins with moisture control.
  • Clean film for metal: Carbon steel blades, axe heads, saws, buckles, pivots, and tool hardware need a different finish from fabric.
  • Insulation room to work: A sleeping bag is not a camp pillow that belongs in its tiny trail sack between trips.
  • Build an inspection habit: Storage is a system, not a one time shove into the garage.
  • Post-trip clean and dry: Empty every pocket, pouch, valve, and food container.
  • Protect carbon steel: First remove sap, grit, food residue, and old oil.
  • Store insulation loose: Confirm the sleeping bag, quilt, puffy clothing, tent, and pad are clean and fully dry.
  • Run gear inspection: Open each labeled bin and breathable sack without mixing clean gear with dirty gear.
Questions people ask
How do you choose camping gear that lasts?

Start with the place, the activity and how long the trip will last, not with a catalog or a price. Read what each material must survive, and make sure you can say what can break and how you will maintain it. Build the core kit around the Ten Essentials first, then add specialized pieces only when a trip or a failure shows the need.

What knife steel suits wet blackwater trips?

Find the maker’s steel name, and never guess from color or a magnet. Stainless resists rust but can still stain or pit, and carbon steel takes a keen edge but needs prompt drying and a thin coat of oil. For humid blackwater country the book calls a quality stainless such as 420HC a practical fit. Hardness (HRC) is a tradeoff, not a score.

How do you sharpen a knife with a stone and strop it?

Choose an angle per side and hold it, checking with marker on the bevel. Work from coarse to fine, staying on one grit until a continuous burr shows, then strop with the cutting edge trailing. Brace the stone so it cannot slide and keep fingers behind the edge. Test with a controlled cut in clean cord or soft wood.

How do you stay dry in rain gear, and what is DWR?

Wear a wicking base layer, an insulating mid layer and a shell, and leave cotton out. DWR is the water-repellent finish on the shell’s outer fabric, not the waterproof membrane. When water stops beading, clean the garment by its care label and reproof it. Vent early, and never dry rain clothing over a flame.

Which knots should you know for camp, and when is utility cord not enough?

The book teaches six knots: the bowline, clove hitch, taut-line hitch, figure-eight, sheet bend and prusik. Read the cord’s label, stay within the maker’s working load limit, and run the whole line through your hands before use. Utility cord holds tarps and camp rigs. Never use it for climbing, rescue, fall arrest or to suspend a person.

How do you pack and fit a backpack?

Measure your torso from the bone at the base of the neck to the top of the hip bone and match it to the pack’s adjustment range. Let the hip belt carry the main load, then snug the straps. Pack soft items low, dense gear close to the spine, and rain gear, map and headlamp within reach. Keep the sleep system in a dry bag inside the liner.

How do you make blackwater safer to drink?

Tea color is not proof of safety. Let cloudy water settle, clarify it through a clean cloth, then boil it at a rolling boil for 1 minute, or filter it and use a backup disinfection method, because ordinary filters do not remove viruses. Do not use UV on dark water. On the Okefenokee refuge, drinking or filtering swamp water is not recommended, so bring all your water.

How do you prevent and care for blisters?

Stop at the first hot spot, take off the shoe and sock, find the cause, and cover the spot with a flat barrier such as tape or a blister dressing. Protect a small intact blister and leave it intact. A large painful blister that will break may need drainage with a sterilized needle, keeping the skin roof in place. Spreading redness, warmth, pus or fever needs medical care.

How do you repair a torn shelter, a stuck zipper or a broken pack buckle in the field?

Clean and dry the tear, then cover it with a rounded patch that overlaps the tear by at least 0.5 inches on every side. Never force a stuck zipper: back it out, clear the debris and lubricate it as the maker directs. Replace a broken buckle with a spare, or hold the webbing with zip ties. These are temporary fixes to mark for proper repair.

How do you store camping gear so it does not mildew or rust?

Empty and clean gear when you get home, then dry every item completely, including pockets, tent floors and rolled flys, before it is stored. Keep it cool, dark and ventilated, and off a concrete floor. Wipe carbon steel clean and dry and give it a thin film of light oil. Store sleeping bags and tents loose, not compressed, and inspect the bins on a regular schedule.